Guide Me Studio empowers you to create, test, and manage guided intake paths through a modern self-service experience. With visual path design, configurable routing logic, validation tools, and AI-assisted draft generation, you can create guided intake experiences that help users reach the right request path faster.
Whether you're implementing a new intake path, refining an existing process, or migrating from Guide Me, Guide Me Studio gives you the tools to design, validate, publish, and maintain intake paths from one centralized location.
Why it matters
Reduces the time required to create and update guided intake paths.
Eliminates dependency on XML configuration and ticket-based maintenance.
Helps you validate routing logic before making guided intake paths available to users.
Improves governance through version management, publishing controls, and change tracking.
Makes it easier to adapt guided intake paths as business needs evolve.
Availability and access
Guide Me Studio is on by default and automatically available to program office users.
Who it's for
MSP, PMO, and system administrators who create, maintain, and govern intake paths.
Program teams responsible for request routing and guided intake experiences.
Organizations transitioning from Guide Me to Guide Me Studio.
How it helps
Lets you build intake paths through a visual, self-service experience.
Enables you to generate draft intake paths from existing business documents.
Allows you to visualize intake path relationships and routing paths.
Helps you test intake paths before publishing them.
Gives you tools to manage intake path versions, changes, and lifecycle status.
Supports migrating existing GuideMe configurations to a modern experience.
Before you begin
Before creating an intake path, take time to plan the user experience and routing logic. Preparing these details in advance can help reduce rework during configuration and testing.
Identify the questions users need to answer.
Determine how each answer should route users through the intake experience.
Define the outcomes users should reach based on their responses.
Gather any existing GuideMe configurations you plan to import.
Gather business requirements or supporting documents if you plan to use AI-Assisted Draft Generation.
Identify any external URLs, resources, or request paths you want to include in outcomes.
Important behavior
Every question must have at least one answer option.
Every answer option must route to another question or an outcome.
Intake paths should be previewed before publishing.
Publishing makes the intake path available to users.
Deactivating an intake path removes it from active use but does not delete it.
Changes are recorded in Change Logs.
Information in this article reflects a standard Enterprise configuration. Your Enterprise platform is based on your organization’s configuration. Settings and/or data visibility rules may vary slightly from what is described.
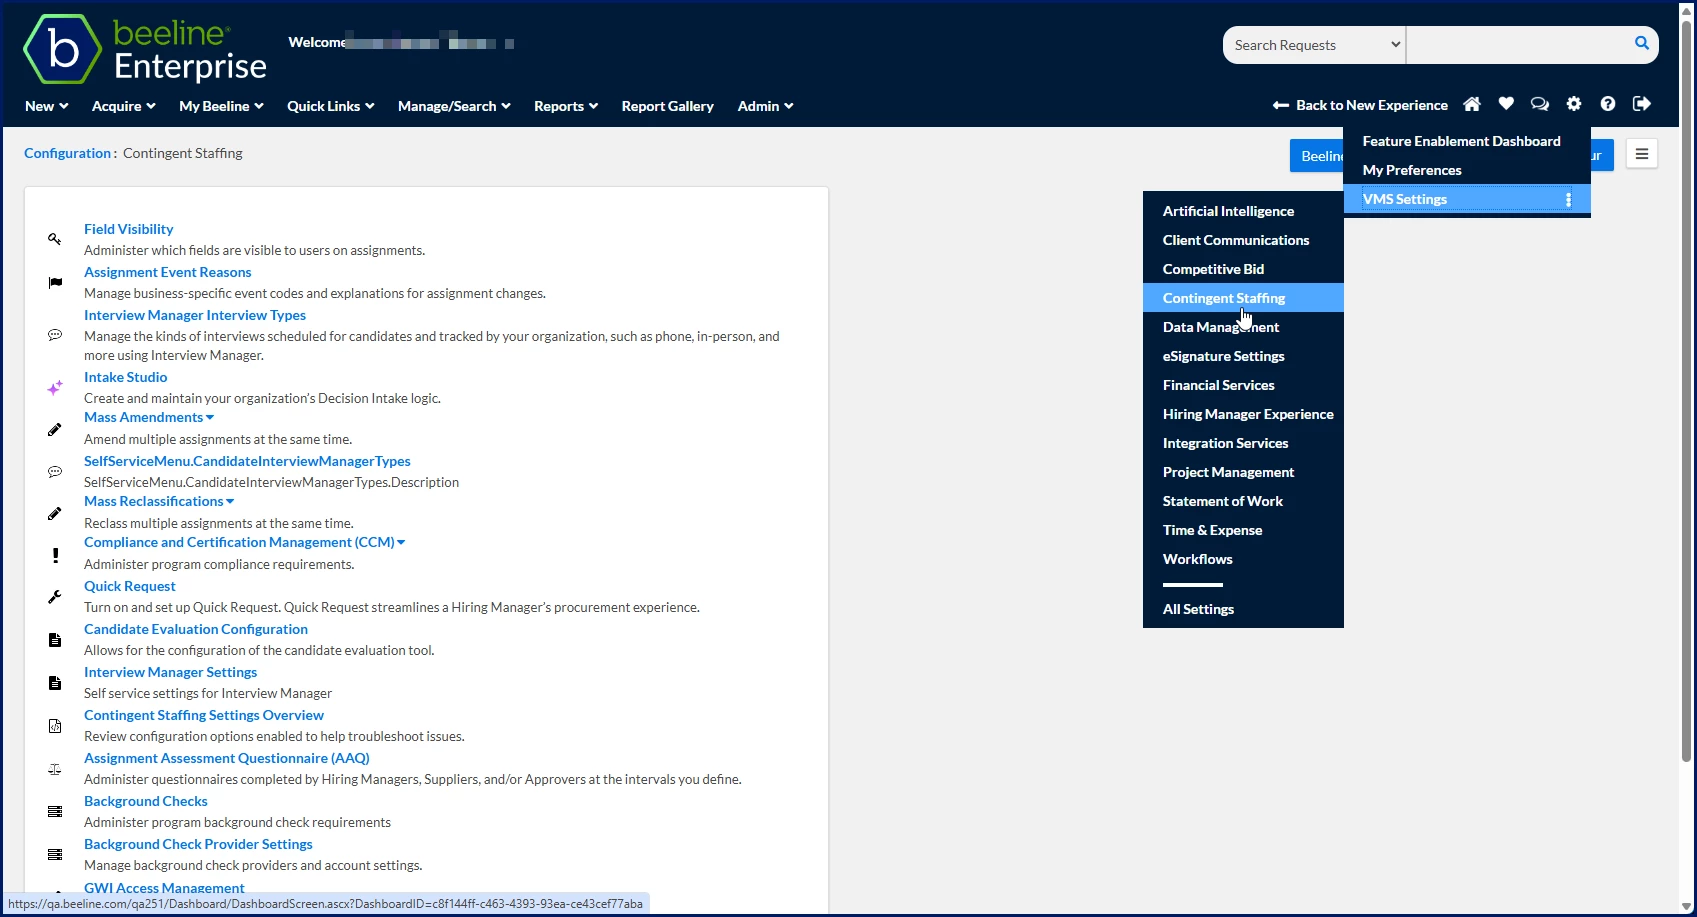
To accomplish your task, complete these steps from your Enterprise dashboard.
Select Guide Me Studio. The Guide Me Studio dashboard displays.
Use the Guide Me Studio dashboard
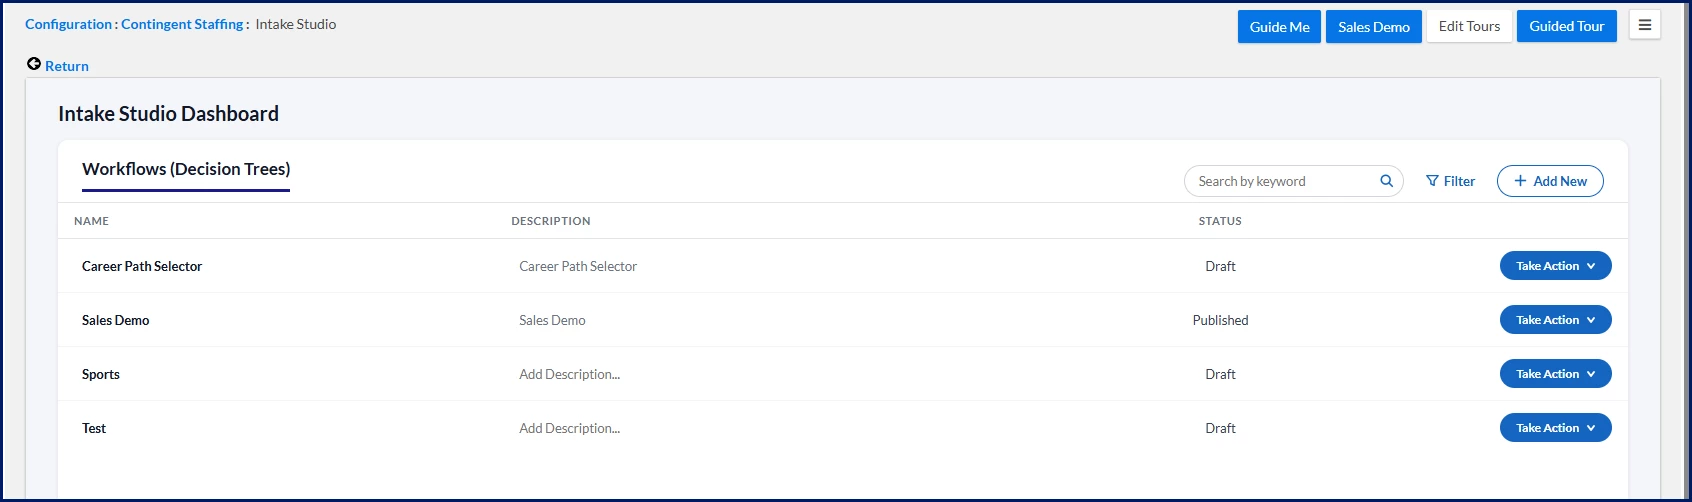
Use the Guide Me Studio dashboard to create, locate, and manage intake paths throughout their lifecycle. From the dashboard, you can:
Search for intake paths.
Filter intake paths.
Create new intake paths.
View intake path statuses.
Access actions such as Edit in Builder, Preview, Change Logs, Publish, Activate, and Deactivate.
Intake path statuses
Status
Description
Draft
The intake path is being created or updated and is not available to users.
Published
The intake path is available to users.
Inactive
The intake path has been deactivated and is not available to users.
Available actions
Action
Description
Edit in Builder
Open the intake path in the Builder and make changes.
Preview
Test the intake experience before publishing.
Duplicate
Create a copy of an existing intake path.
Change Logs
Review configuration changes.
Set to Publish
Publish the intake path.
Activate
Restore an inactive intake path.
Deactivate
Remove an intake path from active use.
Search for an intake path
Enter a keyword in the Search by keyword field.
Matching intake paths display.
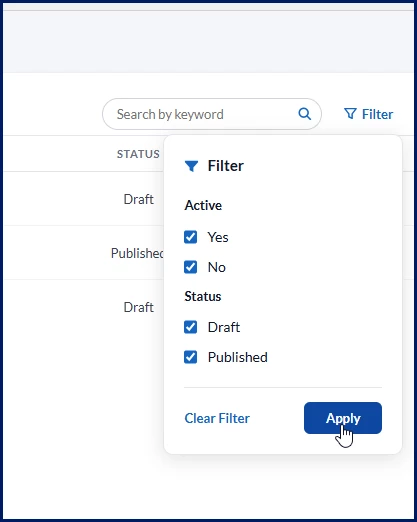
Filter intake paths
Select Filter.
The filter options display.
Select the filter criteria.
Select Apply.
Matching intake paths display.
Create an intake path
Use the Guide Me Studio Dashboard to create and manage intake paths. Choose the method that best fits your scenario.
Option
Use when you want to
AI-Assisted Draft Generation
Create a draft intake path from an existing document.
Start from Blank
Build a new intake path manually.
Import from Legacy
Convert an existing GuideMe configuration.
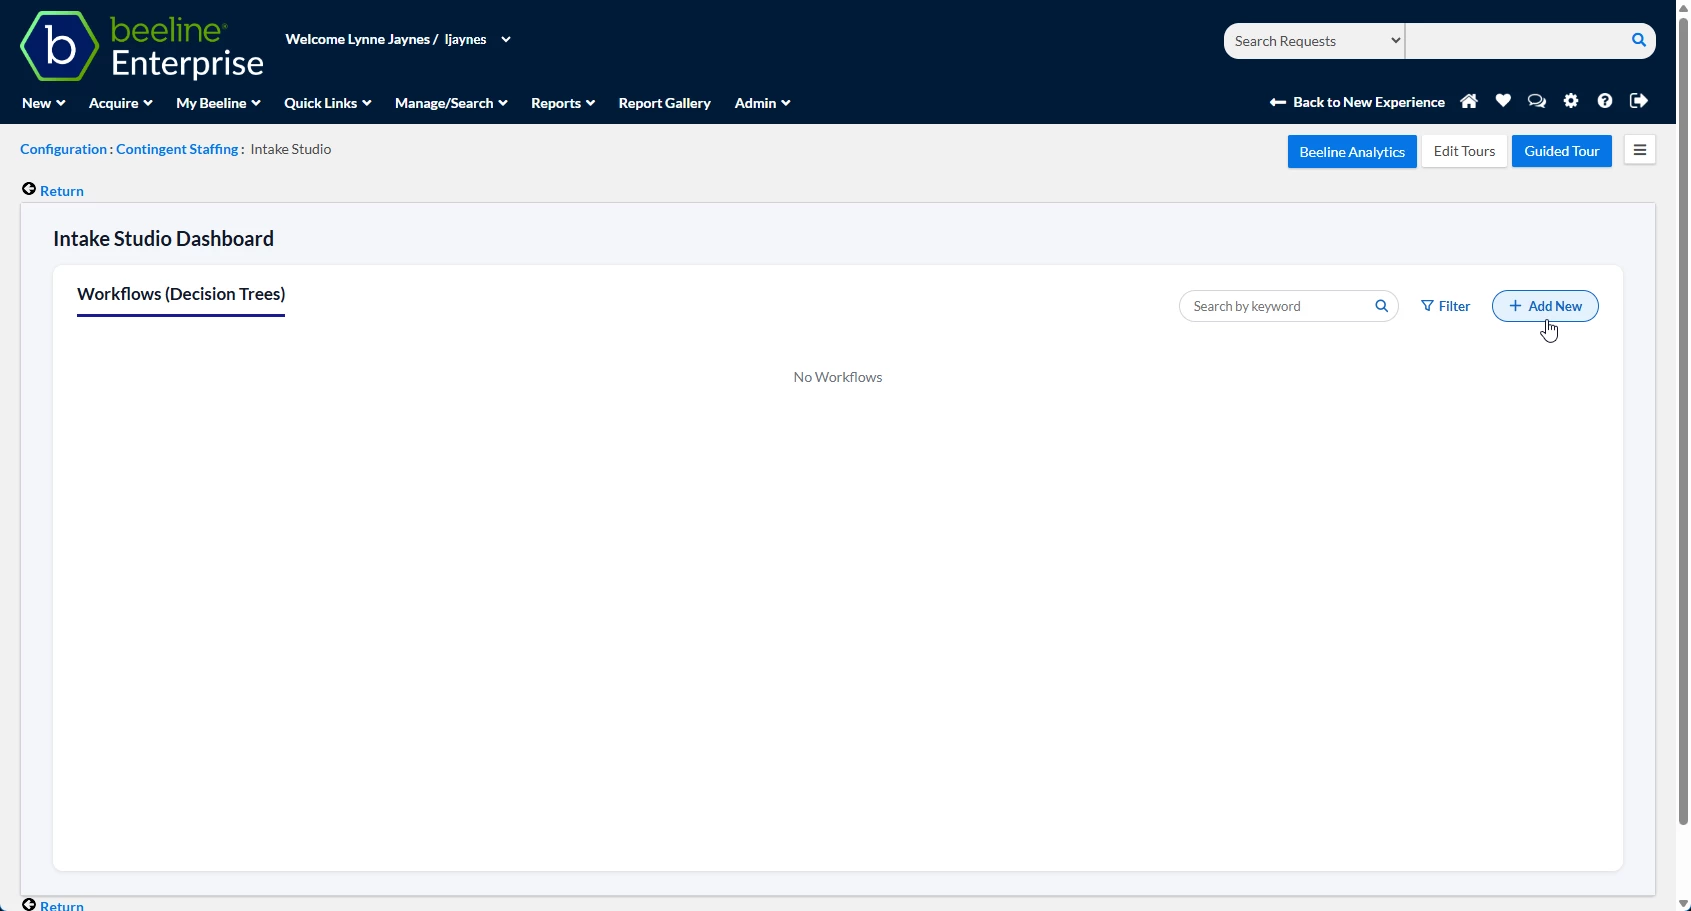
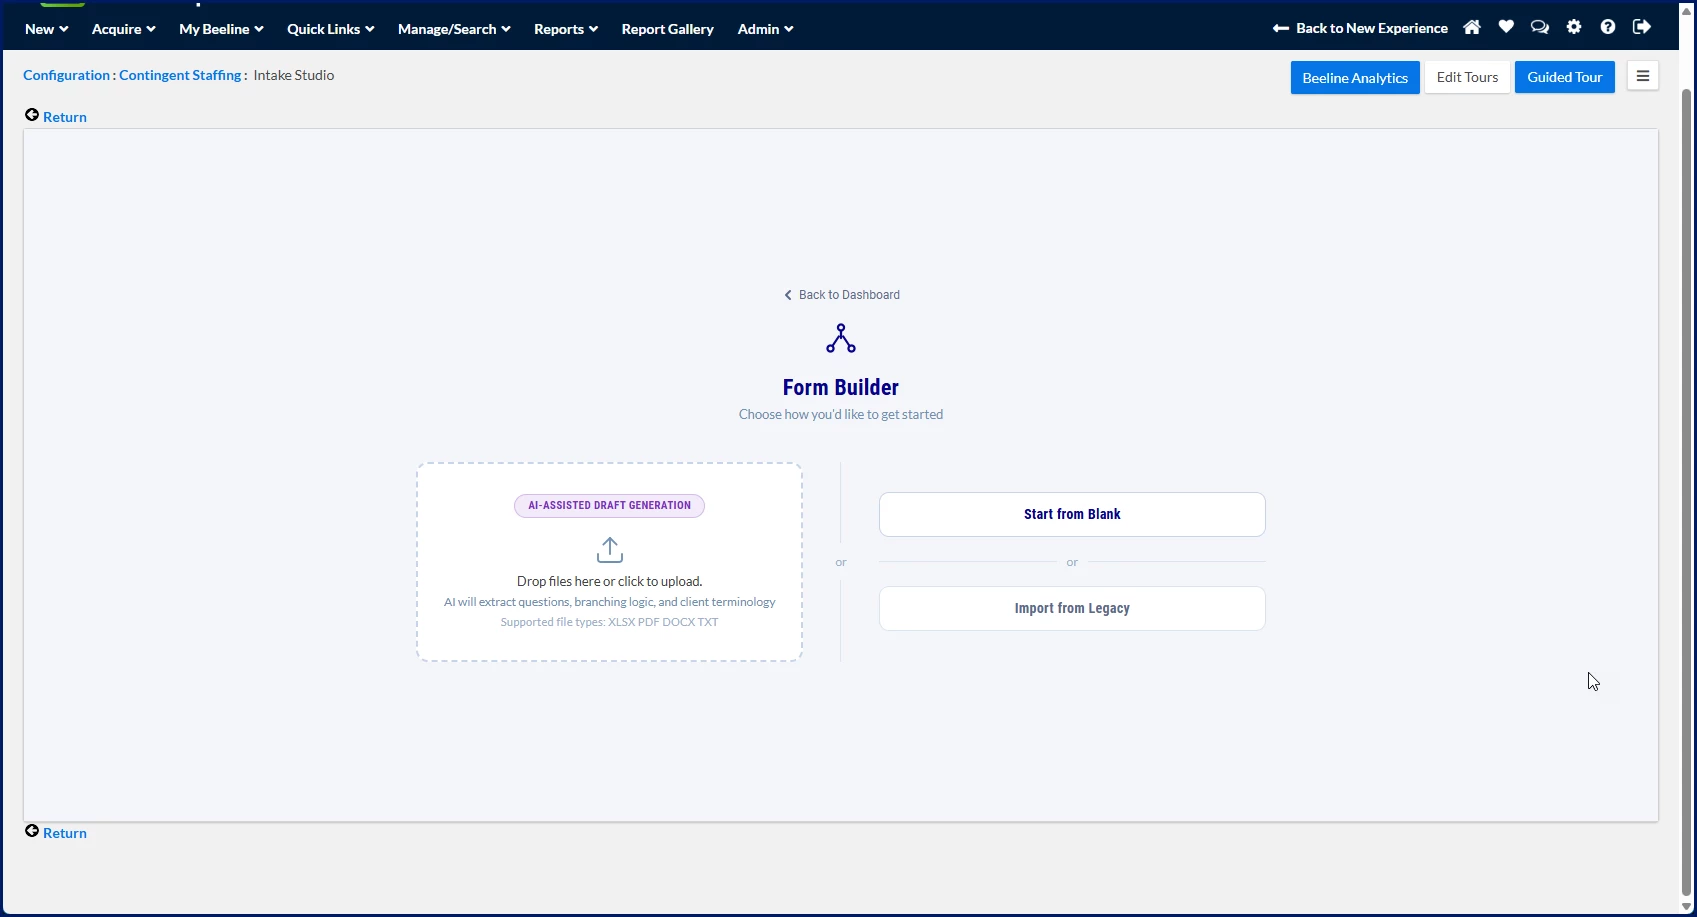
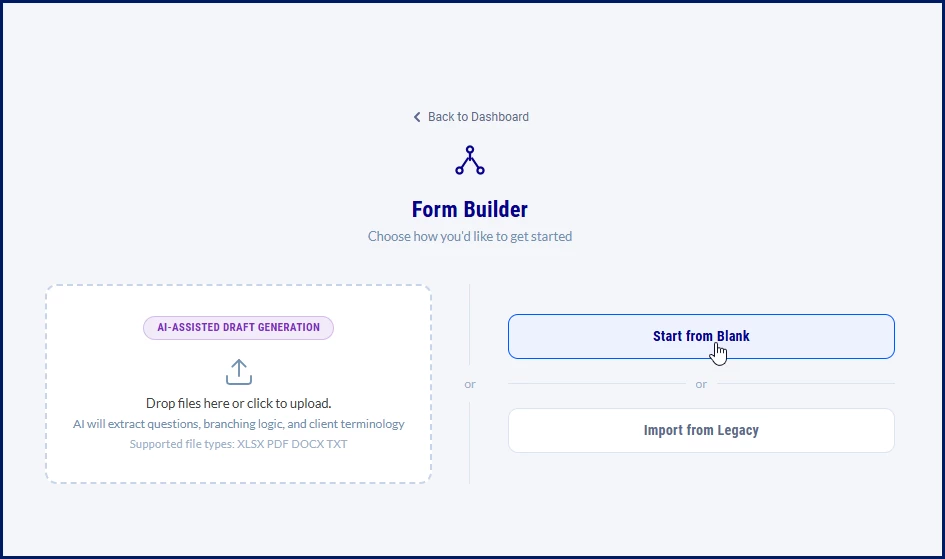
Select Add New. The Select Intake Form Builder page displays.
Select the creation method that best fits your needs. The selected intake path builder page displays.
Generate an intake path with AI
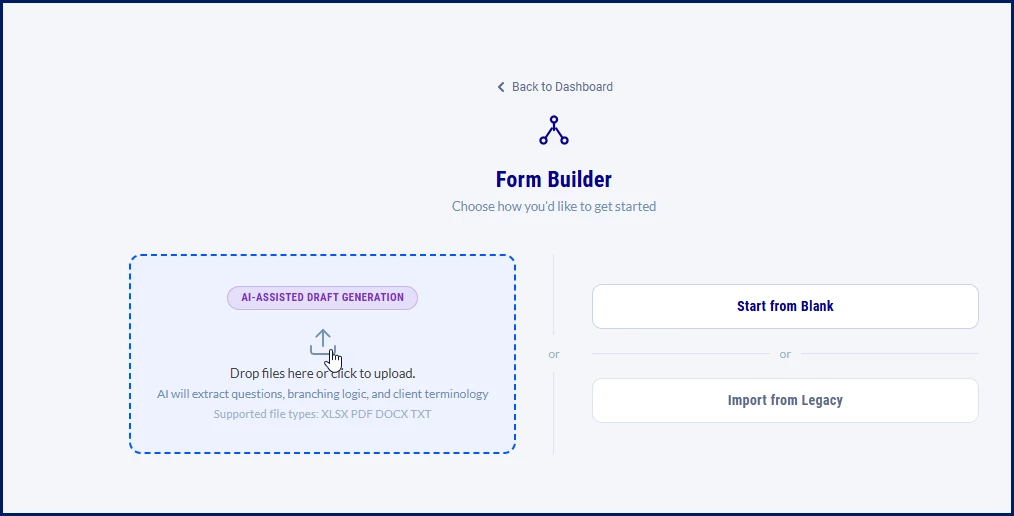
Use AI-Assisted Draft Generation to create a draft intake path from an existing document. Guide Me Studio analyzes the uploaded document and generates questions, routing logic, outcomes, and client-specific terminology that you can review and refine before publishing.
Select Add New. The Select Intake Form Builder page displays.
Select AI-Assisted Draft Generation. An Open dialog displays.
Browse to and select the document you want to use. ⚠️
Supported file types
XLSX
PDF
DOCX
TXT
What this does: Sends the document to Guide Me Studio for analysis.
Why this matters: Guide Me Studio uses the document to identify questions, routing logic, and outcomes.
In simple terms: The system analyzes your document and creates a starting draft for you.
Select Open. The document is uploaded for analysis.
Wait for Guide Me Studio to analyze the document and generate the draft intake path. The draft intake path is generated from information identified in the uploaded document, including:
Questions
Branching and routing logic
Outcomes
Client-specific terminology
Review the generated intake path. ⚠️
What this does: Allows you to validate and refine AI-generated content.
Why this matters: Generated content should be reviewed before publishing.
Update questions, answer options, routing paths, and outcomes as needed.
Validate the intake path using Decision Tree View.
Publish the intake path when you're ready to make it available to users.
Import a legacy GuideMe configuration
Select Add New. The Select Intake Form Builder page displays.
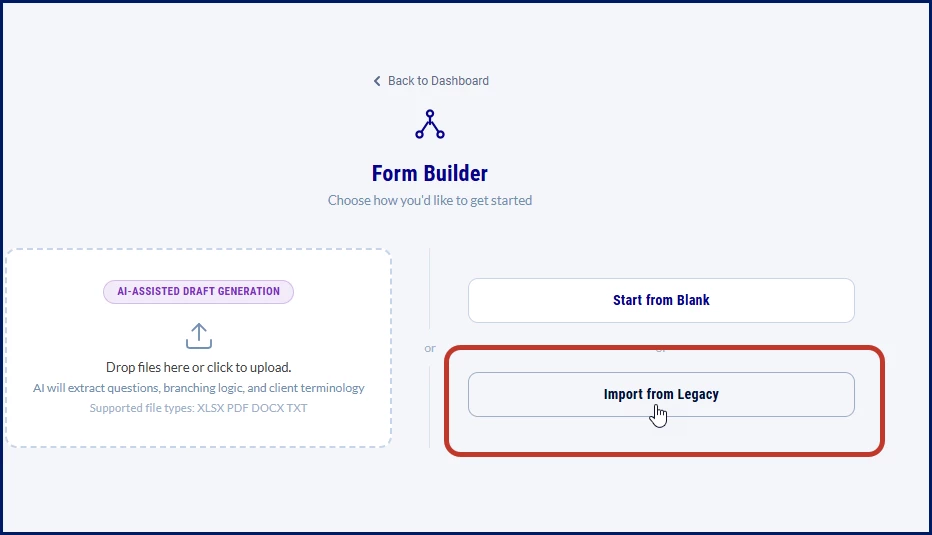
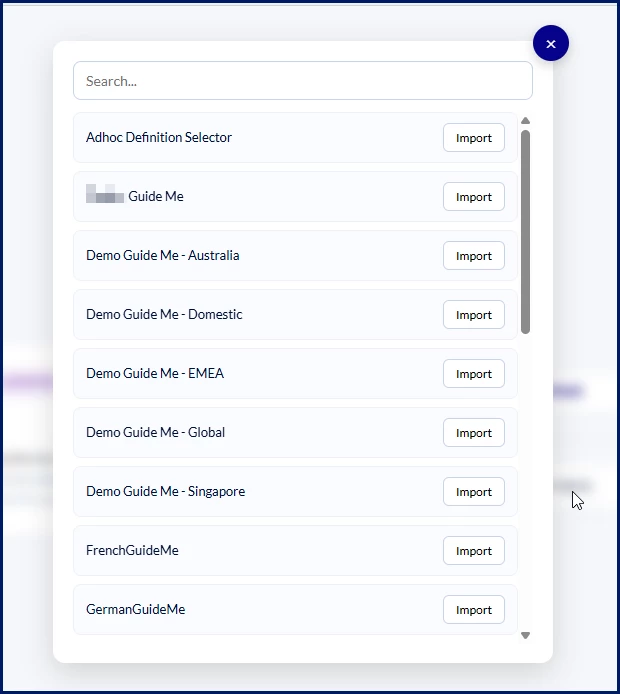
Select Import from Legacy. The Import from Legacy dialog displays.
Locate the GuideMe configuration you want to import. ⚠️
You can:
Scroll through the list of available configurations.
Use the Search field to find a specific configuration.
What this does: Displays available GuideMe configurations that can be converted to Guide Me Studio. Why this matters: Finding the correct configuration helps ensure you're importing the intended intake path.
Select Import next to the configuration. The selected GuideMe configuration is imported.
Review the imported intake path. ⚠️
What this does: Provides access to the converted questions, answer options, routing paths, and outcomes in the Intake Path Builder.
Why this matters: Reviewing imported content helps ensure the intake path behaves as expected after conversion.
In simple terms: You're confirming that the imported intake path matches the original GuideMe experience.
Update questions, answer options, routing paths, and outcomes as needed.
Validate the intake path using Decision Tree View.
Preview the intake path.
Publish the intake path when you're ready to make it available to users.
Create an intake path from a blank template
Use Start from Blank when you want complete control over your intake path design.
Select Add New. The Select Intake Form Builder page displays.
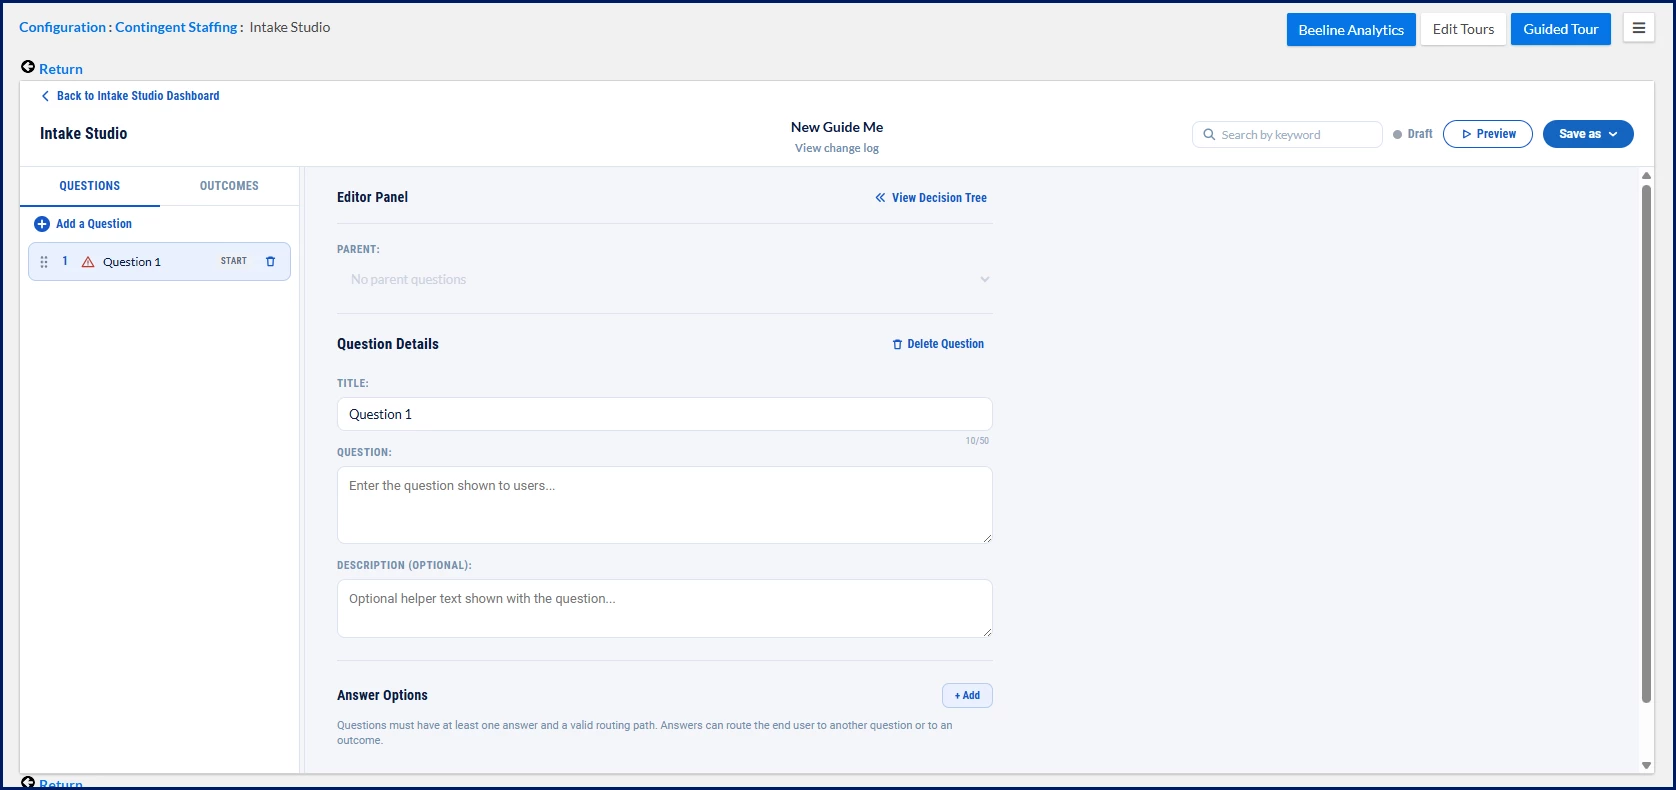
Select Start from Blank. The Intake Path Builder page displays with Question 1 automatically created as the start question. [Why does the page read “New Guide Me”?]
Enter a Title. ⚠️
What this does: Creates an internal name for the question.
Why this matters: A clear title makes the question easier to identify and maintain as the intake path grows.
Enter the Question users should answer. ⚠️
What this does: Defines the question presented to users.
Why this matters: User responses determine the path users follow through the intake experience.
In simple terms: You're asking users a question that helps determine where they should go next.
Optional. Enter a Description.
What this does: Provides additional guidance for users.
Why this matters: Additional instructions can help users provide more accurate responses.
In the Answer Options section, select Add. The Answer Option dialog displays.
Enter the answer text. ⚠️
What this does: Creates a response users can select.
Why this matters: User selections determine the path they follow.
Specify where the answer should route. ⚠️
What this does: Connects the answer to another question or an outcome.
Why this matters: Routing controls how users move through the intake path.
In simple terms: You're telling the system what should happen after a user selects the answer.
Select the destination. You can route the answer to:
Another question
An outcome
Select Save.
Repeat steps 7-11 for additional answer options.
To add another question, select Add a Question. A new question displays in the Questions panel.
Select the new question. The Question Details page displays.
If the question should appear after another question, select a Parent question. ⚠️
What this does: Defines where the question appears in the intake path.
Why this matters: Parent-child relationships control branching logic and routing behavior.
Repeat steps 4-15 until all questions and routing paths are configured.
Configure outcomes
Use outcomes to define the destination or result users reach at the end of an intake path. Outcomes can provide instructions, present information, or direct users to another location based on their responses throughout the intake experience.
Select the Outcomes tab.
The Outcomes page displays.
Select Add an Outcome.
The Outcome Details page displays.
Enter a Title. ⚠️
What this does: Creates the name of the outcome.
Why this matters: A descriptive title makes outcomes easier to identify and maintain.
Optional. Enter a Description.
What this does: Provides information displayed when users reach the outcome.
Why this matters: Additional context can help users understand next steps.
Optional. Enter a URL. ⚠️
What this does: Directs users to a specific destination after reaching the outcome.
Why this matters: Outcomes can guide users to the correct request path, resource, or process.
In simple terms: You're defining where users should go after completing the intake path.
Select Save.
Repeat these steps for additional outcomes.
Validate intake path logic
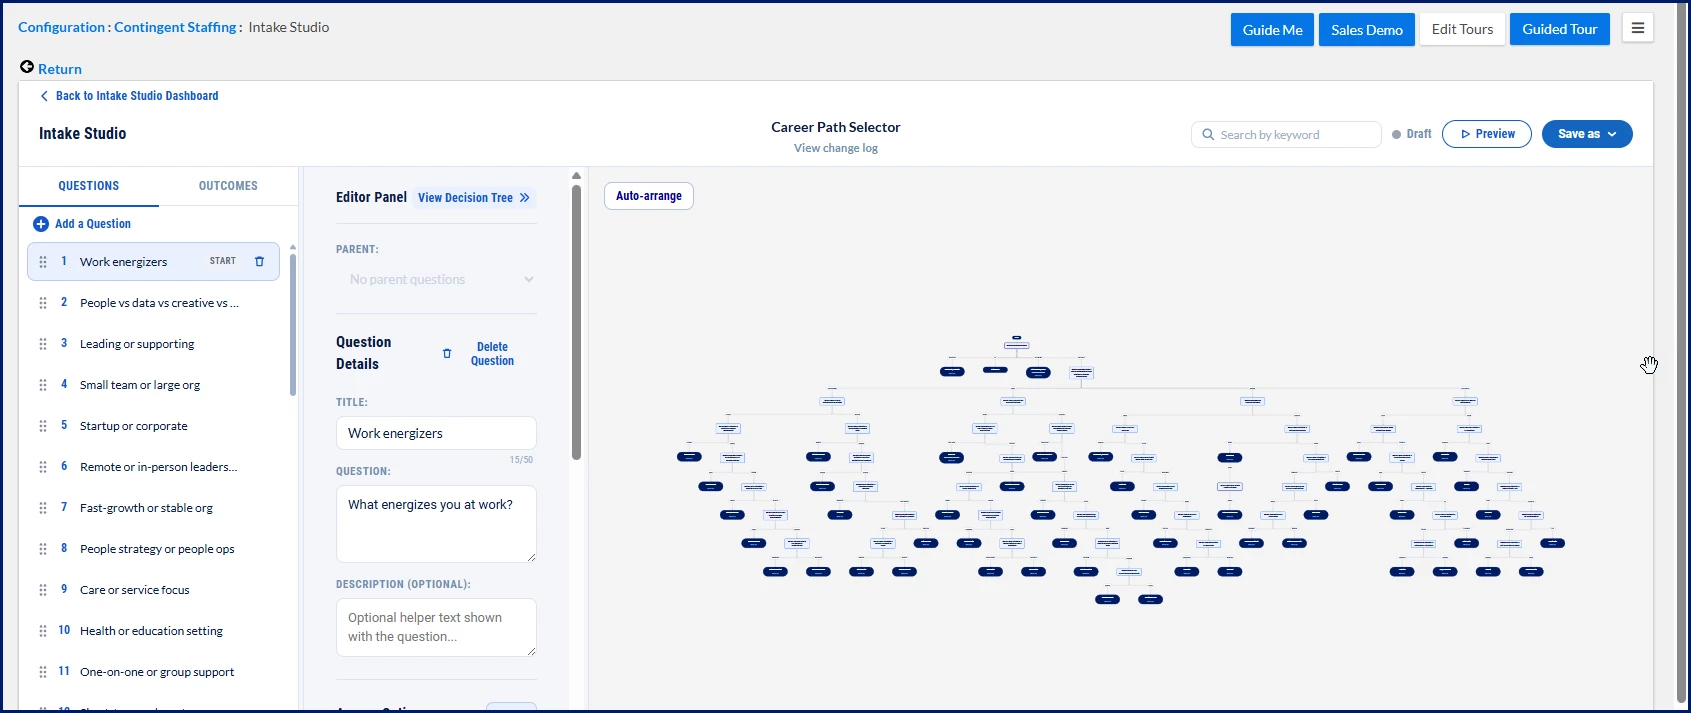
Use the Decision Tree to visualize relationships between questions, answers, and outcomes. While working in the Builder, you can toggle between the Editor panel and the Decision Tree to review routing relationships and validate the overall intake path structure. Reviewing the intake path before publishing can help you identify incomplete branches, missing routing paths, and other configuration issues that could affect the user experience.
From the Take Action menu, select Edit in Builder.
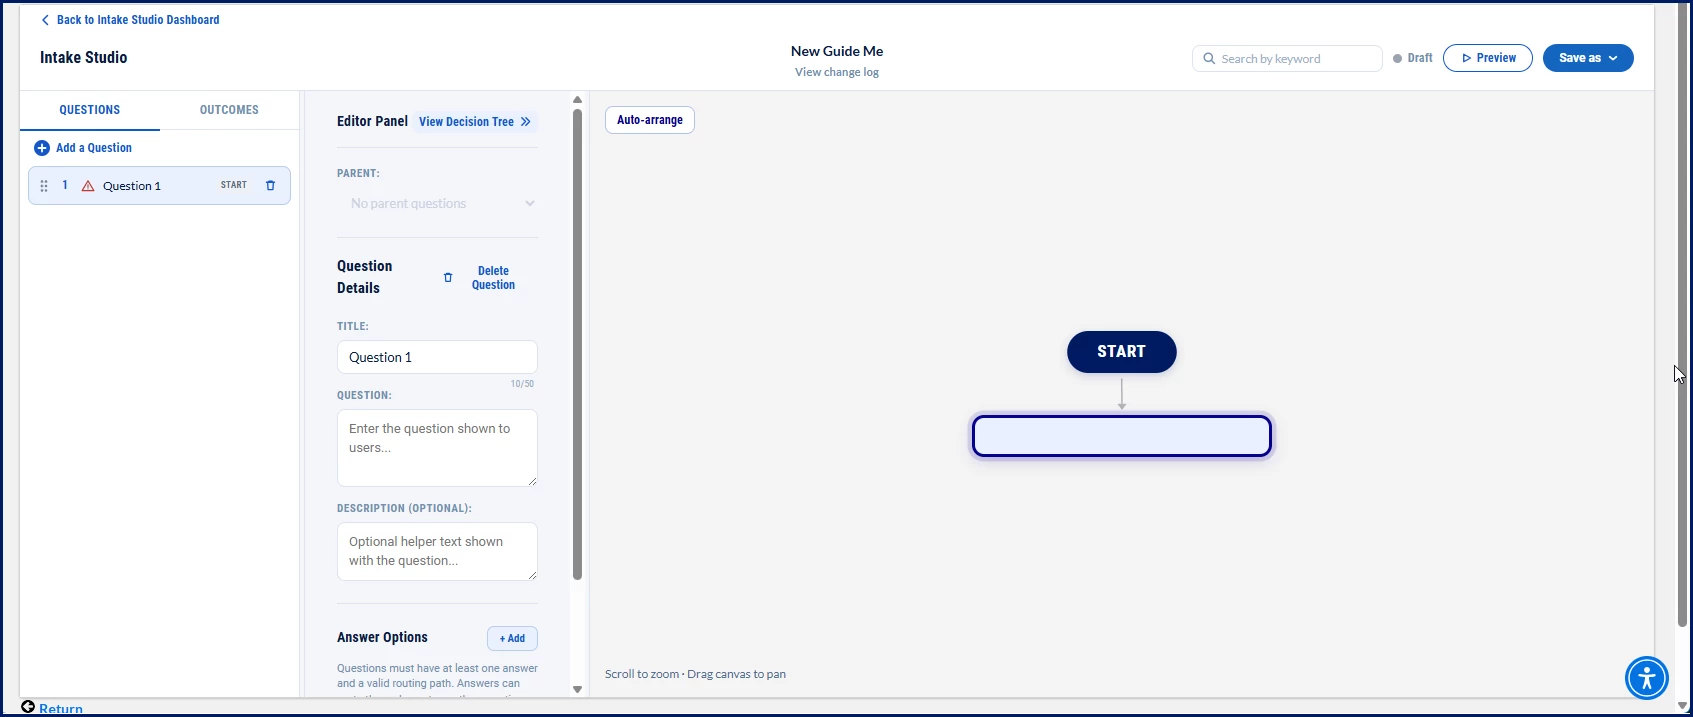
Select View Decision Tree. The Decision Tree displays within the Builder. The Questions tab, Outcomes tab and Editor panel remain available.
Review the routing paths and relationships. ⚠️
What this does: Provides a visual representation of the intake path and its routing relationships.
Why this matters: Visual validation can help identify incomplete branches, routing issues, and disconnected questions before publishing.
In simple terms: You can review the intake path as a visual map instead of reviewing each question individually.
Verify that all questions, routing paths, and outcomes are connected correctly.
New intake paths display a simple structure consisting of the Start node and the initial question.
Additional questions, answer options, and outcomes appear in the Decision Tree as they are added to the intake path.
Select Auto-arrange. The nodes are reorganized to improve readability.
Select the Editor panel. The question configuration fields display.
Make any necessary updates.
Preview an intake path
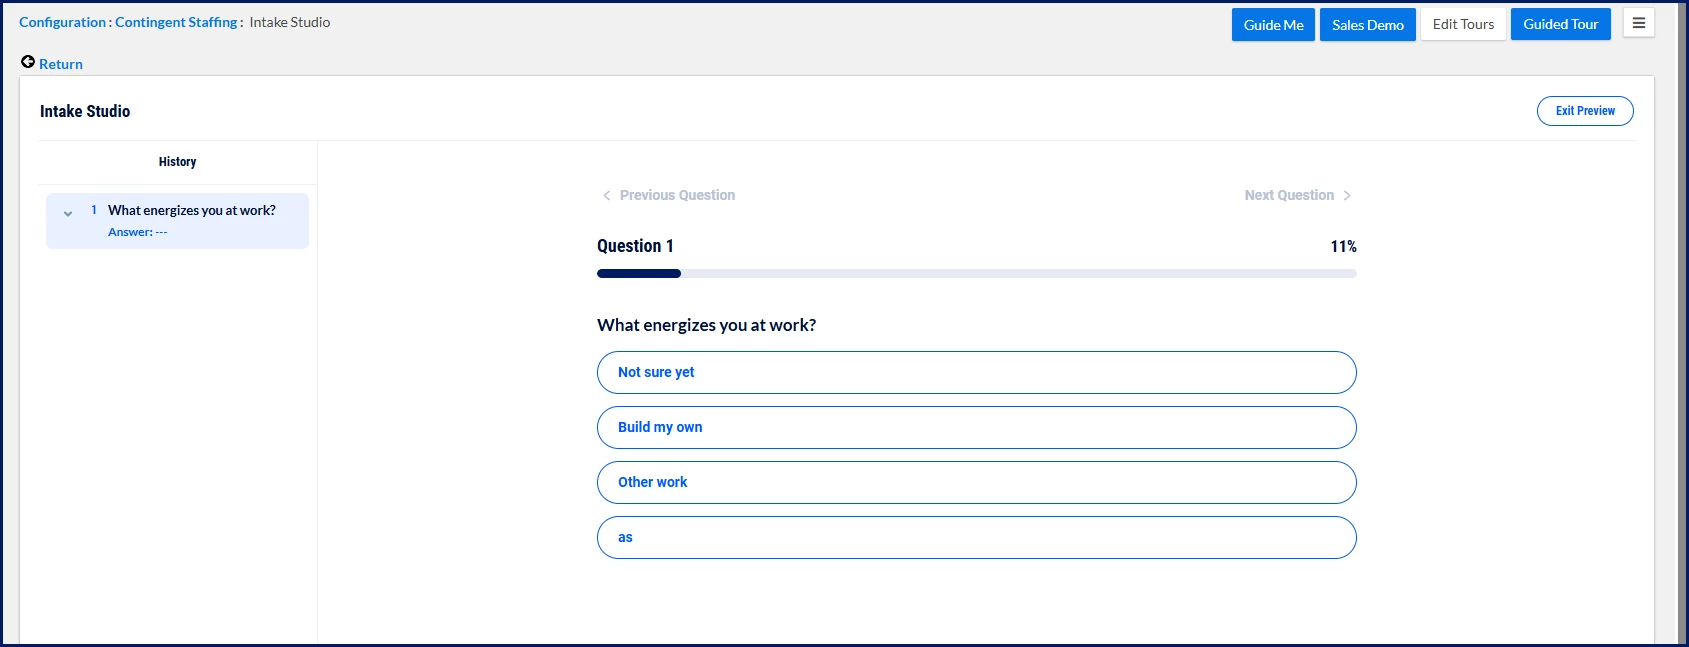
Use Preview to test the intake experience from your users’ perspective before publishing. Preview allows you to verify questions, answer options, routing paths, and outcomes to help ensure users reach the intended destination.
From the Take Action menu, select Preview. The Preview page displays.
Complete the intake experience as a user.
Verify questions, answer options, routing paths, and outcomes. ⚠️
What this does: Allows you to experience the intake path from your users’ perspective.
Why this matters: Testing helps confirm users reach the intended outcome.
Exit Preview.
Update the intake path if needed.
Save and publish an intake path
Use the Save As menu to manage intake path versions and availability. You can save your work while it remains in draft status, create a new version to preserve an existing configuration, or publish an intake path to make it available to users.
To save an intake path
Open the intake path.
Select Save As.
Select Save. The intake path remains in Draft status.
To create a new version
Open the intake path.
Select Save As.
Select Save as new version.
A new version of the intake path is created.
Continue making updates. ⚠️
What this does: Preserves the current version while allowing additional changes.
Why this matters: Versioning supports governance, auditing, and change management.
In simple terms: You keep the current version while creating a new version for updates.
To publish an intake path
Open the intake path.
Select Save As.
Select Publish. The intake path status changes to Published and becomes available to users.
Verify the intake path displays a Published status on the Guide Me Studio Dashboard.
Review changes
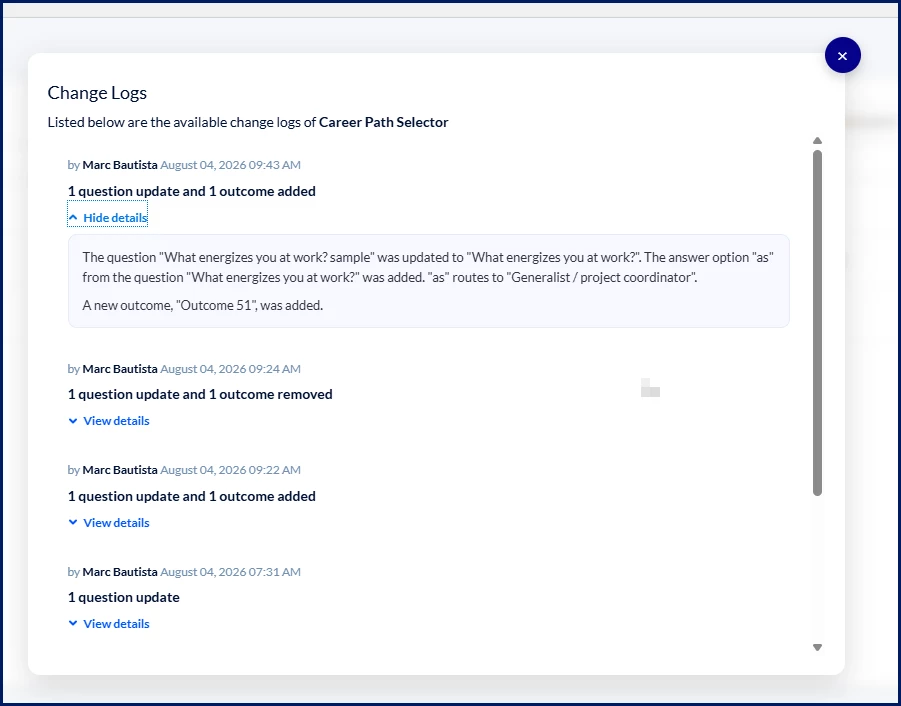
Use Change Logs to review updates made to an intake path over time. Change Logs help you track configuration changes, support governance requirements, and verify who made a change and when.
From the Take Action menu, select Change Logs. The Change Logs page displays.
Expand a change log entry. Change details display.
Review the changes. ⚠️
What this does: Provides a record of updates made to the intake path.
Why this matters: Change logs provide visibility into configuration history and support governance.
Manage intake path status
Use intake path status controls to manage whether an intake path is available to users. You can deactivate an intake path that is no longer needed or reactivate one that is ready for use again.
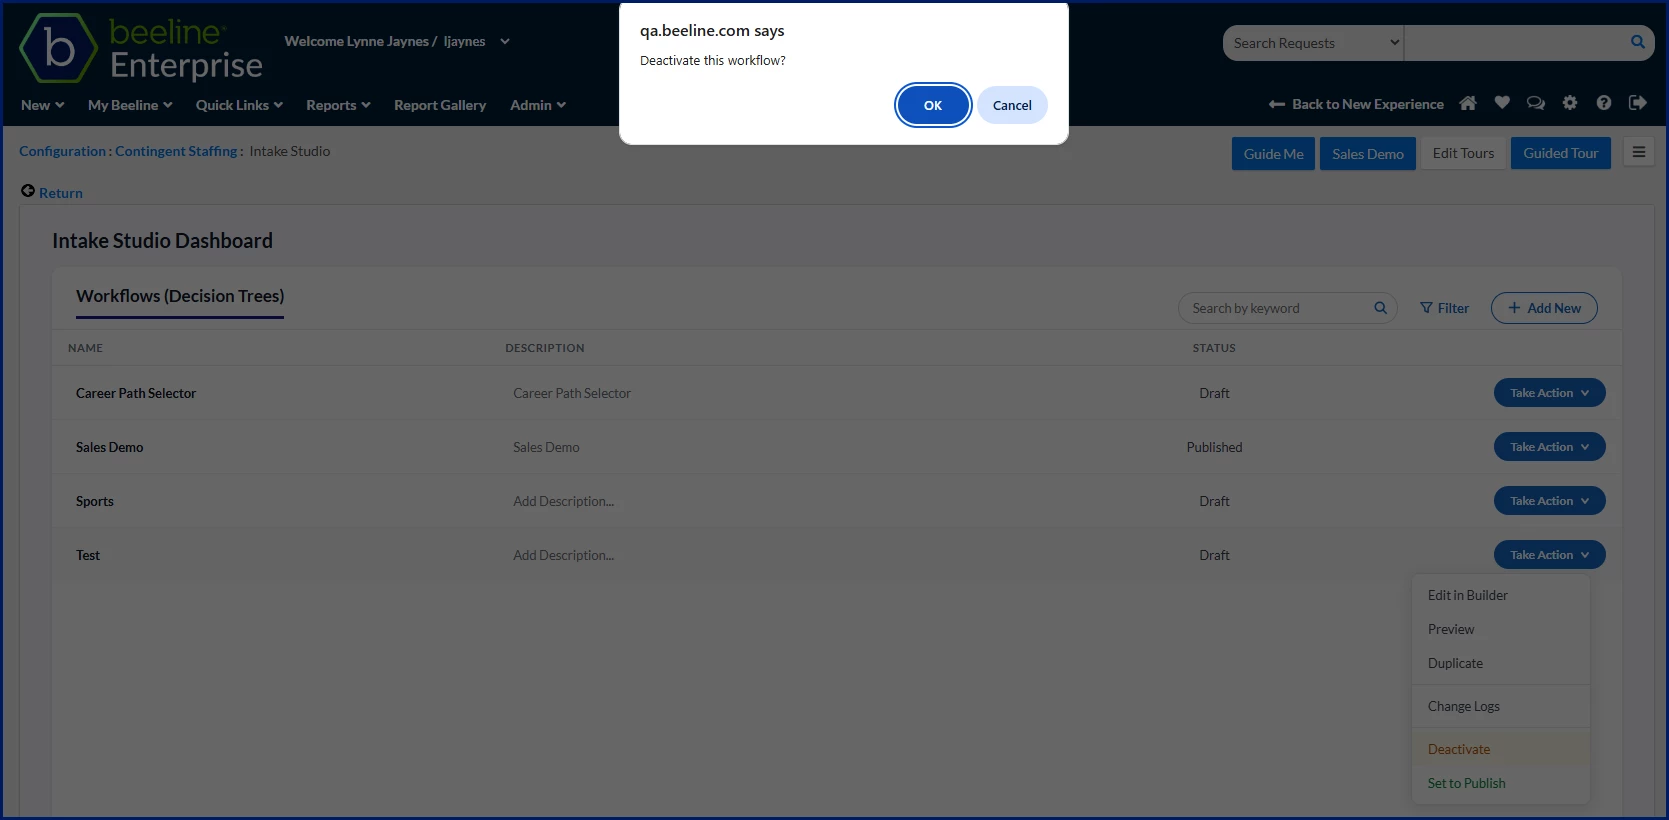
To deactivate an intake path
From the Take Action menu, select Deactivate.
A confirmation message displays.
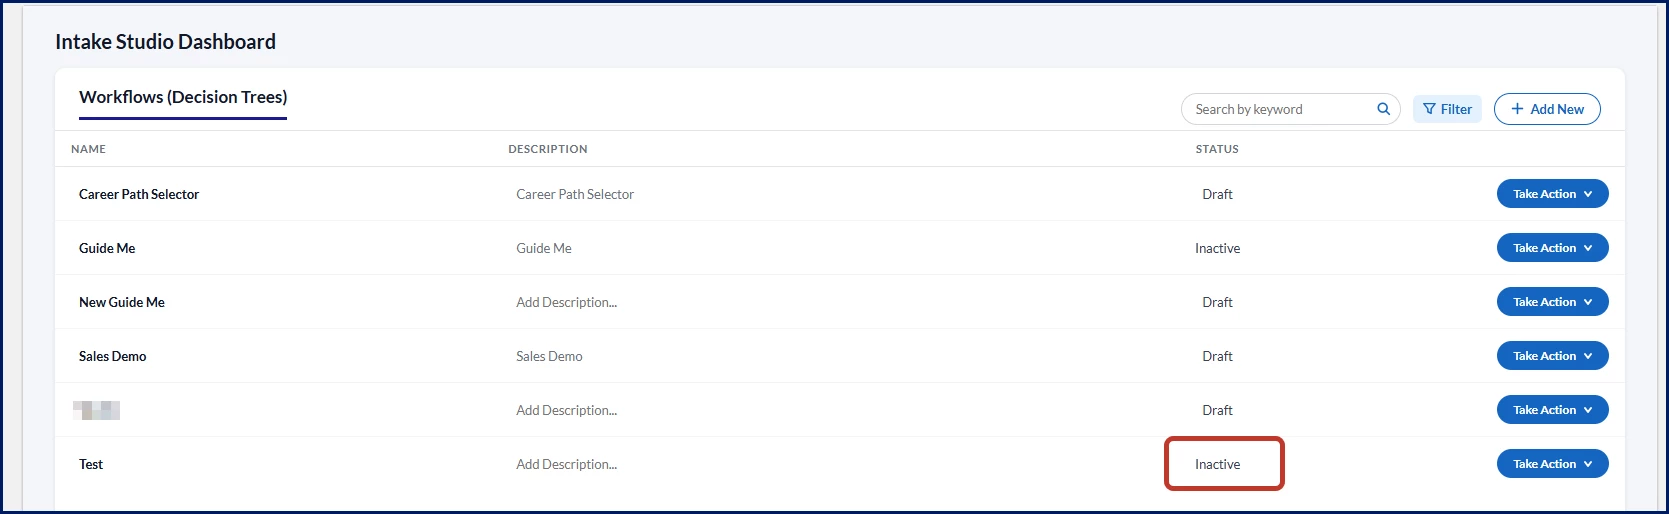
Select OK. The intake path status changes to Inactive.
Verify the intake path displays an Inactive status on the Guide Me Studio dashboard.
To activate an intake path
From the Take Action menu, select Activate. The intake path is reactivated and available for use according to its published configuration.
Verify the intake path displays the appropriate active status on the Guide Me Studio Dashboard.
Final result
You have created and published an intake path that guides users through a series of questions and routes them to the appropriate outcome based on their responses.
Key takeaway
Guide Me Studio helps you create, test, and manage intake paths through a visual, self-service experience. By configuring questions, answer options, routing paths, and outcomes, you can create guided experiences that consistently route users to the correct request path.
Please complete the following fields as part of your Beeline Community registration. Unless noted as private, this information will be displayed on your user profile within the community.