


Suppliers are responsible for managing their own Supplier users who need access to Beeline Enterprise. Tasks related to adding a new supplier user, activating or deactivating supplier users, resetting their password, and unlocking their user account require Supplier Admin user role rights.
This content reflects non-client specific Beeline Enterprise functionality which may vary from what you see when logged into Beeline Enterprise depending on any client-specific settings or adjustments.
To add a new staff user to your supplier organization:
- Navigate to your Beeline Enterprise Home screen.
- Click to expand the Admin drop-down menu located in the Header Menu bar and select User Administration. The User List Screen displays.
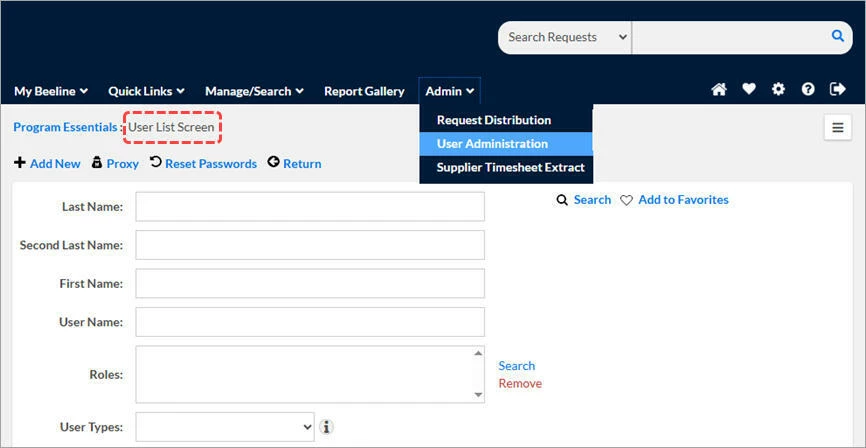
- Click + Add New in the action bar. The Add User – Details page displays.
- Complete all the required fields as indicated by the asterisk (*). Some fields will auto-populate based on your supplier organization settings. Adjust if needed.
- Enter an email address to which you want this user’s system notifications sent.
- Verify that the Culture setting is accurate since this will determine how dates display to the user as well as the sort order for assigned approval tasks (for example, MM/DD/YY for en-US, DD/MM/YY for en-GB).
- Complete other fields as needed.
- Set the Time Zone to match the user’s home base. The system will then automatically adjust time and date settings where users are located in different time zones.
- Verify that the Active setting is checked (default setting). Only active users can perform tasks within the system.
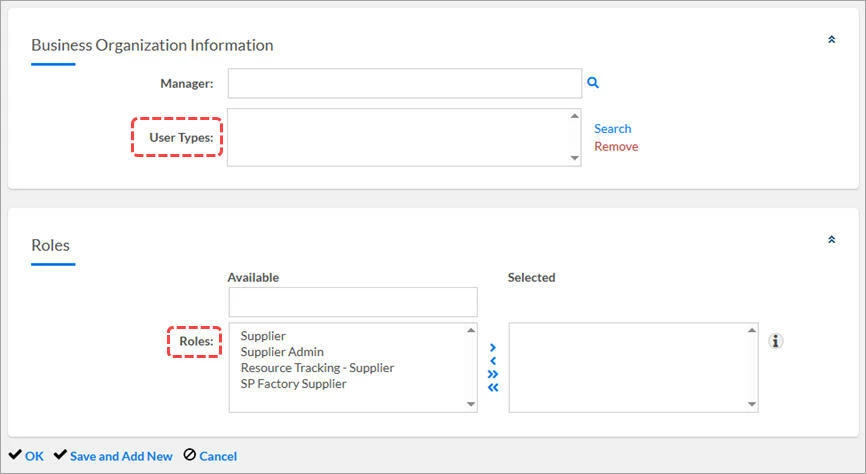
- Be sure to assign both a Role and a User Type! (Users can be assigned more than one depending on their assigned tasks.) Use the selection lists to assign roles and click Search next to User Types to open the selection dialog box.
User roles determine which actions a user can take within Beeline Enterprise in addition to their visibility to system data. User types determine which system-generated notifications (email, dashboard, mobile) they receive.
- Click OK. The page refreshes and asks you to confirm key fields on the user profile. Re-enter these fields to match your original settings.
- Click OK. An alert message will display if there are any errors that need to be corrected. Make the adjustments and click OK again. If there are no errors, the message will state that your changes have been applied. An email is sent to the new user with login instructions.