


Stay compliant without the hassle—automate certifications and keep contractors ready.
Compliance and Certification Management (CCM) gives you a centralized, automated way to track, manage, and enforce contractor compliance requirements. Instead of reacting to issues, you ensure every contractor stays compliant—helping you reduce risk and keep your workforce running smoothly.
Why it matters
Managing compliance manually increases risk, delays onboarding, and creates gaps that can lead to penalties or disruptions. CCM helps you:
- Reduce compliance risk with automated tracking and alerts
- Prevent onboarding delays by enforcing requirements upfront
- Stay aligned with business policies and regulatory standards
- Eliminate manual follow-ups with built-in notifications
- Keep your workforce running smoothly with proactive compliance management
Who it’s for
- Program office users can setup CCM from VMS Settings
How it helps
CCM simplifies compliance management so you can stay ahead instead of reacting:
- Centralize requirements by defining rules in one place
- Automate enforcement by linking requirements to job titles and locations
- Stay informed with alerts for expired or missing certifications
- Enable quick action by assigning tasks to the right stakeholders
- Maintain visibility across all contractor assignments to reduce risk
Prerequisites
Adding CCM to your Contingent Staffing, Services Procurement and Resource Tracking modules in Beeline Enterprise VMS requires a Make a Change ticket and Enterprise configuration. After your VMS is configured, program office users can manage CCM.
Before you begin
- Ensure the feature is available in your Enterprise VMS.
- Verify you have permission to configure compliance requirements.
- Define notification recipients and align them with your process.
- Inform stakeholders before activating requirements to manage notification volume and prevent disruption.
- Plan for high notification volumes when requirements apply to many assignments.
- Account for current limitations:
- Avoid using imported assignments (not supported).
- Expect full visibility access (users can view and edit all requirements or none).
How to steps
CCM connects compliance requirements to contractor roles and automatically triggers notifications so you can resolve issues quickly and maintain compliance.
Information in this article reflects a standard Enterprise configuration. Your Enterprise platform is based on your organization’s configuration. Settings and/or data visibility rules may vary slightly from what is described.
To accomplish your task, complete these steps from your Enterprise dashboard.
Set up compliance requirements
Define compliance requirements, associate job titles and work locations that are required for each requirement.
- Select Preferences > VMS Settings > Contingent Staffing.
- Expand Compliance and Certification Management (CCM) and select Compliance Requirements.
- Select Add New.
- Enter requirement details, including:
- Name that identifies the requirement based on your program terminology.
- Description that helps differentiate between compliance requirements.
- Code for identification.
- Optional. Requirement group to associate this specific requirement to a group that’s defined for your program.
- Active status to enforce compliance on all matching requests and assignments and send notifications.
- Comments to define whether user comments are required or optional.
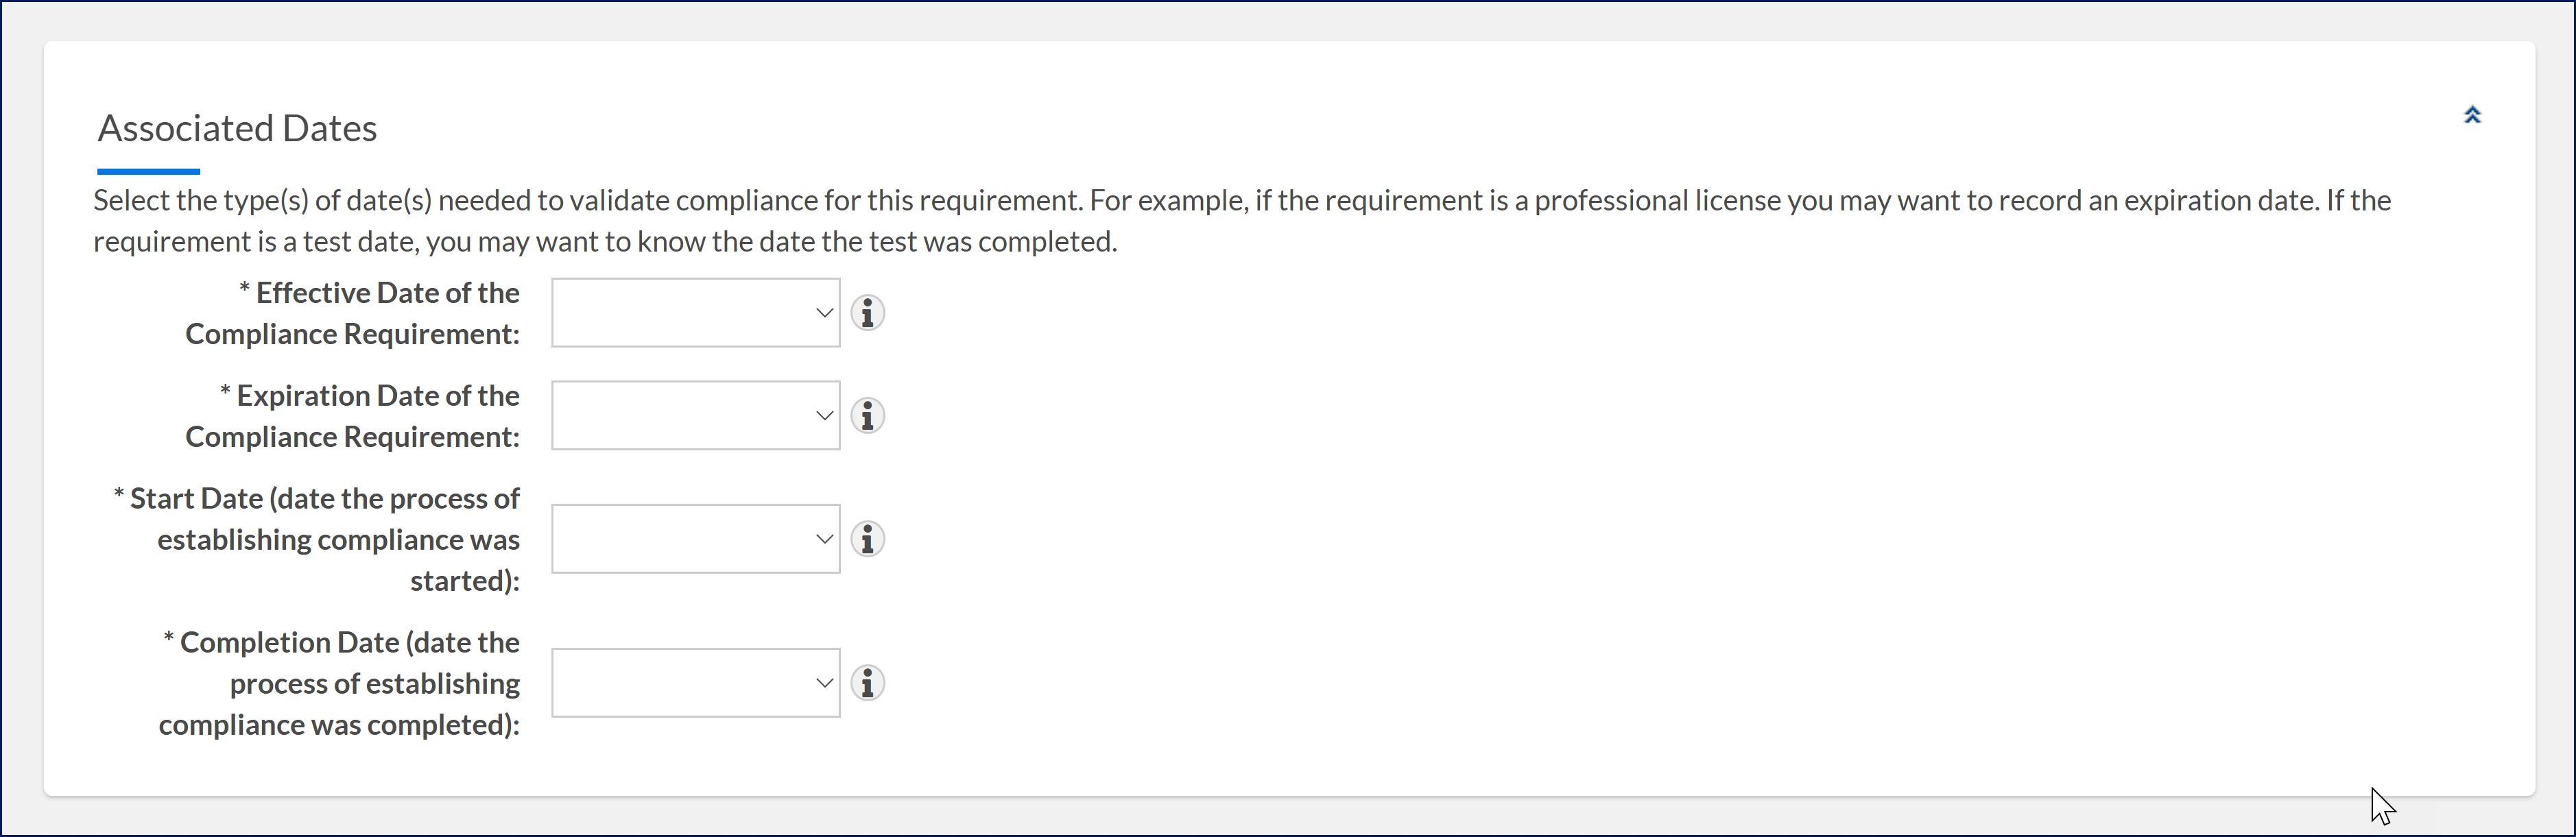
- Choose Optional, Required, or Does Not Apply for these date types to track compliance. For example, use an Expiration Date for a license or a Completion Date for a test.
- Effective Date of the Compliance Requirement
- Expiration Date of the Compliance Requirement
- Start Date (date the process of establishing compliance was started)
- Completion Date (date the process of establishing compliance was completed)
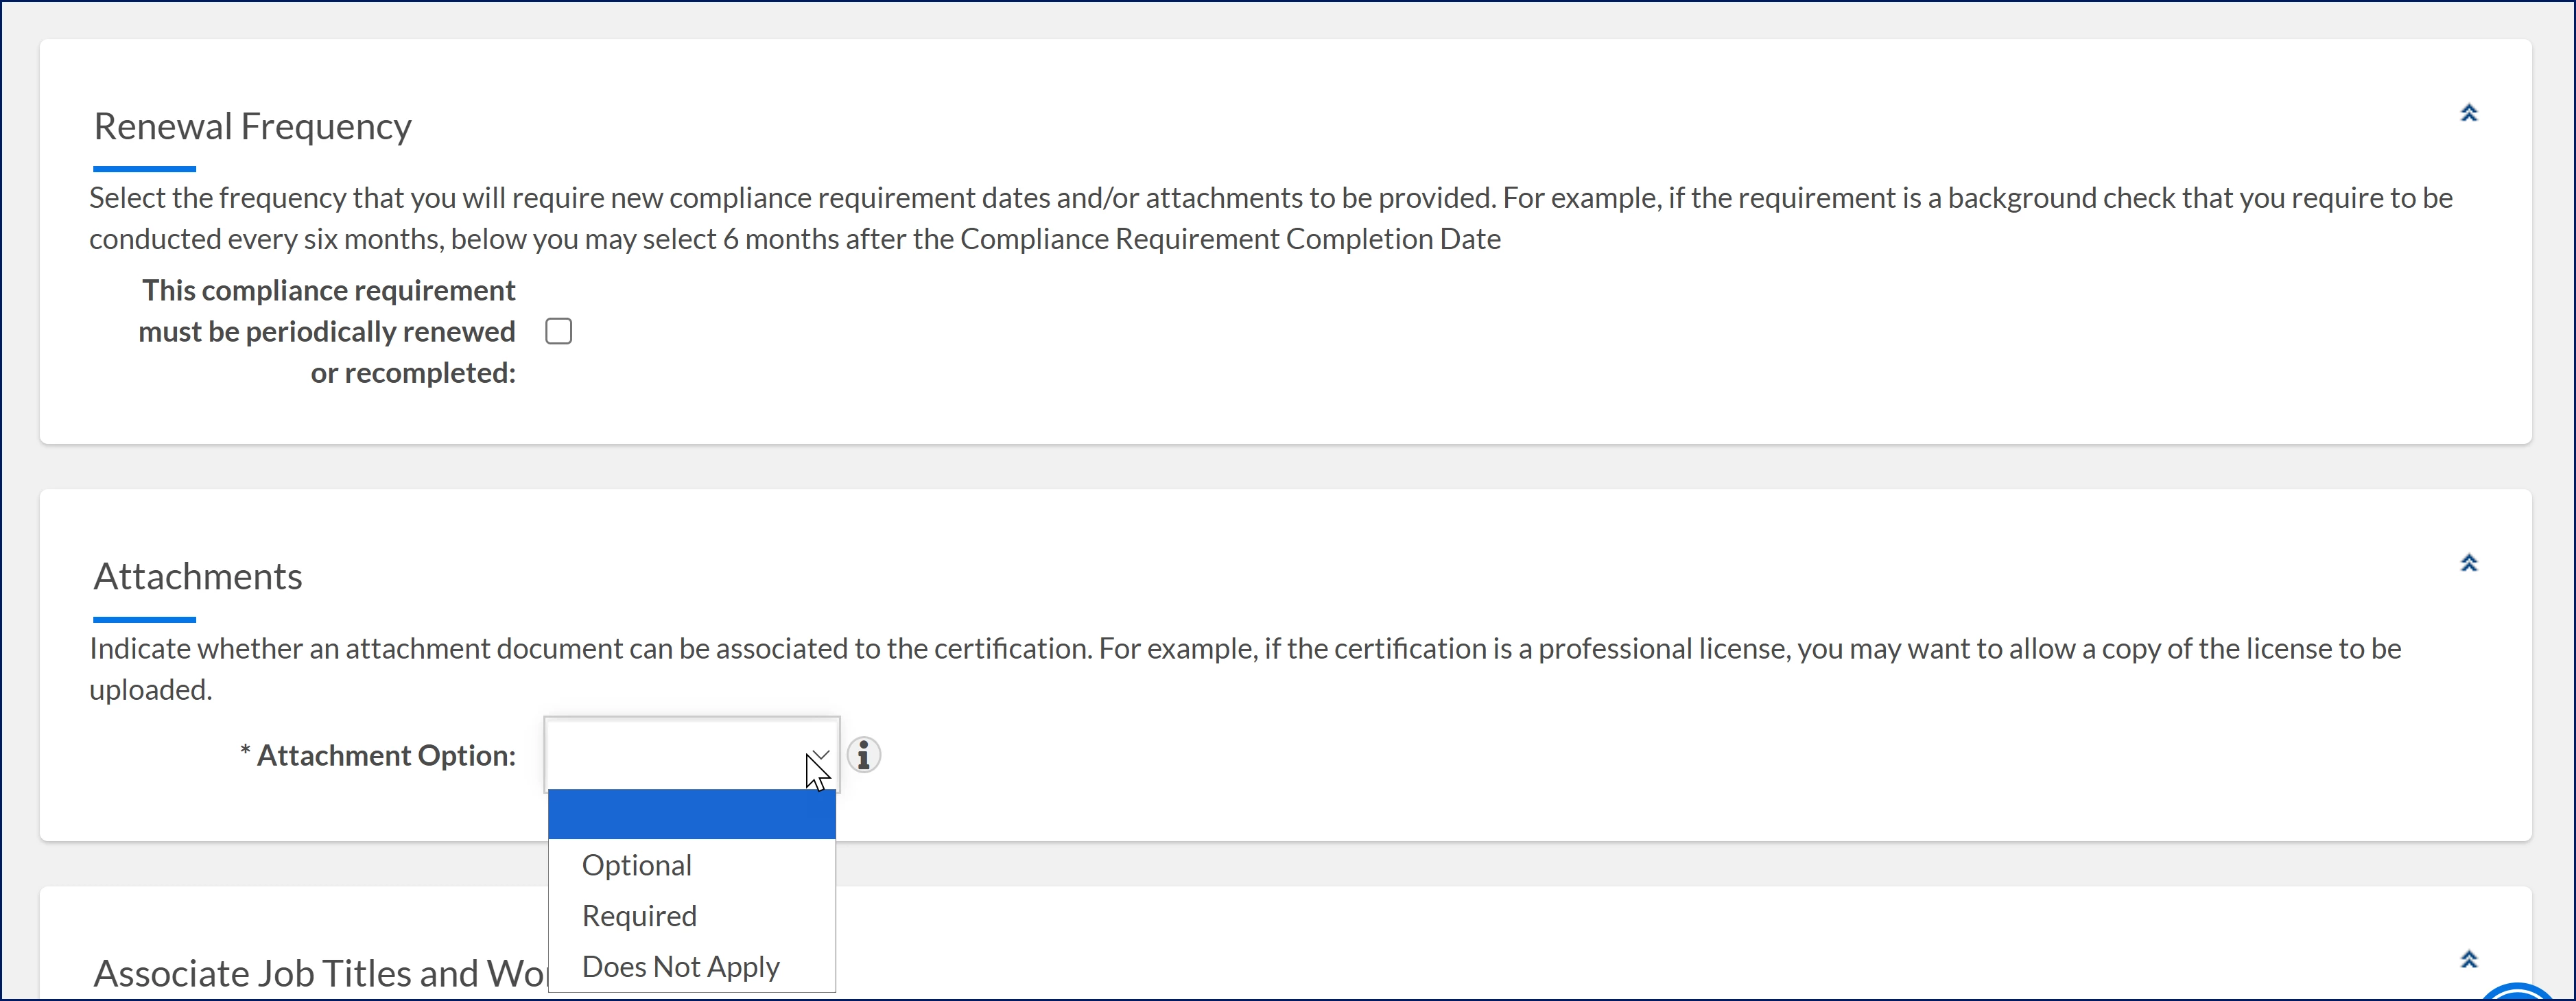
- Set Renewal Frequency to define how often users must update compliance details or upload new documents. For example, select 6 months after completion if a background check must be renewed every six months.
- Configure Attachments by selecting Optional, Required, or Does Not Apply.
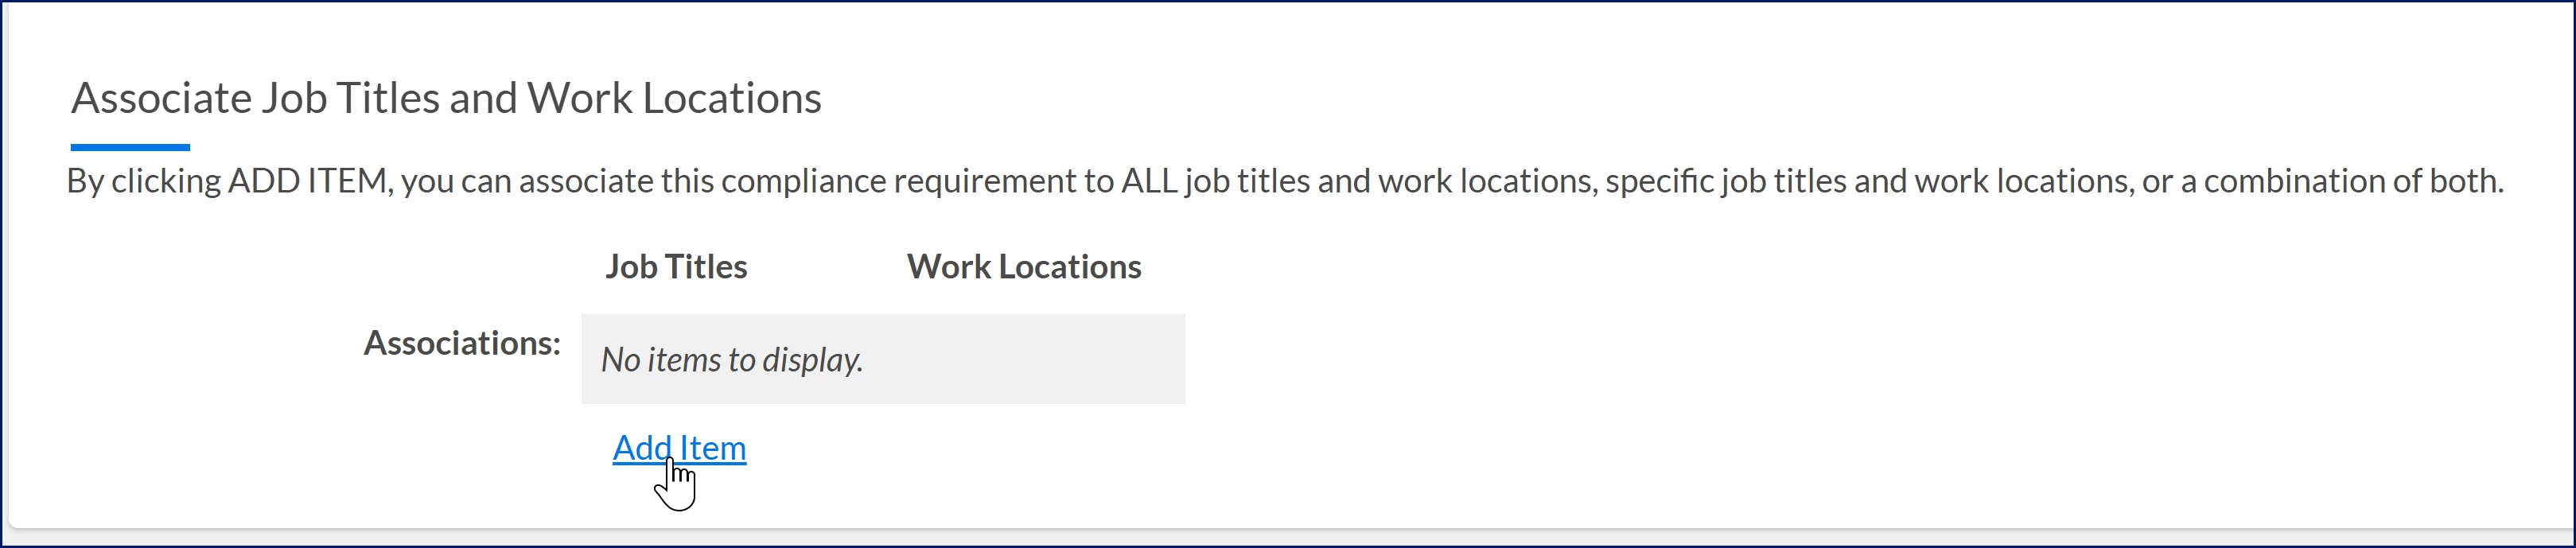
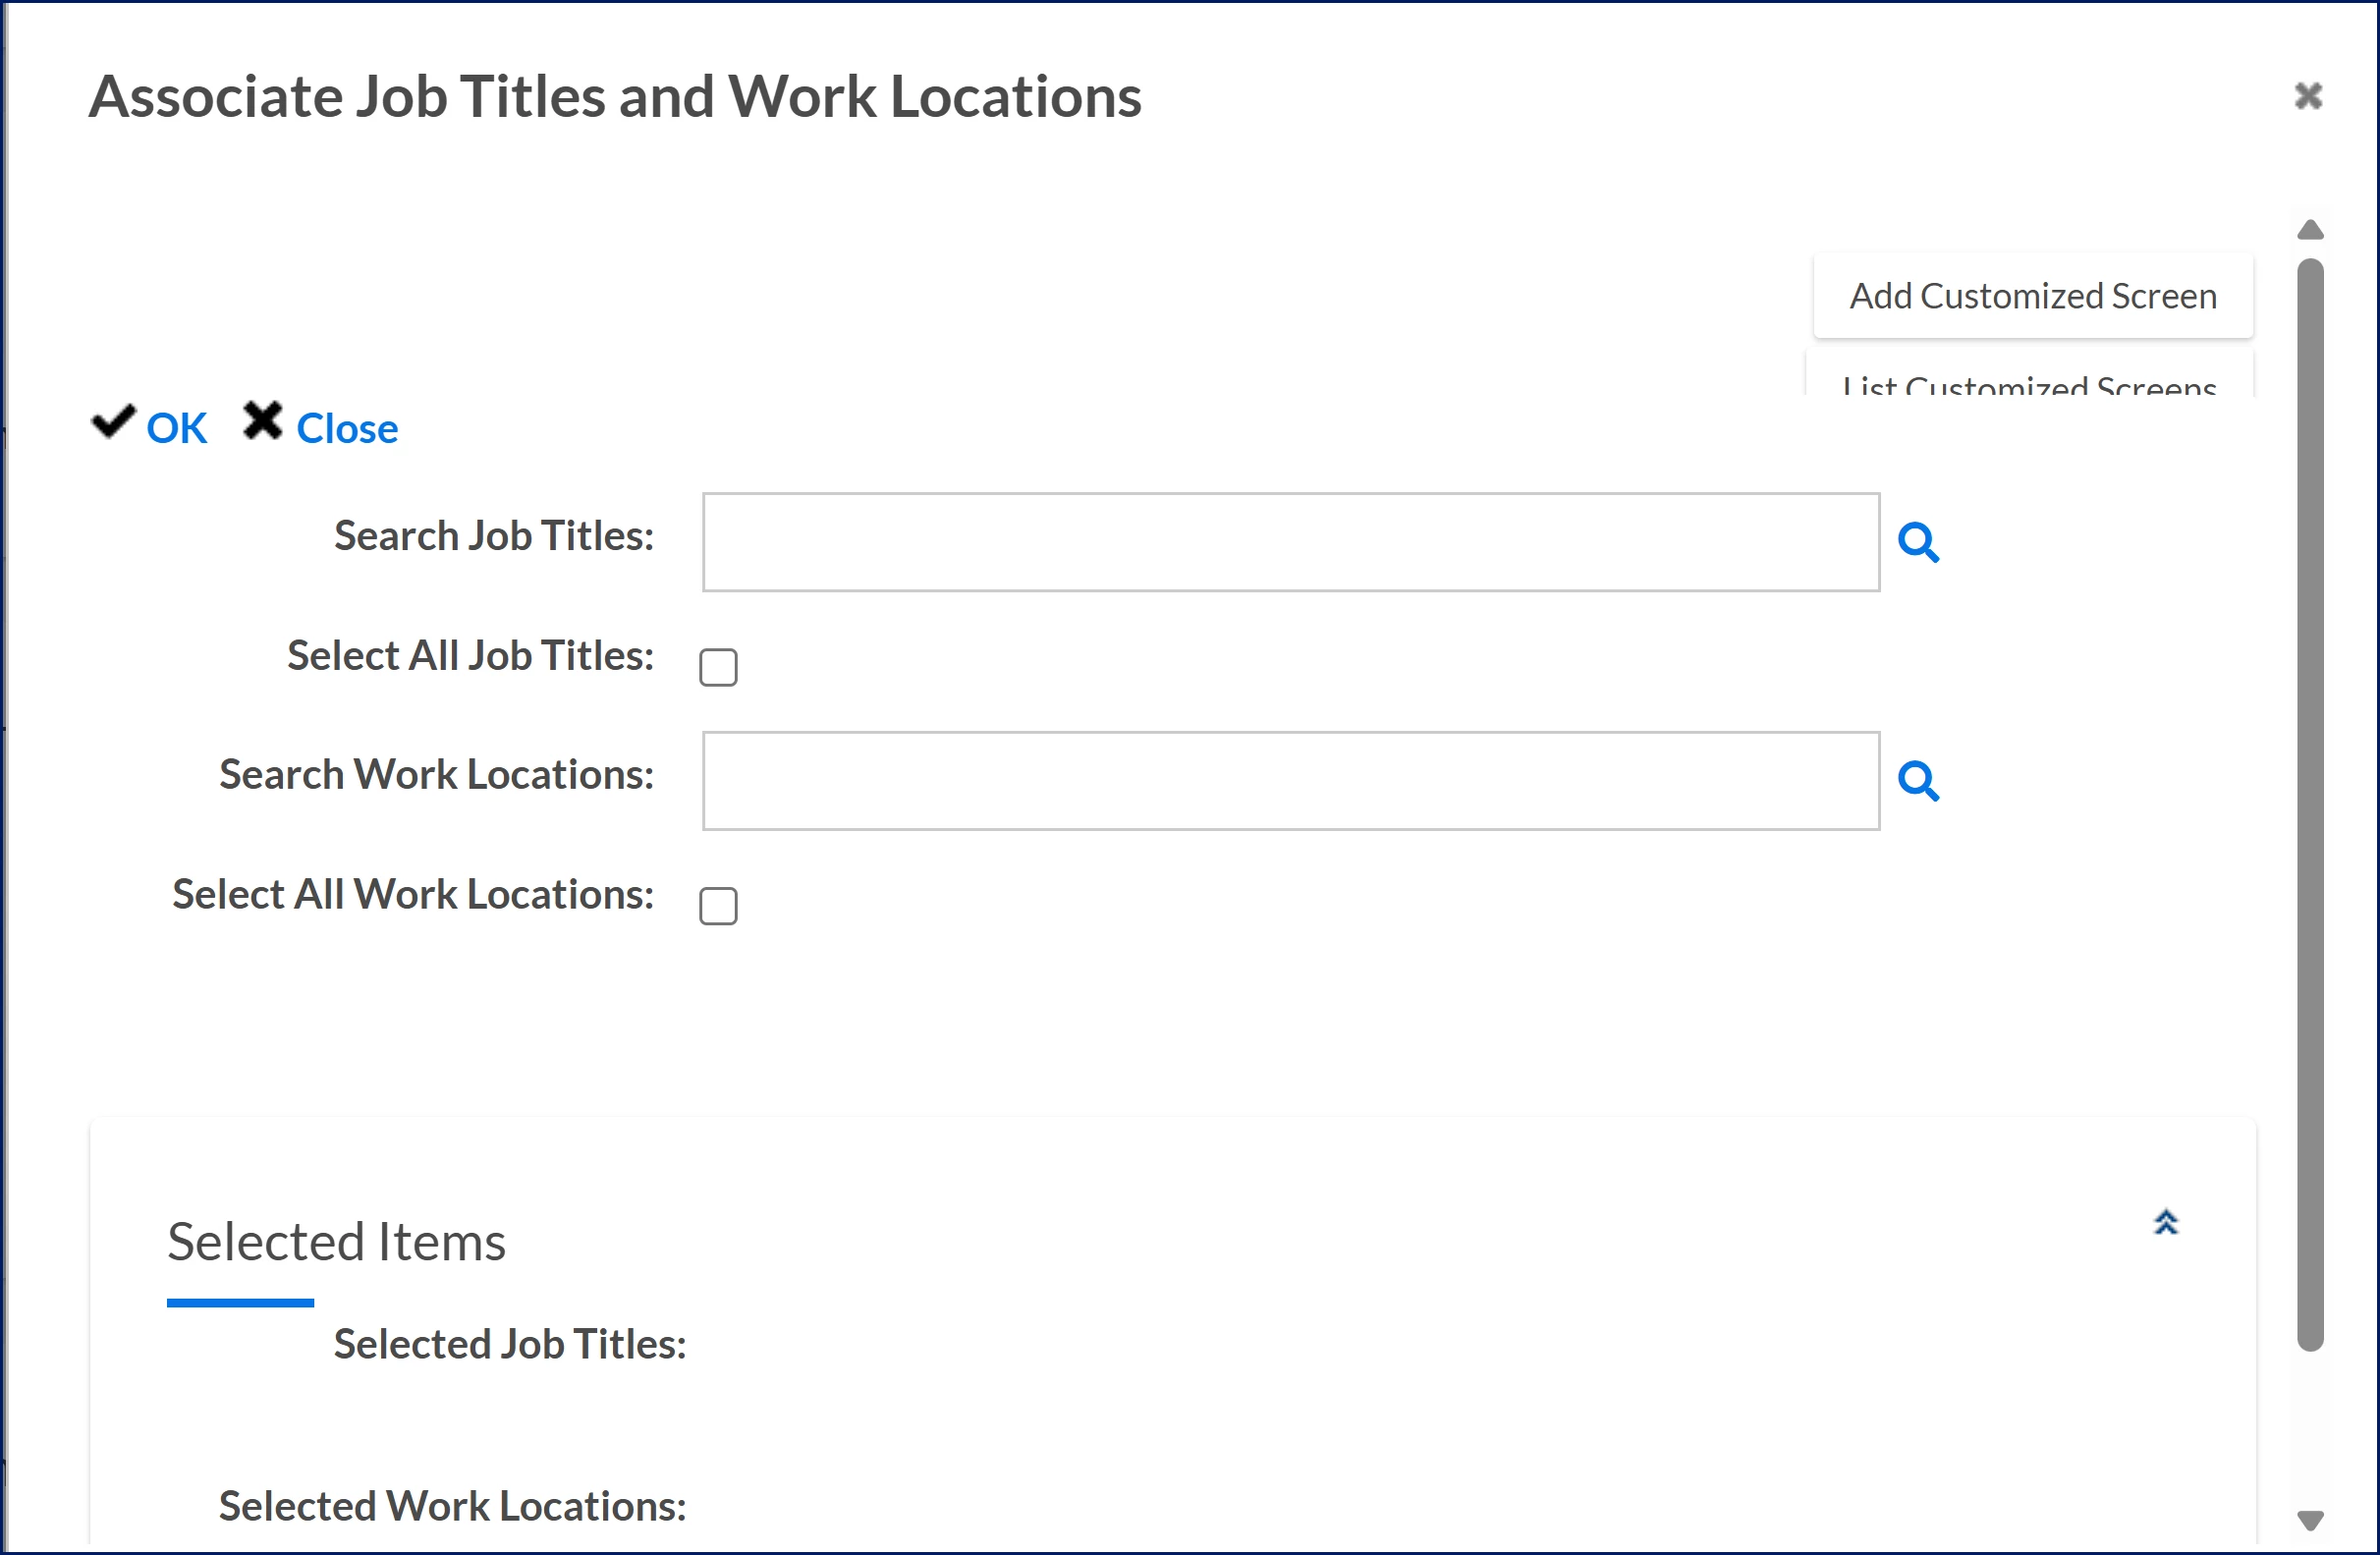
- Select Add Item to open the Associate Job Titles and Work Locations dialog and associate the requirement to roles and locations by adding:
- Job titles
- Work locations
- Or both, depending on where the requirement applies
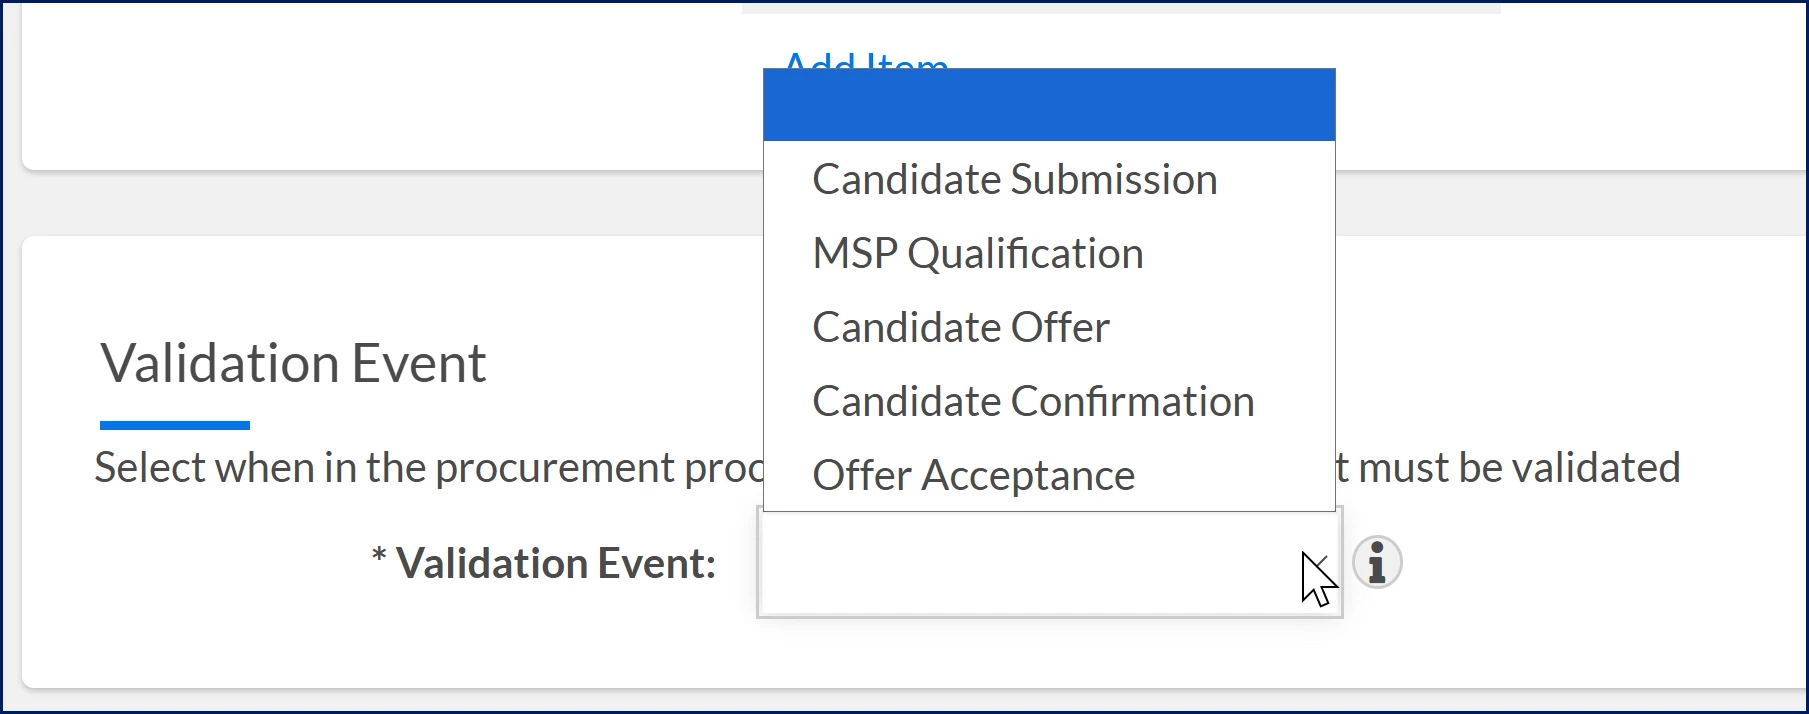
- Select the Validation Event from the Validation Event list to specify when compliance must be verified, such as Candidate Submission, MSP Qualification, and more.
- Select OK to save the requirement to apply it to matching assignments.
Create compliance requirement groups
Create compliance groups to organize requirements and make them easier to manage.
- Select Preferences > VMS Settings > Contingent Staffing.
- Expand Compliance and Certification Management (CCM) and select Compliance Requirement Groups.
- Select Add New.
- Add a Name that identifies the group based on your program terminology.
- Add a Code for identification.
- Optional. Enter a Description that helps identify the group.
- Select OK to save the group
Set up Compliance Requirement Notifications
Configure notifications your way by choosing between tasks or email alerts, selecting who receives them, and tailoring how they appear in Beeline Classic and the Hiring Manager Experience, so the right people stay informed and take action faster.
You can set up alerts to notify users when a compliance requirement or certification is approaching expiration or has already expired. CCM uses approval workflows to determine when notifications are sent and who receives them. These include workflows for items approaching expiration (Expiring) and for items that are expired or non‑compliant (Non‑Compliant).
- Select Preferences > VMS Settings > Contingent Staffing.
- Expand Compliance and Certification Management (CCM) and select Compliance Requirement Notifications. The Compliance Item Configuration page displays.
- To change the default frequency for CCM expiration notifications, take these steps:
- In First Notification Override, enter a number other than the default 15 days (the number of days before a CCM expires when a notification is sent).
- In Second Notification Override, enter a number other than the default 5 days (the number of days before a CCM expires when a notification is sent).
- In Third Notification Override, enter a number other than the default 1 day (the number of days before a CCM expires when a notification is sent).
- To manage the default notification recipients, take these steps:
- Add users: From the Users to Notify Override Available list, select the users you want to include, and then use the Arrow keys to move them to the Users to Notify Override Selected list.
- Remove users: From the Users to Notify Override Selected list, choose the users you want to remove, and then use the Arrow keys to move them to the Users to Notify Override Available list.
- To configure assignment statuses that trigger CCM notifications and alerts, take these steps:
- From the Select which assignment statuses should trigger CCM notifications and alerts Override Available list, select the statuses you want to include.
TIP: By default, notifications are sent for assignments in all statuses. To limit notifications to specific statuses, select only those statuses. This setting applies only to the Expiring and Non‑Compliant approval workflows. - Use the Arrow keys to move them to the Select which assignment statuses should trigger CCM notifications and alerts Override Selected list.
Only assignments in the selected statuses will trigger notifications and alerts for Expiring or Non-compliant items.
- From the Select which assignment statuses should trigger CCM notifications and alerts Override Available list, select the statuses you want to include.
- Select OK to apply your configurations.
| Persona Clients, program office users | Modules Contingent Staffing Services Procurement Resource Tracking | Documentation release Beeline Enterprise | Q2 2026 | Feedback? Email us: |