
- Navigate to your Beeline Enterprise Home screen.
- Complete the timesheet as indicated. Time entry for Monthly Workers is tracked by “units” per day and not by the number of hours per day as used in standard (hourly) timesheet entry. Each day worked is 1 unit.
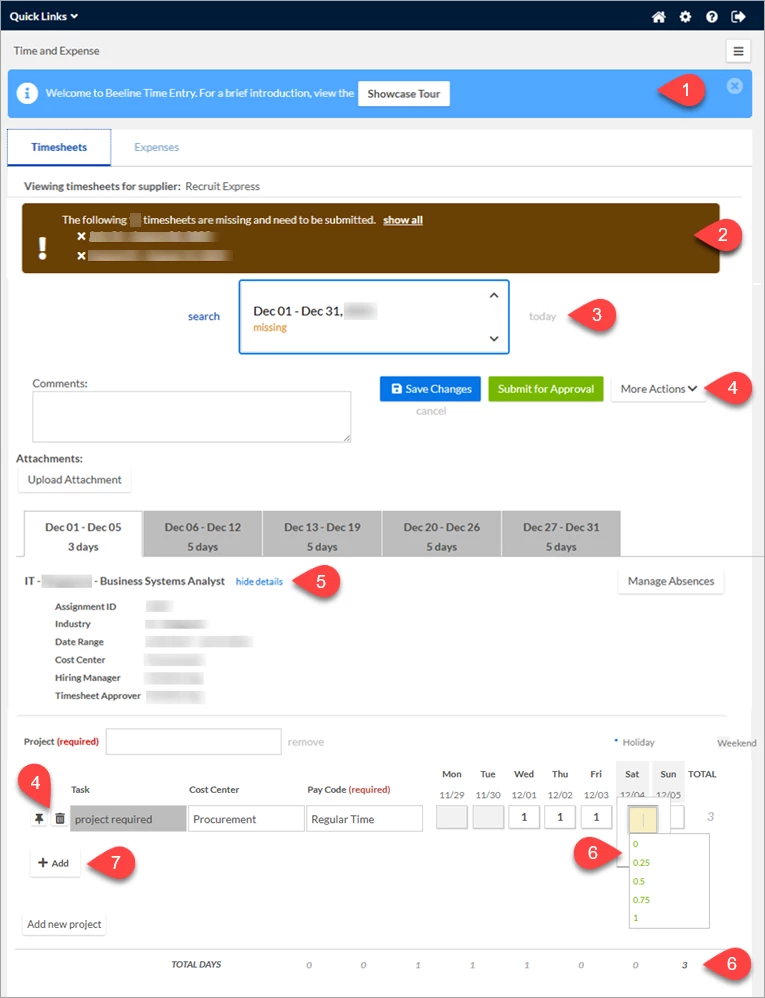
- Update your monthly timesheet by changing the “1” to “0” (zero) to indicate days that were not worked or to one of the other selection options to indicate a partial day of work. No adjustment is needed for days worked since, by default, a “1” is entered for each calendar day on a Monthly Worker timesheet.
- Check the features and options explained in the Monthly Timesheet Features section below if you need to make any other adjustments.
- Click Save Changes to store your entries if you plan to submit your timesheet at a later time.
OR
Click Submit for Approval when the timesheet is complete and ready to send to the Timesheet Approver.
Monthly Timesheet Features
 | Showcase Tour |
 | Alerts |
 | Navigation |
 | Actions (Timesheet) When your timesheet entries are complete, click Submit for Approval. The status will update in the Date Picker section and the timesheet is forwarded to your timesheet approver. You may save a copy of your submitted timesheet by clicking the “view printable pdf” link and using the save feature. Please Note: Each dated tab displayed beneath the Save Changes and Submit for Approval buttons must be completed before submission. There is a tab for each calendar week that includes days for that respective month. The total number of tabs will vary from month to month depending on the date ranges. Actions (Line Item) |
 | Details |
 | Units Optional: Some programs may choose to use the checkbox entry method instead of units entered. The contractor simply checks the box to indicate the days they worked. |
 | Add Task For a standard holiday: add a new task, select Holiday Time under Pay Code, enter “1” under the respective date, and change the default value on the standard time entry to “0” (zero). (This will automatically calculate the designated Holiday Rate.) If you work on a holiday: leave the default value on the standard time entry set to “1”, add a new task, select Holiday Time under Pay Code, and enter “1” under the respective date. (The pay rate for working a holiday is double time.) For PTO (Paid Time Off): add a new task, select Paid Time Off under Pay Code, enter “1” under the respective date(s), and change the default value on the standard time entry to “0” (zero) for each work day designated as PTO. |