
This content reflects non-client specific Beeline Enterprise functionality which may vary from what you see when logged into Beeline Enterprise depending on any client-specific settings or adjustments.
- Navigate to your Beeline Enterprise Home dashboard. Your Home page displays showing the timesheet entry view.
- Click the Expenses tab to switch to the expense entry page.
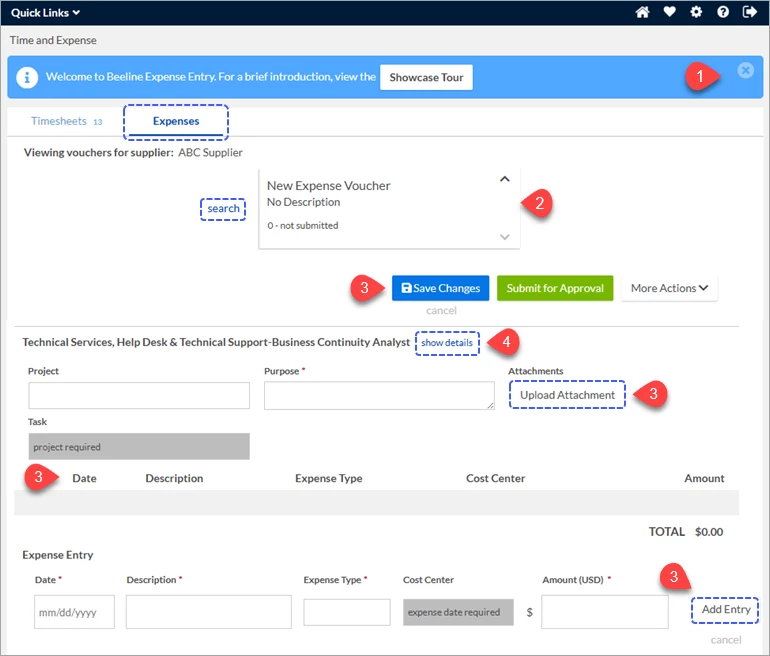
- Complete the expense voucher as indicated. Features and options for filling in an expense voucher are explained in the “Expense Voucher Entry Features” section below.
- Click Save Changes to store your entries if you plan to submit your expense voucher at a later time.
OR
Click Submit for Approval when the entry is complete and ready to send for approval.
Expense Voucher Entry Features


| Showcase Tour |

| Navigation |
 | Actions Use the Add Entry button to add as many line items as needed. Once you have added all your expense line items, you can edit or delete items using the “pencil” or “x” icons in the totals table. The Upload Attachment button allows you to add receipts, or other documentation, to your expense voucher directly from your computer. After your voucher is complete, you can choose to either Save Changes, Submit for Approval, or Cancel using the links provided. When you click Submit for Approval. The status will update in the Date Picker section and the expense voucher is forwarded to your timesheet approver. You may save a copy of your submitted voucher by clicking the “view printable pdf” link and then use the save feature. |
 | Details |