As a program office user or supplier, you administer talent management documents initiated at the key approval workflow steps chosen by your organization. Your organization can integrate DocuSign® with your candidate and assignment workflows throughout Beeline Enterprise. Talent management documents you send for eSignature can be triggered at these approval workflow steps:
Candidate offer
Assignment amendment
Assignment extension
Persona
Program office users and suppliers
Important
Because Signature pages are validated by DocuSign based on each signer's DocuSign profile, the signatory information must exactly match the information in DocuSign or the validation will fail.
If signer information changes after a document has been initiated, the document may need to be cancelled and recreated depending on workflow requirements. Verify signatory information before submitting documents for signature.
Updates made to user profile records (Name, Job Title) in Enterprise are not automatically synchronized with signer profiles in DocuSign.
How to steps
Information in this article reflects a standard Enterprise configuration. Your Enterprise platform is based on your organization’s configuration. Settings and/or data visibility rules may vary slightly from what is described.
Sending documents for approval
Once a DocuSign instance is initiated by a workflow step, you must prepare the relevant documents and send them for processing and approval.
To prepare and send documents for eSignature processing and approval, complete these steps from your Enterprise dashboard.
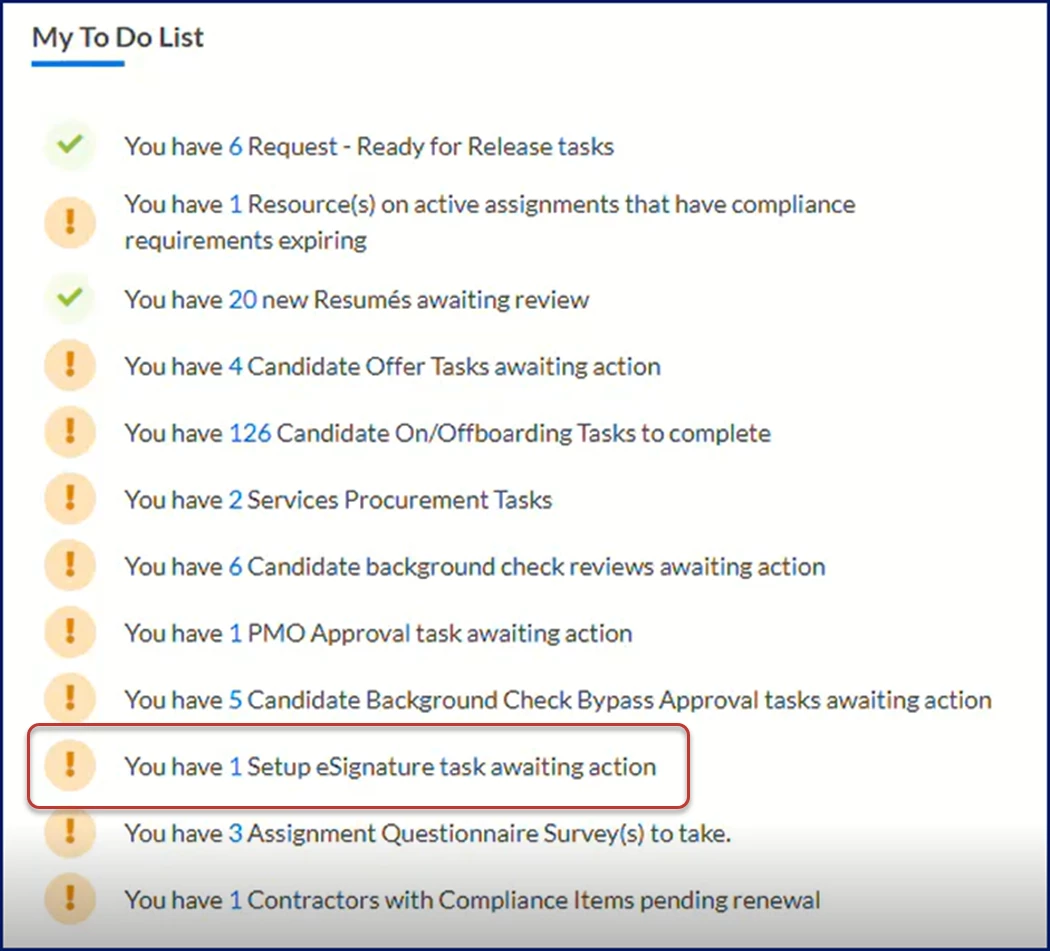
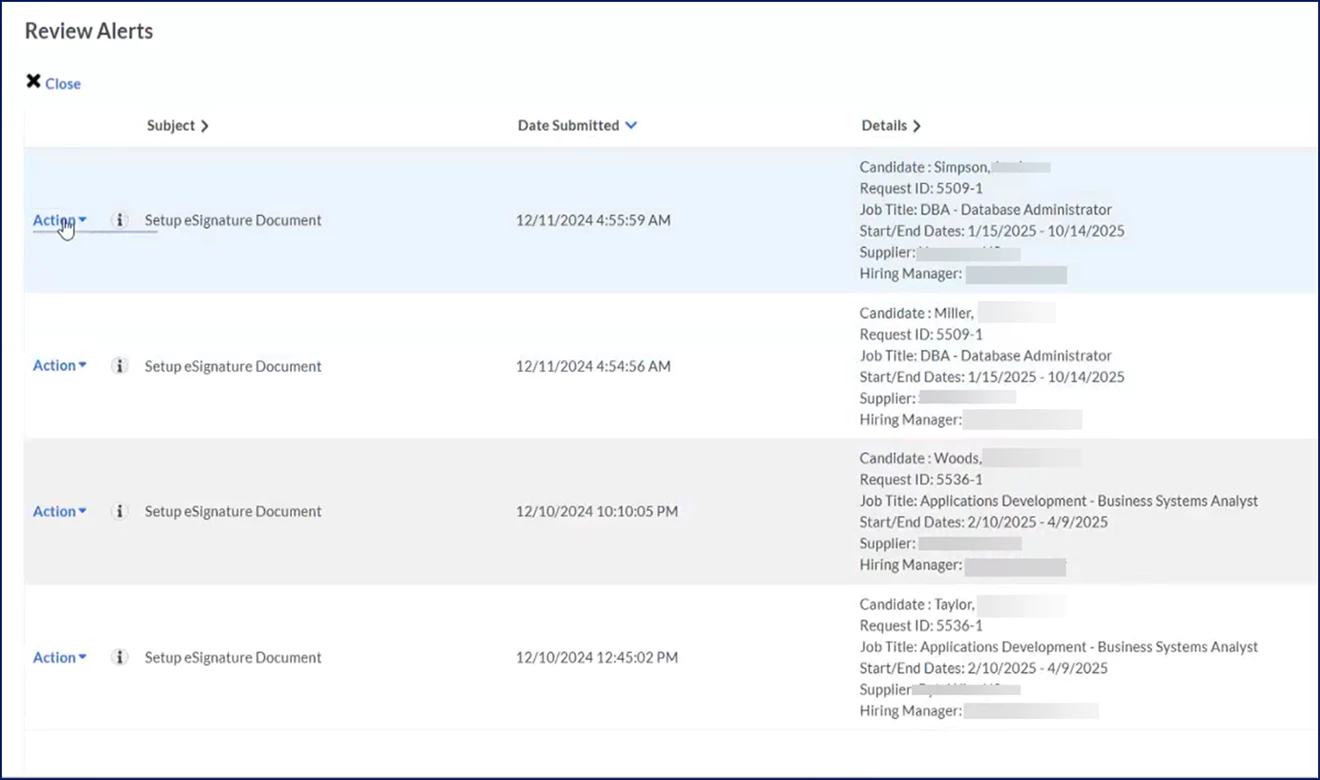
Select the Setup eSignature task awaiting action link in the My To Do List. A Review Alerts dialog displays.
From the Action menu, select View Details. An Approval Details page displays. TIP: If you’d like to bypass sending required documents, you can approve the task without setting up eSignature documents.
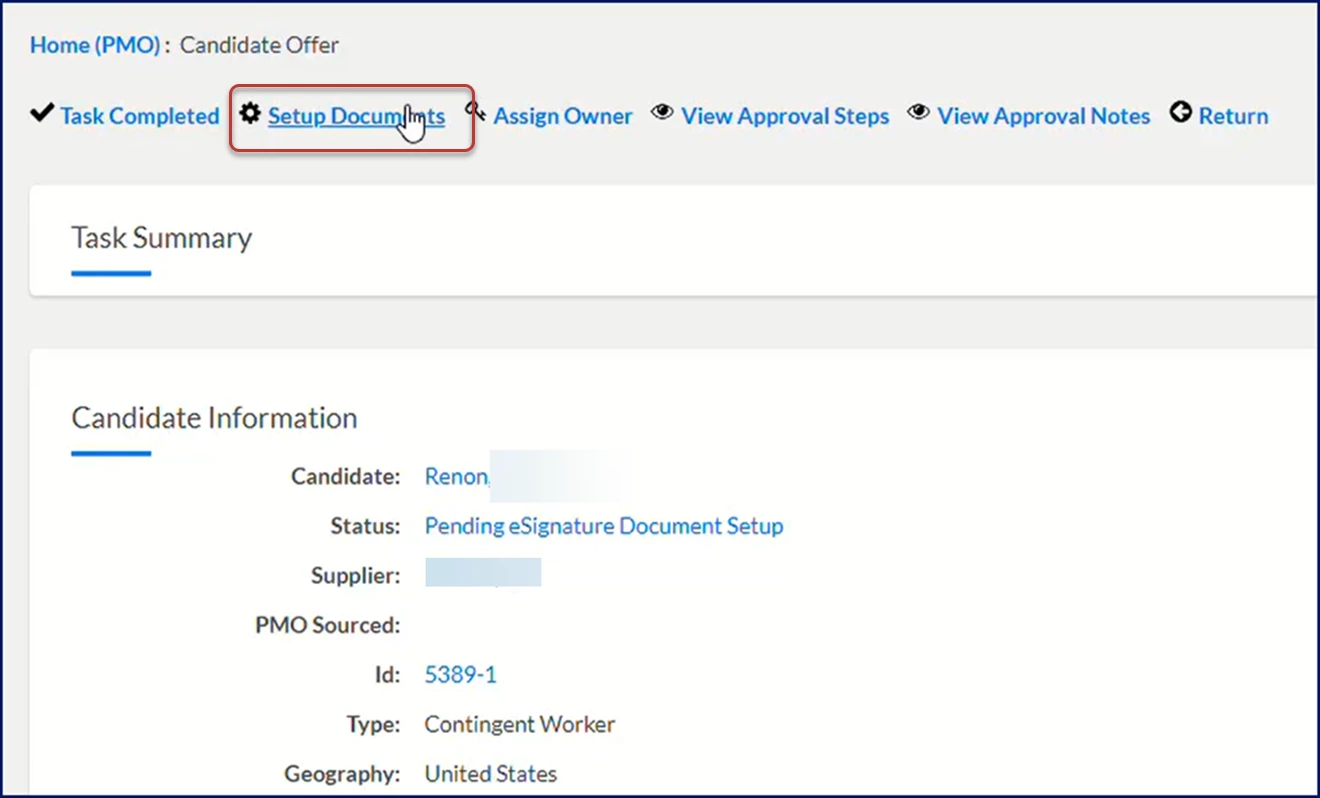
Select Setup Documents near the top of the page. An eSignature DocuSign Process page displays.
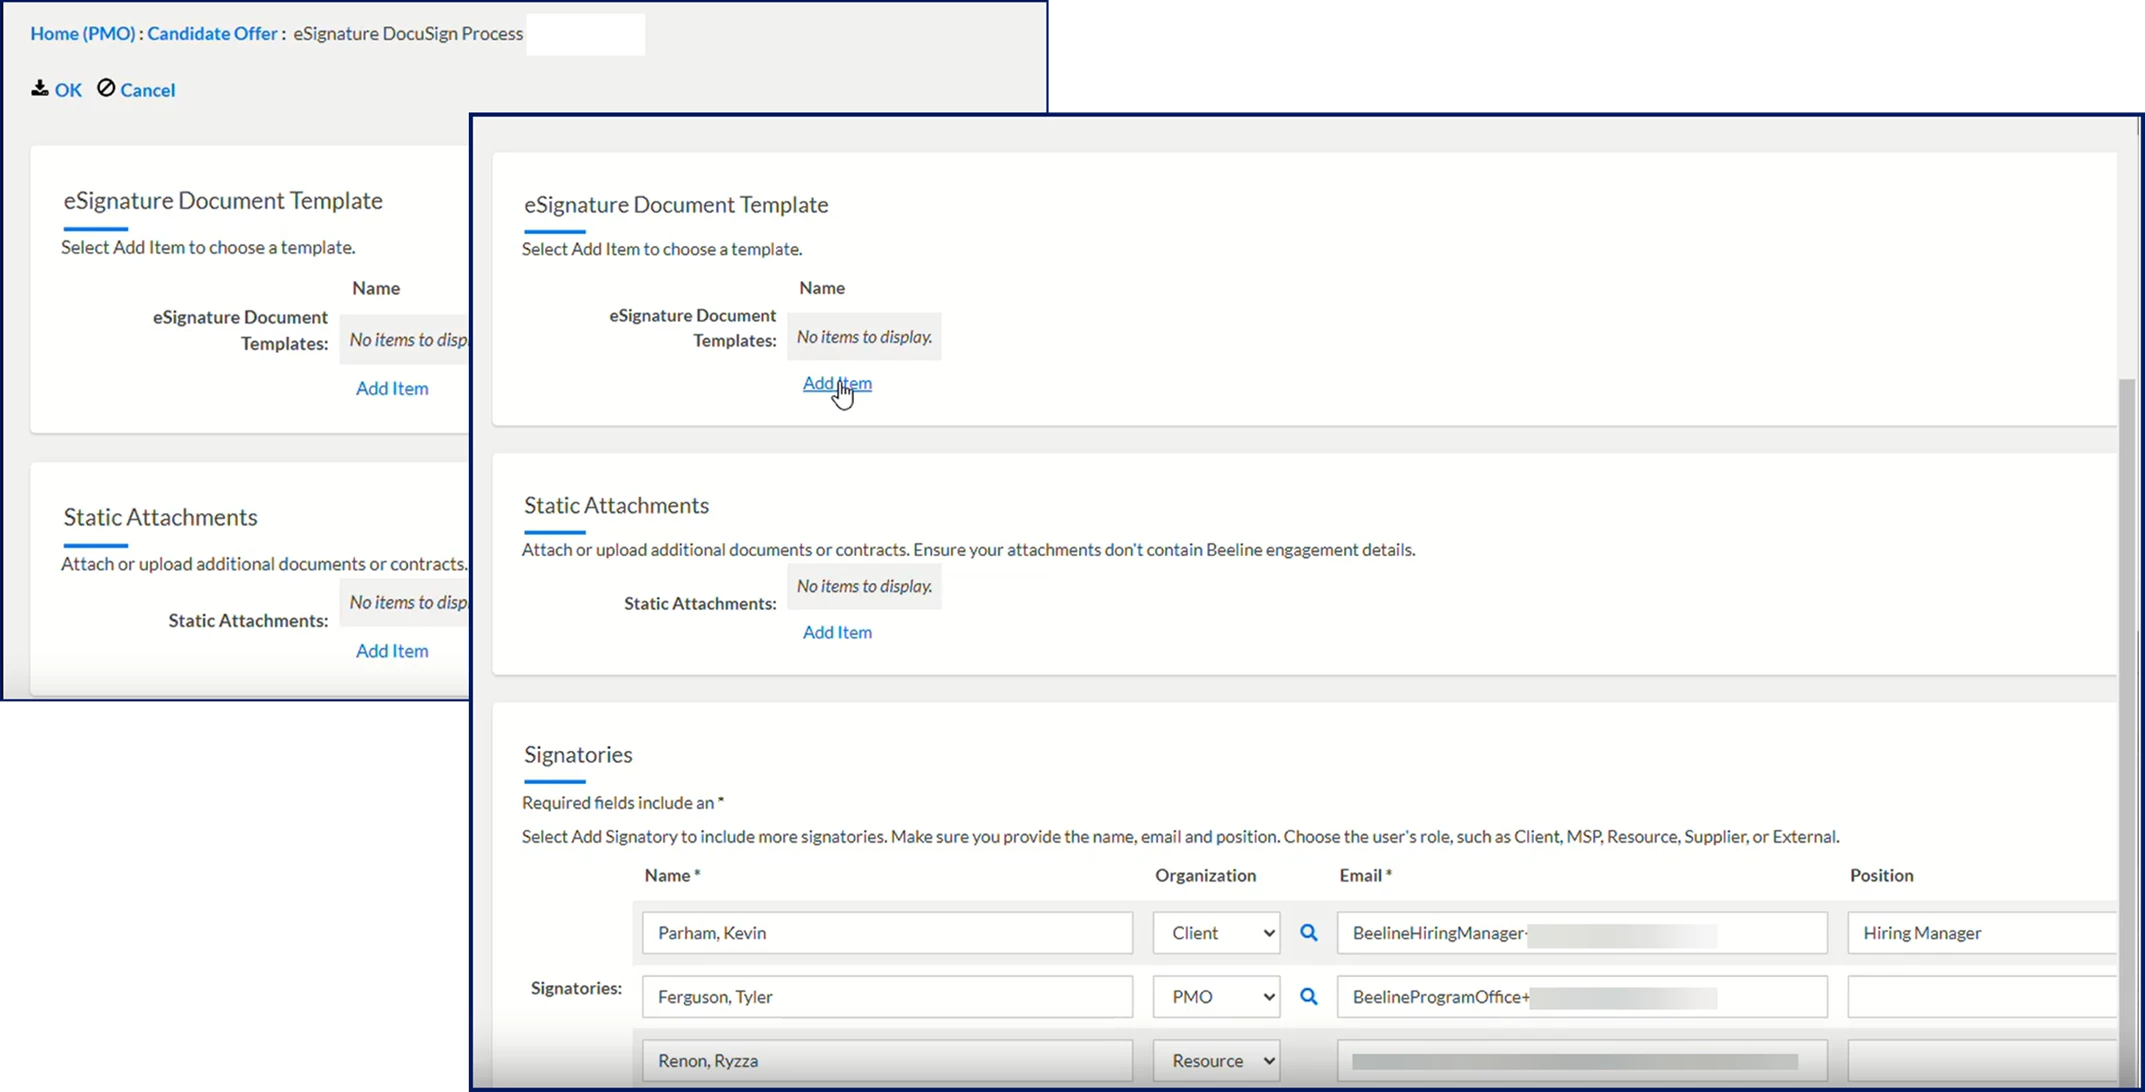
Optional. In the eSignature Document Template section, complete these steps to select a template:
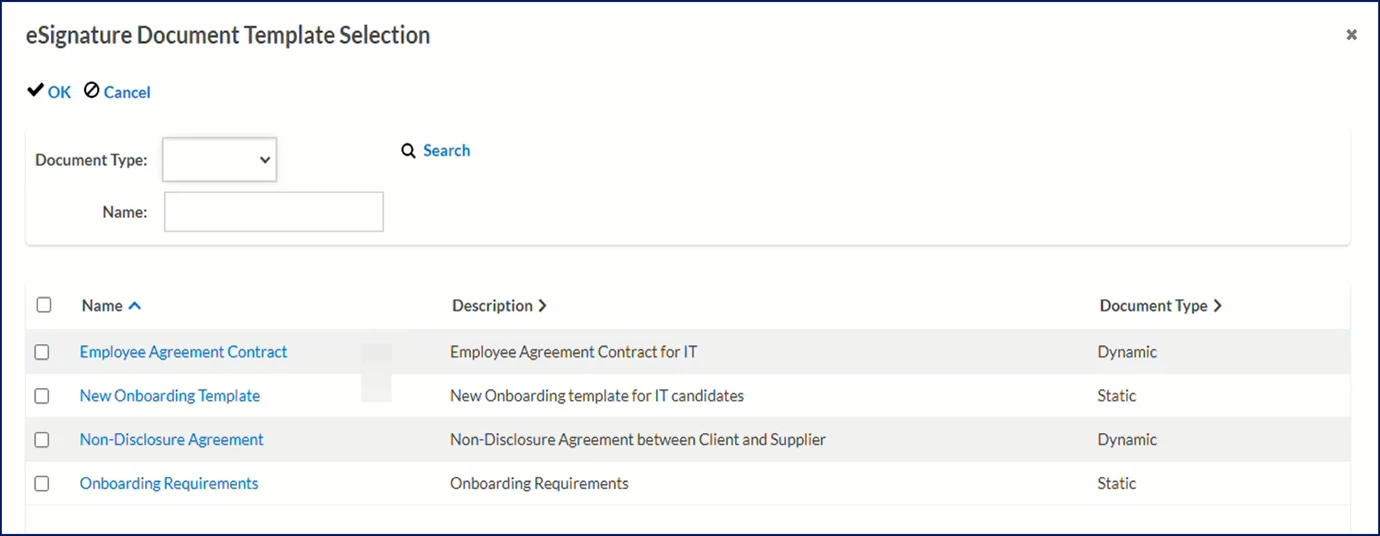
Select Add Item to choose the template you want to use. An eSignature Document Template Selection dialog displays showing you available templates based on the workflow type and industry associated.
Optional. From the Document Type list, select the kind of document you want, such as static or dynamic.
Select the template you want to use, and then select OK.
Optional. In the Static Attachments section, complete these steps to select additional attachments with fixed content that must be ratified:
Select Add Item to include your non-disclosure agreements, code of ethics, company policies, or onboarding documents.
Select Choose File.
Locate your file from your local device.
Select Upload.
Select Save.
In the Signatories section, make sure that the default signatures listed are accurate.
If you're a program office user, you'll see these default signatories: the hiring manager, the managed service provider (MSP) owner and the resource, who is the candidate or contingent talent.
If you're a supplier, you'll see this default signatory: resource, who is the candidate or contingent talent.
When you verify the default signatories, you also confirm the organization, which is the business unit the signer is associated with in Enterprise. Use this table to match user roles to organizations.
Organization
Description
Client
All customer/buyer users, such as hiring managers, internal managed service providers, your legal team, and your management personnel.
PMO
Program office users, managed service providers and vendor management office users.
Resource
Candidate or contingent talent.
Supplier
Vendors who provide candidates.
External
Any user who doesn't have a profile in Enterprise.
Optional. To include additional signatories, complete these steps:
Select Add Signatory. TIP: If you're a supplier, you can add only a resource, a supplier or an external signer.
From the Organization list, choose the signer's role, such as Client, PMO, Resource, Supplier, or External. TIP: The organization is the business unit the signer is associated with in Enterprise. Use External for signers who don't have a profile in Enterprise.
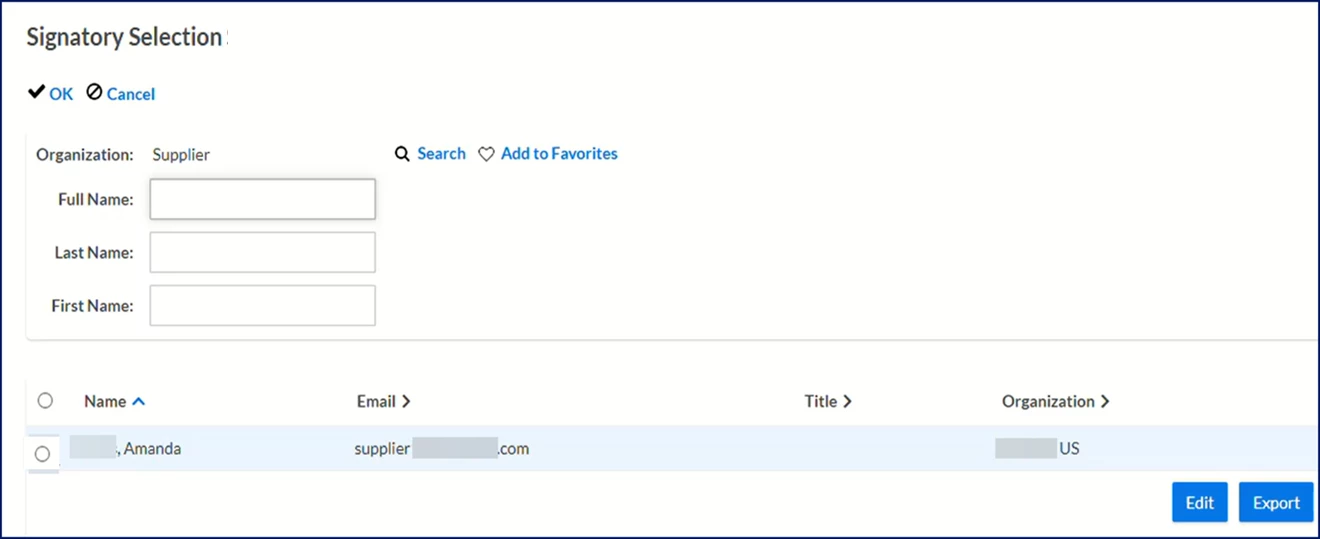
Enter the signer's full name in the Namefield, or use the Searchicon to open a Signatory Selection dialog, locate the signer and then select OK.
Enter the signer's email address in the Email field.
Optional. Enter the signer's title in the Position field.
Verify that the sequence in which a signatory's response is required is accurately shown by the Order.
Optional. Select Remove to delete signatories you don't need.
Select OK at the top of the eSignature DocuSign Process Screen page to save your choices. A message displays advising you that proceeding with your action creates an uneditable record.
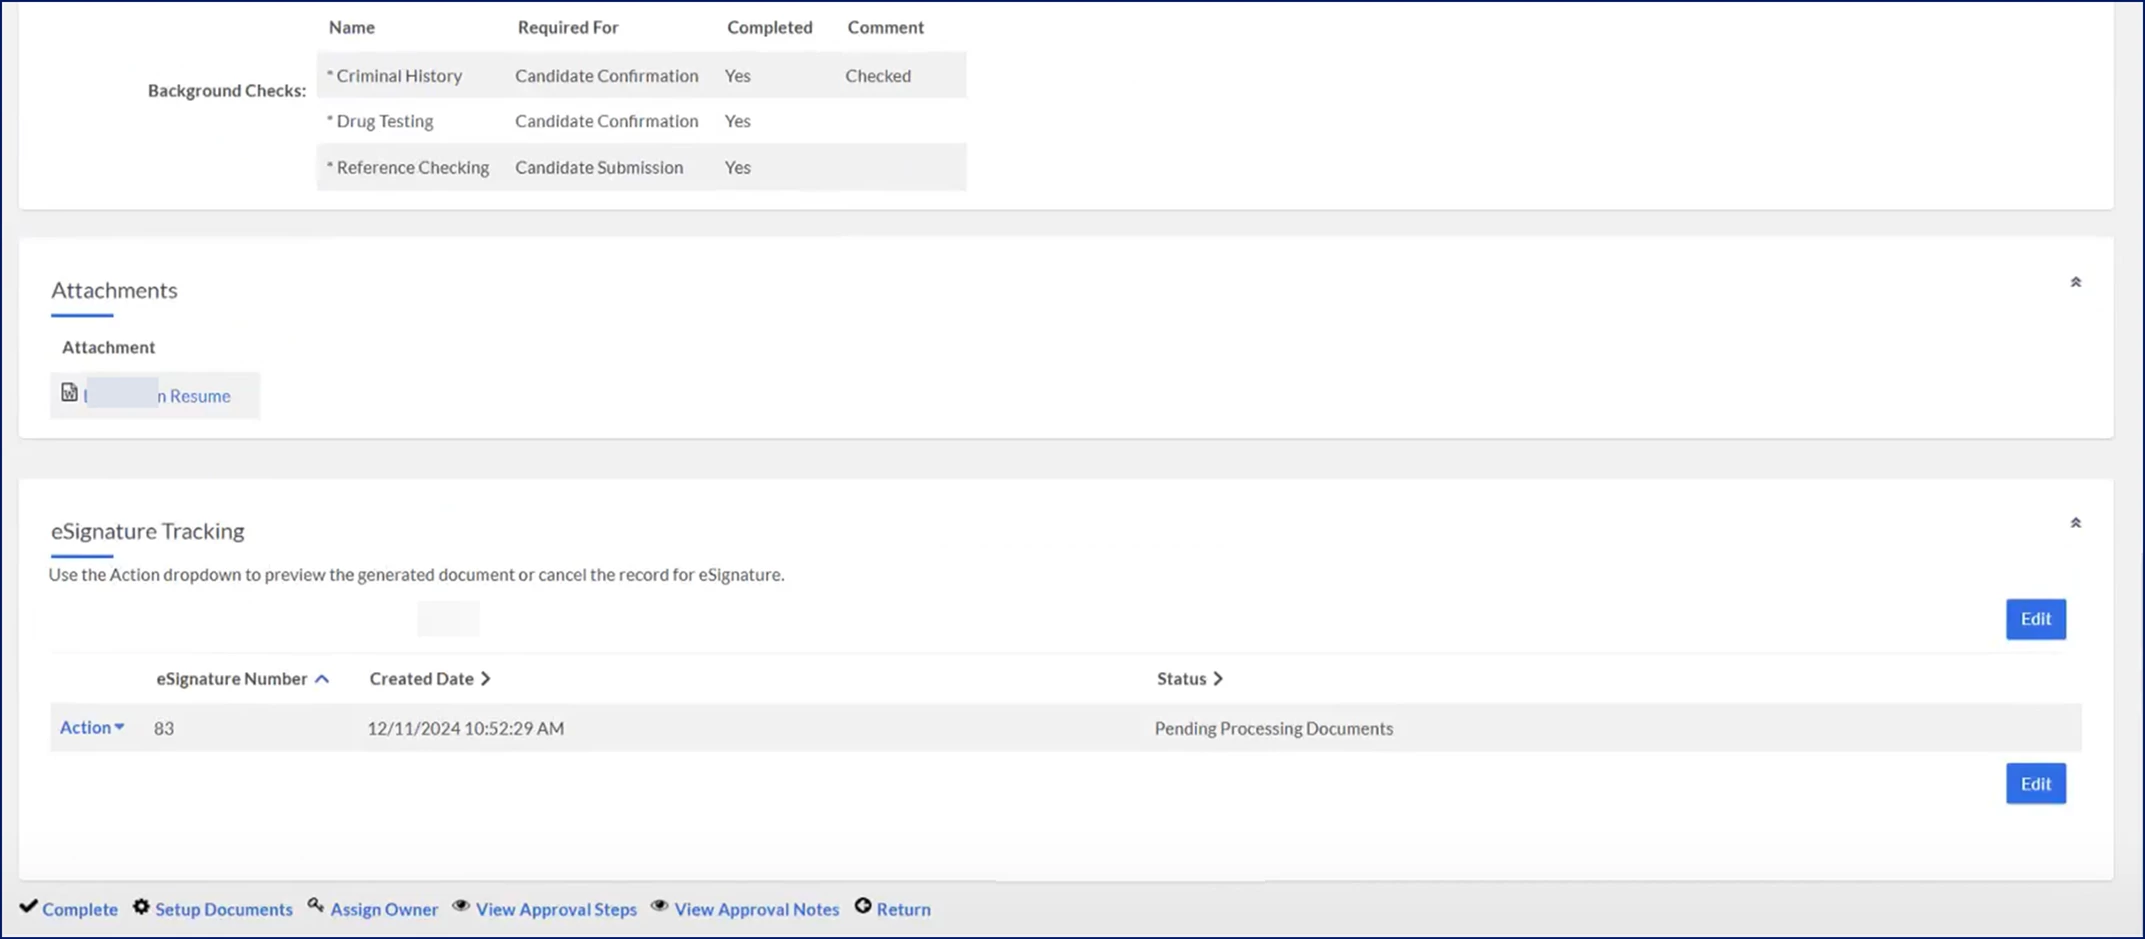
Select OK. You're returned to the Approval Details page that now includes an eSignature Tracking section.
Optional. To view the eSignature instances you've created for a specific approval, scroll towards the bottom of the Approval Details page to the eSignature Tracking section.
You can immediately view these details: the eSignature Number generated for the document envelope, the date the eSignature instance was created and the processing status of the document.
From the Action menu, select View Signatories to open a Signatories dialog where you can ensure you added the correct signatories.
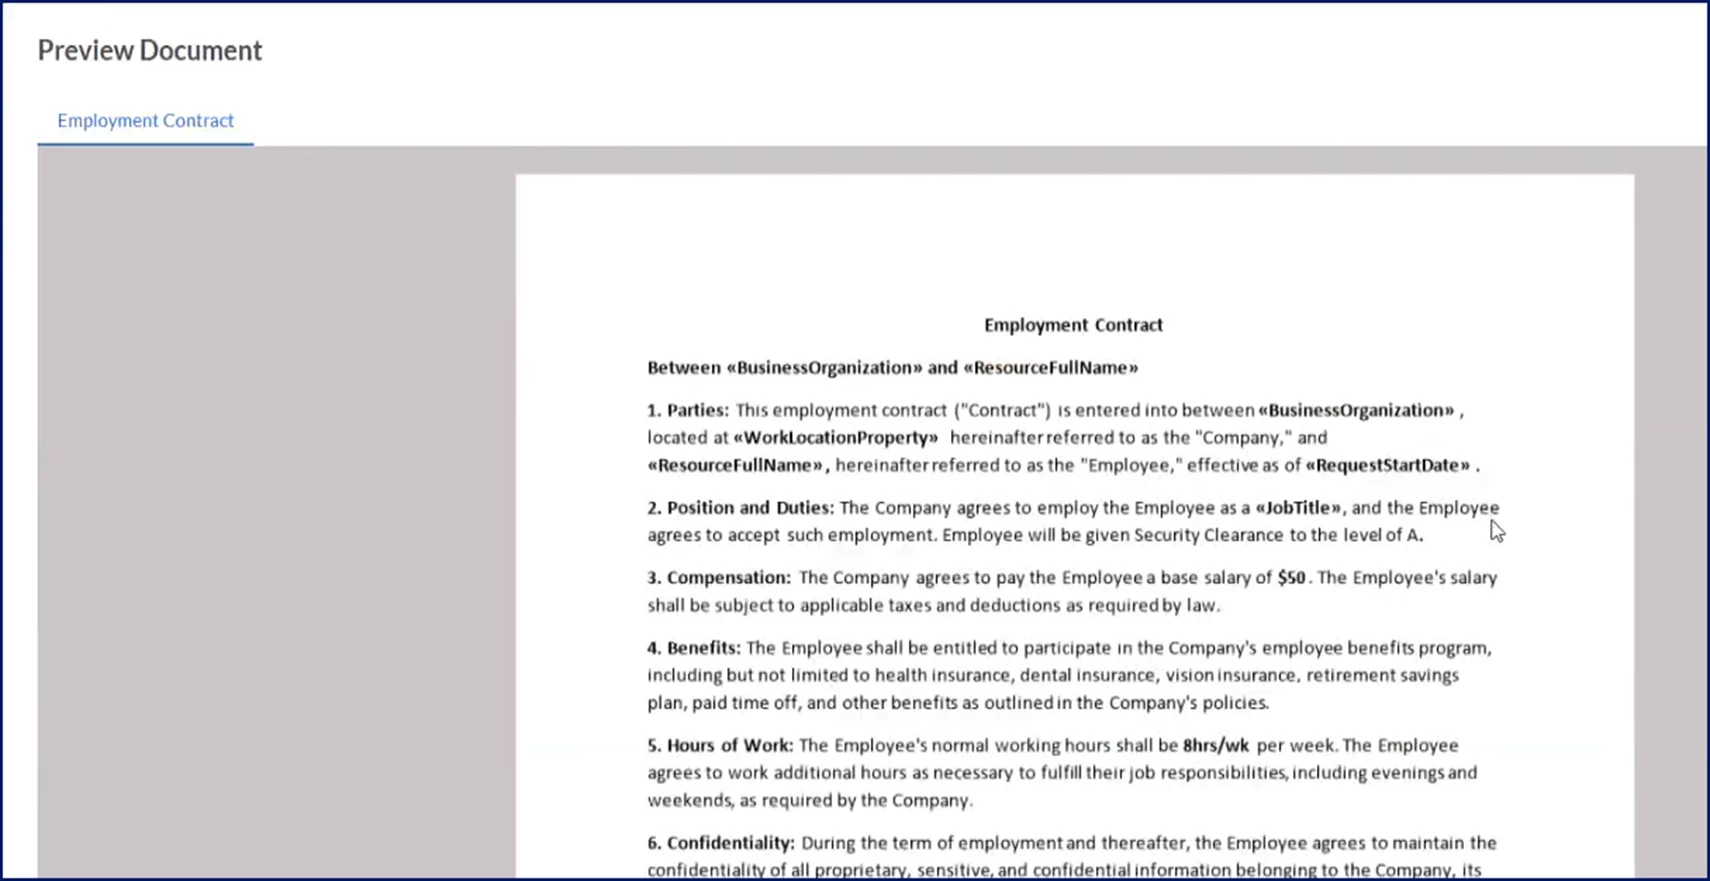
From the Action menu, select Preview Document to inspect your document.
Optional. If you notice inaccuracies or incorrect signatories in your document, select Cancel from the Action menu.
Optional. If you want to initiate additional documents with different signatories, repeat steps 3 through 11.
Follow your organization's processes for completing an approval step.
Select Complete to finalize your workflow.
Your documents are processed in Enterprise and sent to DocuSign.
Viewing statuses for candidate documents
When you extend a candidate offer, you might send your code of ethics, a confidentiality agreement and a non-disclosure agreement to the candidate. You can ensure you have ratified documents endorsed by a candidate before proceeding with additional sourcing steps.
To view and monitor eSignature documents for a specific candidate, complete these steps from your Enterprise dashboard.
From the Simple Search option at the upper right of your dashboard, select Search Resources, enter the candidate’s name, and then select the Search icon to locate the candidate you want to view. Search results display at the bottom of a Search Candidates Advanced page.
Select the link for the candidate you want to view. A View Candidate - Summary page displays.
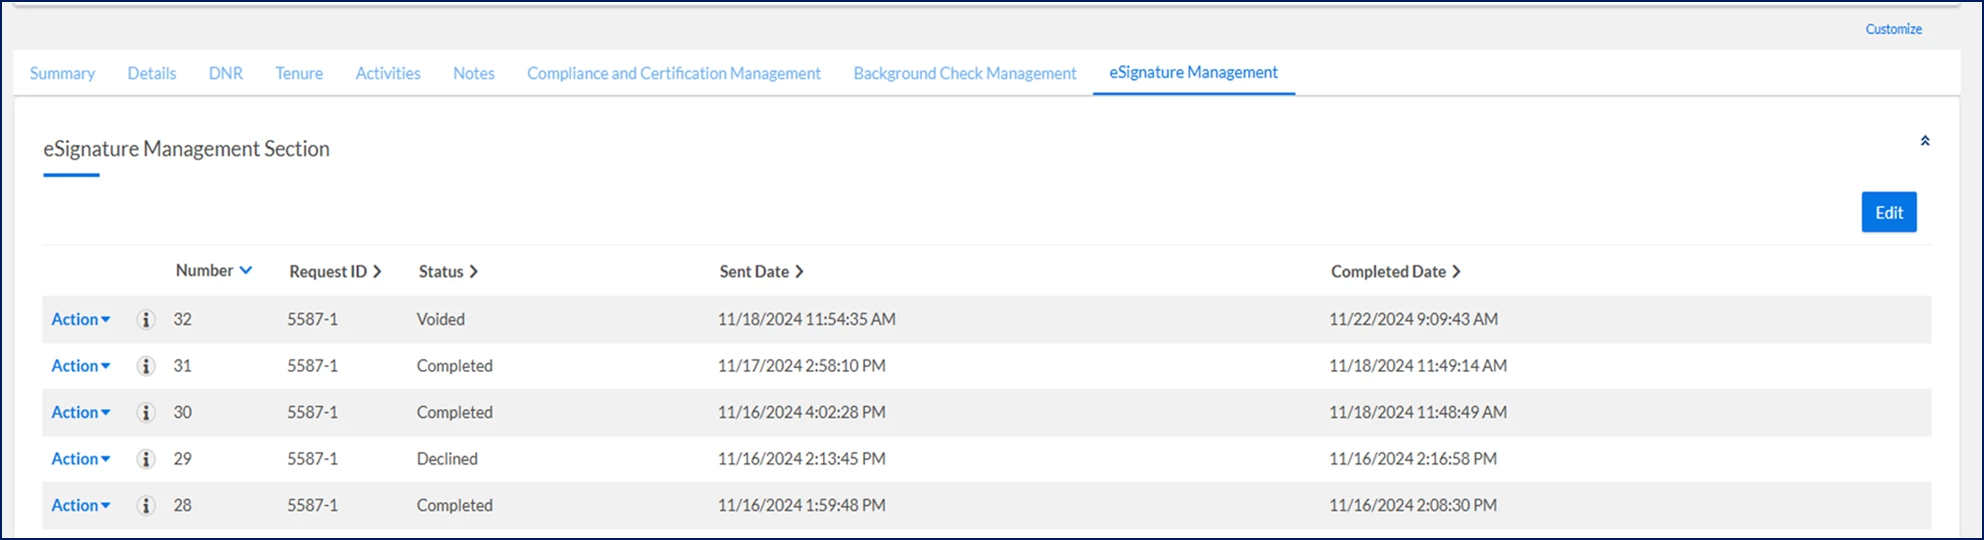
Select the eSignature Management tab. You can instantly view this information:
DocuSign envelope number
Enterprise Request ID
Status of the DocuSign instance
Date the document was sent to DocuSign
Date eSignature processing was completed
Optional. Select Edit to add more columns, such as Create Date, to the eSignature Management Section.
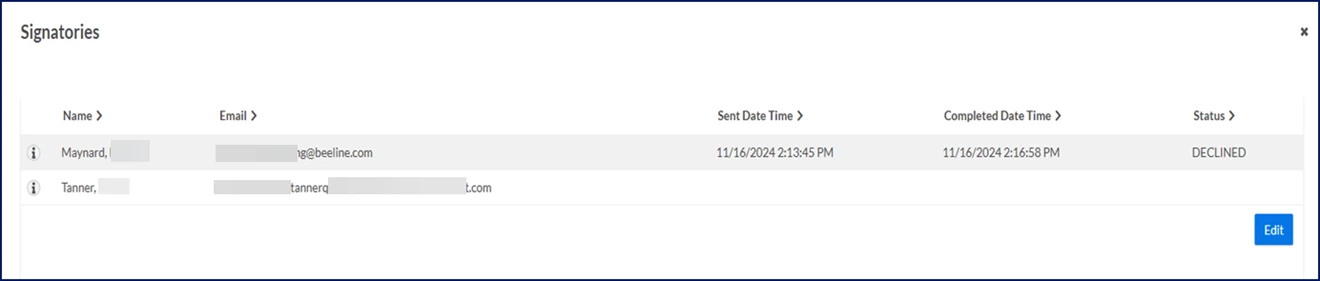
From the Action menu, select View Signatories. A Signatories dialog displays. You can instantly view this information.
Signatory’s last and first names
Email address associated the signatory
Date and timestamp the document was sent to a specific signatory
Date and timestamp a signatory
Status of the signatory’s response to a specific document
Each time you select the View Signatory link from an Action menu, Enterprise pulls real-time signatory status from DocuSign via an API call.
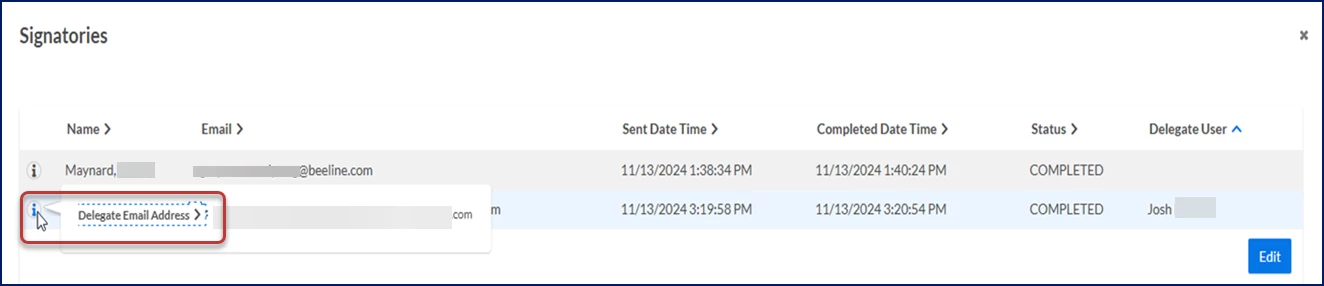
Optional. Select Edit to add more columns, such as Delegate User and Delegate Email Address, to the Signatories dialog.
Select the Close icon to exit the Signatories dialog.
Optional. Repeat step 5 to view the status of other envelopes associated with the candidate.
Select Return to exit the View Candidate - Summary page.
Viewing statuses for assignment documents
Your organization may require documents that must be authorized using eSignature when you amend or extend an assignment. You can ensure you have ratified documents endorsed by the appropriate signatory before approving an assignment amendment or extension.
To view and monitor eSignature documents for an assignment, complete these steps from your Enterprise dashboard.
From the Simple Search option at the upper right of your dashboard, select Search Assignments, enter the assignment ID, and then select the assignment you want to view. An Assignment Details page displays.
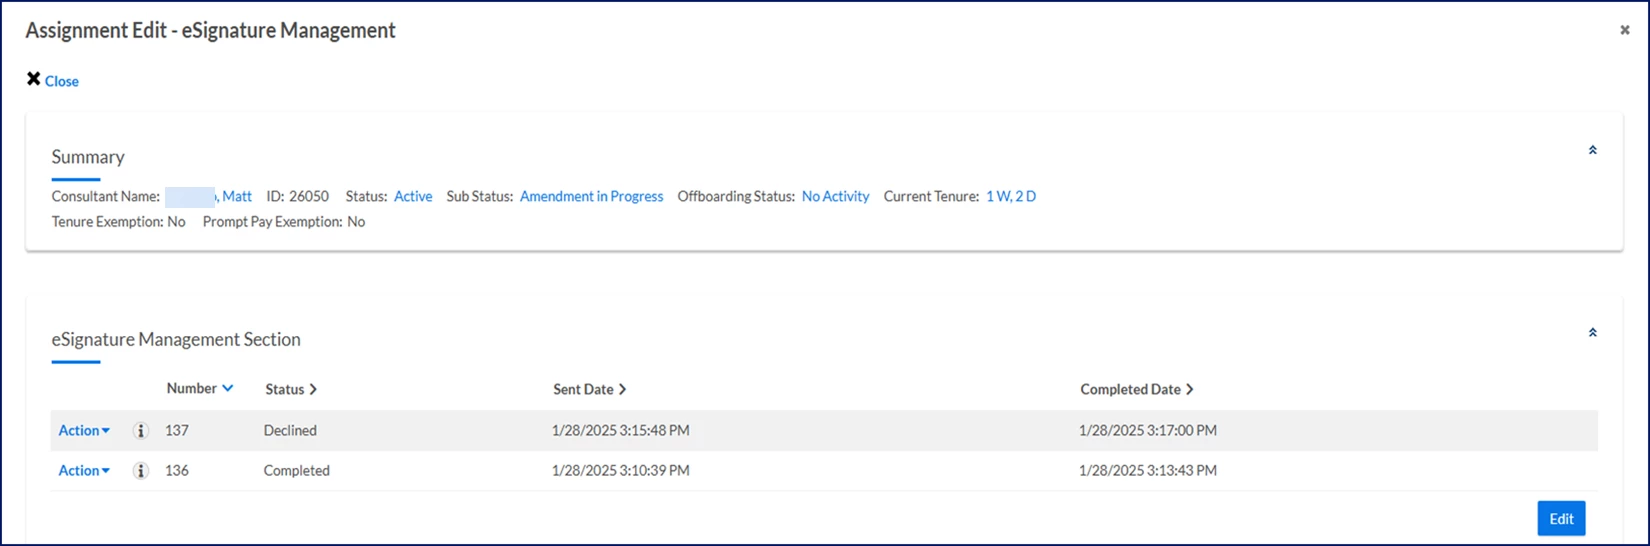
From the Assignment Menu, select More Actions > eSignature Management. An Assignment Edit - eSignature Management dialog displays. You can instantly view this information:
DocuSign envelope number
Status of the DocuSign instance
Date the document was sent to DocuSign
Date eSignature processing was completed
Optional. Select Edit to add more columns, such as Create Date, to the eSignature Management Section.
From the Action menu, select View Signatories. A Signatories dialog displays. You can instantly view this information.
Signatory’s last and first names
Email address associated the signatory
Date and timestamp the document was sent to a specific signatory
Date and timestamp a signatory
Status of the signatory’s response to a specific document
Each time you select the View Signatory link from an Action menu, Enterprise pulls real-time signatory status from DocuSign via an API call.
Optional. Select Edit to add more columns, such as Delegate User and Delegate Email Address, to the Signatories dialog.
Select the Close icon to exit the Signatories dialog.
Optional. Repeat step 5 to view the status of other envelopes associated with the candidate.
Select the Close icon to exit the Signatories dialog and return to the Assignment Details page.
Viewing eSignature statuses for candidates
Part of your organization’s candidate evaluation process may include documents that must be authorized using eSignature.
To view and monitor eSignature status for a candidate, complete these steps from your Enterprise dashboard.
From the Simple Search option at the upper right of your dashboard, select Search Request, enter the request number, and then select the requisition you want to view. A Request Details page displays.
Navigate to the Candidate section towards the bottom of the page. You can immediately view candidate details, including any eSignature-related status.
About statuses
As talent management documents are sent from Enterprise and processed in DocuSign, you can view document statuses, candidate statuses and real-time status for pending signatures. You can view statuses if you have the appropriate permissions.
About document statuses
If you have the appropriate permissions, here are the document statuses you may encounter in an eSignature Tracking section.
Document status
Description
Cancelled
The document was withdrawn.
Document Generated
The document is complete and processed.
Pending Processing Documents
A document is being processed.
If you have the appropriate permissions, here are the document statuses you may encounter in an eSignature Management section.
Document status
Description
eSignature Process Initiated
A document was sent from Enterprise to DocuSign.
Completed
The document was processed by DocuSign.
Completed - Awaiting Signed Documents
The document was signed by all parties, but finalizing and recording the signed version is pending.
Declined - Awaiting Signed Documents
One of the signatories rejected the document, but finalizing and recording the partial version is pending
Error
A fault was encountered while attempting to process the document.
Pending Processing Documents
A document is being processed.
Void - Awaiting Signed Documents
The document expired, but finalizing and recording any signed versions is pending.
Voided
The document is unsigned and has expired.
About candidate statuses
If you have the appropriate permissions, here are the candidate statuses you may encounter on the eSignature tabs in a Candidate or Resource Profile.
Candidate status
Description
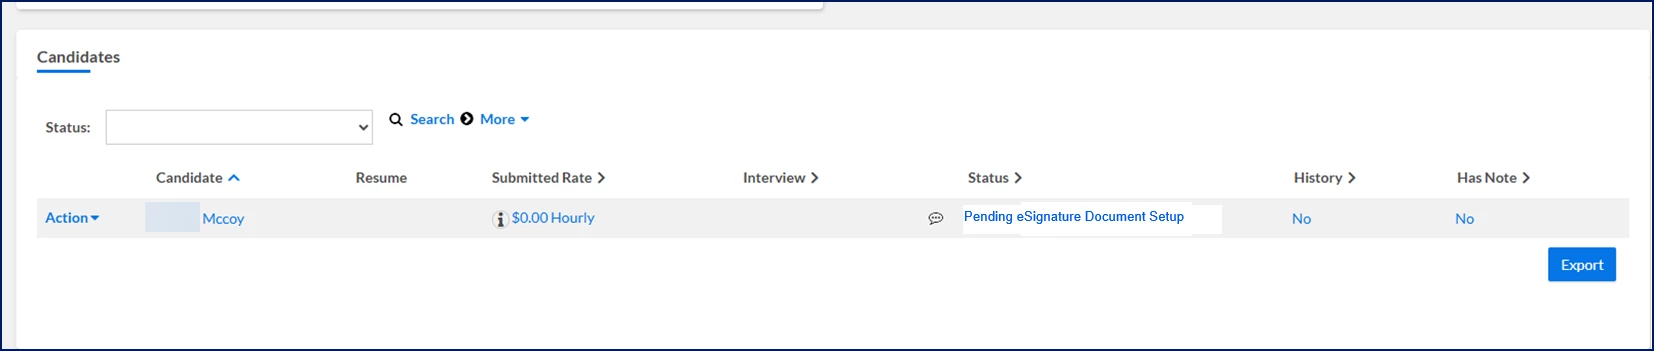
Pending eSignature Document Setup
A document must be initiated and sent from Enterprise to DocuSign or bypassed.
Pending eSignature Signer Completion
A document was sent from Enterprise to DocuSign but the document hasn’t been signed by the designated signatories.
Pending MSP/PMO Review
A task assigned to the program office to review a rejected or voided document is incomplete.
eSignature Review-Rejected
The program office rejected the review. The workflow reverts to Submit Offer.
Please complete the following fields as part of your Beeline Community registration. Unless noted as private, this information will be displayed on your user profile within the community.