
Topics on this page
Integrating Beeline Enterprise workflows with DocuSign® can streamline the processing of talent management documents using eSignature. As a program office user, you can administer document templates used for talent management after your DocuSign account is linked with Enterprise.
Creating templates for your eSignature documents helps ensure your organization captures the data needed to manage your contingent talent. You can set up and administer two types of templates: static and dynamic.
| Template type | Description |
|---|---|
| Static | Fixed templates with unchanging information that don’t include or require details about the engagement in Enterprise but must be electronically signed and ratified. For example, you can upload your non-disclosure agreements, code of ethics, company policies, or onboarding documents as a static template. |
| Dynamic | Templates that include variables that represent details about the engagement in Enterprise, such as the hiring manager’s name, resource name, supplier, and much more. |
TIP: Templates you create are not used to ratify statements of work. They apply only to candidate and assignment workflow steps.
Persona
Program office users
How to steps
Information in this article reflects a standard Enterprise configuration. Your Enterprise platform is based on your organization’s configuration. Settings and/or data visibility rules may vary slightly from what is described.
The steps outlined in this article are based on non-client-specific configuration settings. Your specific setup is based on your company's configuration/visibility and may vary slightly.
Creating a static template
Building a static template allows you to easily manage and organize documents that don’t include specifics about an engagement but must be electronically signed and ratified. For example, your organization may require all workers to sign your non-disclosure agreement (NDA). So, you can easily upload your NDA and link it to your onboarding workflow.
To create a static template, complete these steps from your Enterprise dashboard.
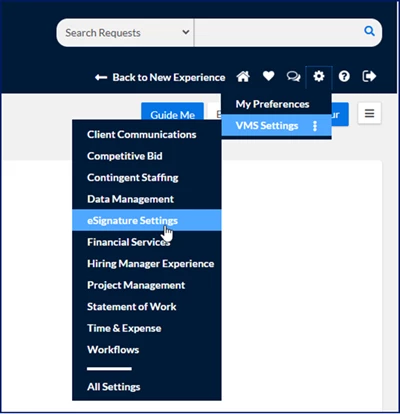
- Select Preferences > VMS Settings > eSignature Settings.

An eSignature Settings page displays.
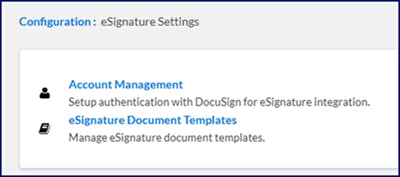
- Select eSignature Document Templates. An eSignature Document Templates page displays showing existing templates towards the bottom of the page. You can see only templates for which you have visibility permissions.
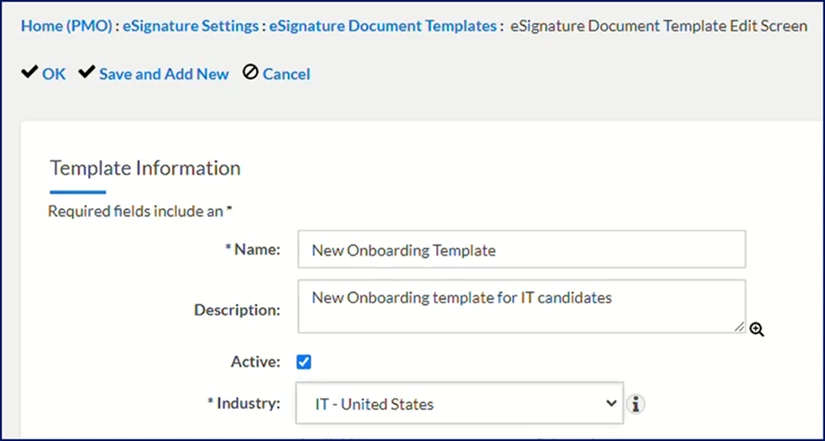
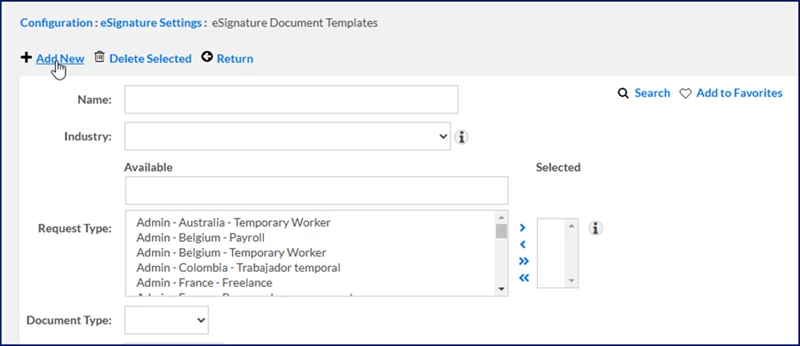
- Select Add New. An eSignature Document Template Edit page displays.
- In the Name field in the Template Information section, enter a title for your template.
- Optional. In the Description field, add an explanation for how or when your template will be used.
- From the Industry list, select the line of business for which the template applies.
- Optional. To limit the kind of requisition to which the template applies, select a requisition type from the Available Request Type list, and then use the Arrows to move the type to the Selected Request Type list.
TIP: When you don’t select a request type, the template is available to all requisition types associated with the industry you select. - From the Document Type list in the Document Information section, select Static.
- From the Workflow Type list, select either Candidate or Assignment to select which procurement workflow stage you want the template to apply.
- To add your static template, complete these steps:
- Click the Select Attachment link. A Select Document dialog displays.
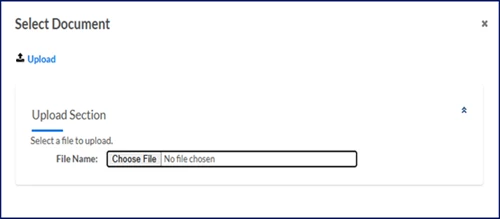
- Select Choose File. A File Explorer dialog opens.
- Navigate to and select your document, such as a non-disclosure agreement, code of ethics, company policy, or other onboarding document.
- Select Open.
- Select Upload from the Select Document dialog.
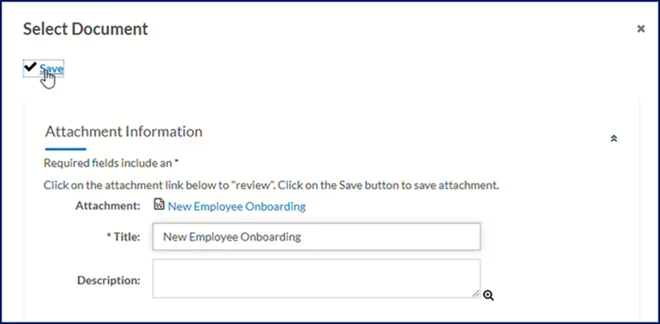
- Make sure that the title and description are correct.
- After your file is uploaded, select Save to close the Select Document dialog.
- Click the Select Attachment link. A Select Document dialog displays.
- Select OK at the top of the eSignature Document Template Edit Screen page to save your static document template. A message displays informing you that your changes were saved.
The static document you uploaded is saved in Enterprise, associated with the workflow type you chose and selectable during workflow steps.
Creating a dynamic template
Building a dynamic template allows you to include variable details about an engagement in Enterprise. When you create a template, you can include client-defined fields (CDFs) your organization may be using and these standard Enterprise fields:
| Candidate workflows | Field description | Assignment workflows | Field description |
|---|---|---|---|
| Billing Term Category | Groups fees (such as the supplier’s, MSP, and Beeline) into a specific bucket linked to the request type. The category determines which fees can be invoiced on an assignment. | Address Line 1 | First line in the street address where the contingent talent is expected to work. Usually contains these components:
|
| Business Organization | Name of the organization associated with the request. | Address Line 2 | Secondary address information where the contingent talent is expected to work. Typically includes apartment numbers, suite numbers, building names, floor numbers, or other relevant details excluded from the physical street address. |
| Cost Center | Organization units within a company that incur costs without directly generating revenue. | Contractor | Full name of the contingent talent. |
| Duration | The planned length of the assignment. | Cost Center | Organization units within a company that incur costs without directly generating revenue. |
| End Date | Date the assignment is planned to stop. | End Date | Original date the assignment was scheduled to stop. |
| End Date Property | Date and timestamp the assignment is planned to stop. | End Date Property | Current date the assignment is scheduled to stop. |
| Estimated Cost | Expected spend associated with an assignment. | Effective Date | Date the assignment is planned to start. |
| Estimated Expenses | Expected costs associated with an assignment. | Estimated Cost | Expected spend associated with an assignment. |
| First Name | Candidate’s personal name. | Estimated Expenses | Expected costs associated with an assignment. |
| Hiring Manager | Individual responsible for recruiting the candidate associated with the requisition. | Extension Start Date | Date supplemental time begins on an assignment. |
| Hiring Manager's Email | Email address of the hiring manager associated with the candidate. | Full Date of Birth | Month, date and year a candidate was born. |
| Hours per Week | Number of hours each week that the resource is expected to work. | Hiring Manager | Individual responsible for recruiting the candidate associated with the requisition. |
| Job Class | Kind of job associated with the assignment, such as Information Technology, Nursing, or Programming. | Hours per Week | Number of hours each week that the resource is expected to work. |
| Job Description | General tasks, related duties and responsibilities the resource is expected to perform while on an assignment. | ID | Enterprise-generated number associated with the assignment. |
| Job Title | Name for a particular position in an organization. | Job Class | Kind of job associated with the assignment, such as Information Technology, Nursing, or Programming. |
| Last Name | Candidate’s surname. | Job Description | General tasks, related duties and responsibilities the resource is expected to perform while on an assignment. |
| Localized First Name | Candidate’s regionalized personal name. | Job Title | Name for a particular position in an organization. |
| Localized Last Name | Candidate’s regionalized surname. | MSP Owner | Name of the managed service provider associated with the assignment. |
| Localized Middle Name | Candidate’s regionalized personal name that precedes their surname. | Partial DOB | A portion of the candidate’s date of birth. |
| MSP Owner's Email | Email address for the managed service provider associated with the candidate. | Physical Work Location Address | Business address associated with the supplier. |
| Offer Bill Rate | The amount charged to clients for each unit of completed work as stipulated in the candidate’s offer. The bill rate includes the supplier’s markup. | Physical Work Location City | Municipality associated with the supplier’s business address. |
| Offer Hours/Week | Number of hours each week the resource is expected to work as stipulated in the candidate’s offer. | Physical Work Location Country | Region associated with the supplier’s business address. |
| Offer Start/End Dates | First and last dates of the assignment as stipulated in the candidate’s offer. | Physical Work Location State/Province | State or province associated with the supplier’s business address. |
| Partial DOB | A portion of the candidate’s date of birth. | Physical Work Location Line 1 | First line in the street address associated with the supplier’s business. Usually contains these components:
|
| Physical Work Location | Address where the resource is expected to work. | Physical Work Location Line 2 | Secondary address information associated with the supplier’s business address. Typically includes apartment numbers, suite numbers, building names, floor numbers, or other relevant details excluded from the physical street address. |
| Physical Work Location Country | Region where the contingent talent is expected to work. | Physical Work Location Postal Code | Code used to direct mail associated with the supplier’s business address. |
| Physical Work Location State/Province | State or province where the resource is expected to work. | Private ID | Enterprise-generated identification that is unique to each resource record. |
| Physical Work Location Address | Address where the resource is expected to work. | Procurement Skill | Skills required for an assignment. |
| Procurement Skill | Candidate’s skillset. | Rate Card Category 1 | Groups rate cards to limit rates available when a requisition is created to those in that category. This category is most often used to group rates by region. |
| Rate Card Category 1 | Groups rate cards to limit rates available when a requisition is created to those in that category. This category is most often used to group rates by region. | Rate Type | Drives how the rate associated with an assignment is handled (hourly, daily or monthly) and the supported time entry options. |
| Request # | Enterprise-generated number associated with the requisition. | Request Type | An option selected when the requisition was created. The request type determines which Enterprise rules are applied as the request is processed. Such as:
|
| Request Start Date | Date the assignment will begin. | RT Rate | Rate defined on the assignment for resource tracking. |
| Request Type | An option selected when the requisition was created. The request type determines which Enterprise rules are applied as the request is processed. Such as:
| Start Date Property | Current date the assignment is scheduled to begin. |
| Resource Full Name | Candidate’s first, middle and last names. | Supplier | Vendor associated with the assignment. |
| Start Date Property | Date and timestamp the assignment is scheduled to begin. | Supplier Billing Address City | Municipality to which a vendor’s payments are sent. |
| Supplier | Name of the vendor associated with the candidate. | Supplier Billing Address Country | Region to which a vendor’s payments are sent. |
| Supplier Billing Address City | Municipality to which a vendor’s payments are sent. | Supplier Billing Address Line 1 | First line in the street address where a vendor’s payments are sent. Usually contains these components:
|
| Supplier Billing Address Country | Region to which a vendor’s payments are sent. | Supplier Billing Address Line 2 | Secondary address information where a vendor’s payments are sent. Typically includes apartment numbers, suite numbers, building names, floor numbers, or other relevant details excluded from the physical street address. |
| Supplier Billing Address Line 1 | First line in a street address where a vendor’s payments are sent. Usually contains these components:
| Supplier Billing Address Postal Code | Code used to direct mail associated with the location where a vendor’s payments are sent. |
| Supplier Billing Address Line 2 | Secondary address information where a vendor’s payments are sent. Typically includes apartment numbers, suite numbers, building names, floor numbers, or other relevant details excluded from the physical street address. | Supplier Mailing Address City | Municipality to which a vendor’s invoices are sent. |
| Supplier Billing Address Postal Code | Code used to direct mail associated with the location where a vendor’s payments are sent. | Supplier Mailing Address Country | Region to which a vendor’s invoices are sent. |
| Supplier Mailing Address City | Municipality to which a vendor’s invoices are sent. | Supplier Mailing Address Line 1 | The first line in the street address where a vendor’s invoices are sent. Usually contains these components:
|
| Supplier Mailing Address Country | Region to which a vendor’s invoices are sent. | Supplier Mailing Address Line 2 | Secondary address information where a vendor’s invoices are sent. Typically includes apartment numbers, suite numbers, building names, floor numbers, or other relevant details excluded from the physical street address. |
| Supplier Mailing Address Line 1 | First line in the street address where a vendor’s invoices are sent. Usually contains these components:
| Supplier Mailing Address Postal Code | Code used to direct mail associated with the location where a vendor’s invoices are sent. |
| Supplier Mailing Address Line 2 | Secondary address information where a vendor’s invoices are sent. Typically includes apartment numbers, suite numbers, building names, floor numbers, or other relevant details excluded from the physical street address. | Supplier Mailing Address State | State or province to which a vendor’s invoices are sent. |
| Supplier Mailing Address Postal Code | Code used to direct mail associated with the location where a vendor’s invoices are sent. | Work Location | Site where the contingent talent is expected to work. |
| Supplier Mailing Address State | State or province to which the vendor invoices are sent. | Work Location City | Municipality where the contingent talent is expected to work. |
| Work Location Country | Region where the contingent talent is expected to work. | Work Location Country | Region where the contingent talent is expected to work. |
| Work Location Property | Premises where the contingent talent is expected to work. | Work Location Postal Code | Code used to direct mail associated with the site where the contingent talent is expected to work. |
| Work Location State | State or province where the contingent talent is expected to work. | Work Location Property | Premises where the contingent talent is expected to work. |
| Work Location State | State or province where the contingent talent is expected to work. |
To create a dynamic template, complete these steps from your Enterprise dashboard.
- Select Preferences > VMS Settings > eSignature Settings.
An eSignature Settings page displays.

- Select eSignature Document Templates. An eSignature Document Templates page displays showing existing templates towards the bottom of the page. You can see only templates for which you have visibility permissions.
- Select Add New. An eSignature Document Template Edit page displays.
- In the Name field in the Template Information section, enter a title for your template.
- Optional. In the Description field, add an explanation for how or when your template will be used.
- From the Industry list, select the line of business for which the template applies.
- Optional. To limit the kind of requisition to which the template applies, select a requisition type from the Available Request Type list, and then use the Arrows to move the type to the Selected Request Type list.
TIP: When you don’t select a request type, the template is available to all requisition types associated with the industry you select. - From the Document Type list in the Document Information section, select Dynamic.
- From the Workflow Type list, select either Candidate or Assignment to select which procurement workflow stage you want the template to apply. A Dynamic Document Fields section displays towards the bottom of the page showing you standard Enterprise fields and client-defined fields (CDFs).
- From the Dynamic Document Fields section on the eSignature Document Template Edit page, select the Copy icon next to the Merge Token you want to include in your template.
TIP: The fields available in the Dynamic Document Fields section vary based on your Enterprise configuration and match the kind of workflow you selected from the Workflow Type list.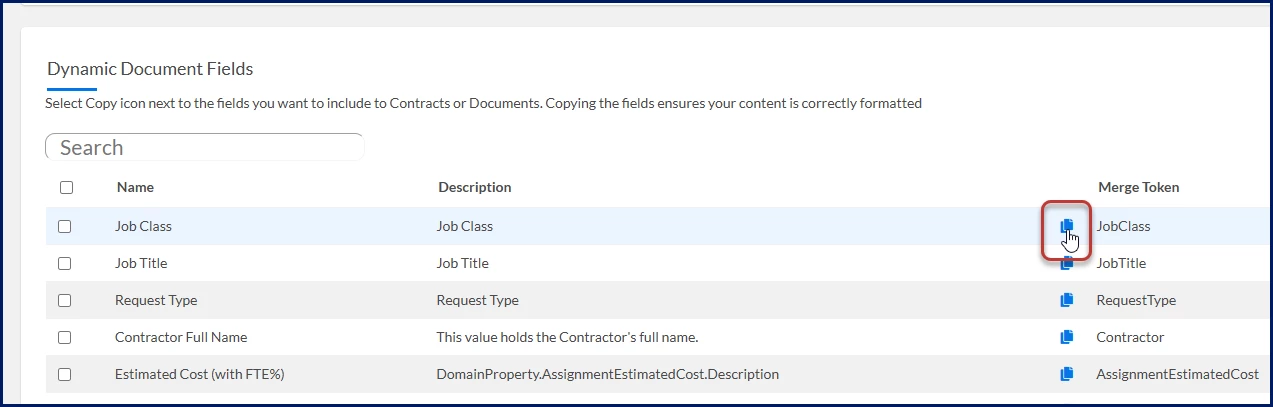
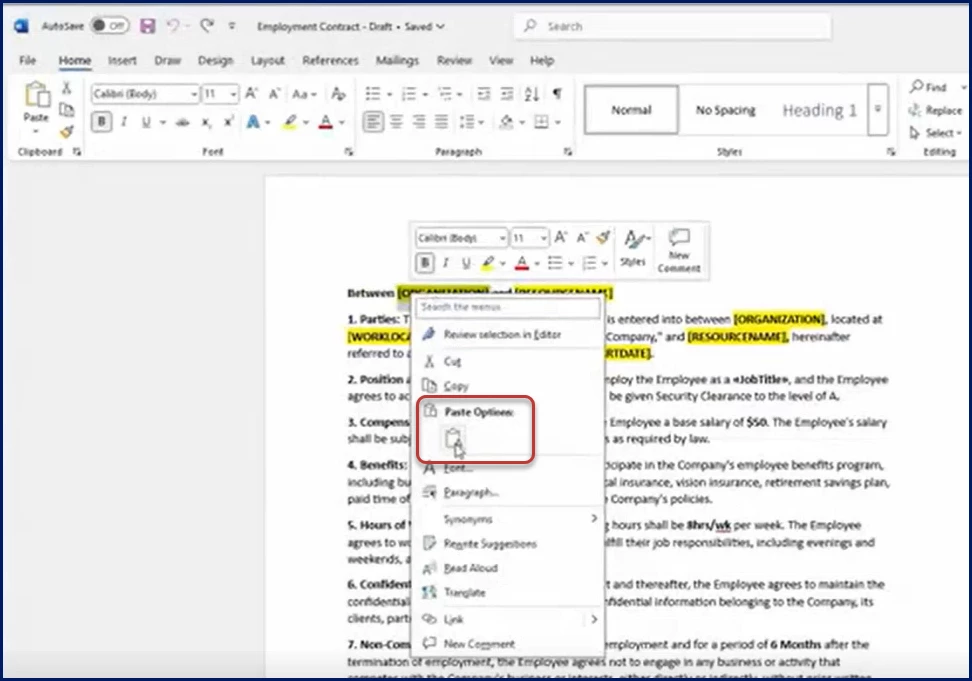
- Navigate to your eSignature Document Template on your device and then paste the field in the location you want.
- Repeat steps 10 and 11 for each field you want to add.
- Save your eSignature Document Template.
- To upload your final template, complete these steps:
- Click the Select Attachment link. A Select Document dialog displays.
- Select Choose File. A File Explorer dialog opens.
- Navigate to and select your final template, and then select Open.
- Select Upload from the Select Document dialog.
- After your file is uploaded, select Save to close the Select Document dialog.
-
Select OK at the top of the eSignature Document Template Edit Screen page to save your dynamic document template. A message displays informing you that your changes were saved.
The template you created is saved in Enterprise, associated with the workflow type you chose and selectable during workflow steps.
Documentation release: Beeline Enterprise | Q1 2025