You can have trueRATE set up with various drivers that impact rate calculations, such as a Worker's physical work location, job class and title, industry, and more. Driver values may need to be adjusted for any number of reasons (such as Supplier negotiations, governmental requirements, or contractual changes) and are generally associated with effective dates.
To ensure rates are accurately calculated, you can update trueRATE driver values in bulk or individually from Beeline Enterprise. And apply updates to active assignments.
You can simultaneously update multiple driver values by exporting existing values, changing those you need and then importing new values to your Beeline platform using a single template. Beeline’s import process leverages the familiarity of Microsoft Excel® making it easier for you to update data. Importing driver values is an efficient way to update multiple driver values. Importing is simple and your validation results display online.
To simultaneously update multiple trueRATE driver values, complete these steps from your Enterprise dashboard.
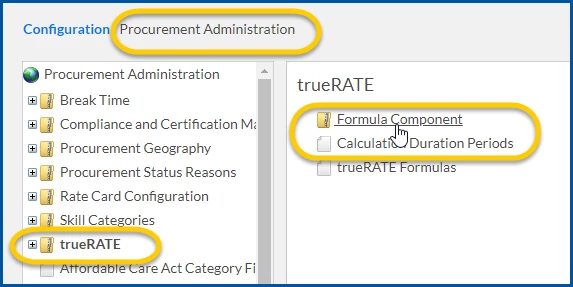
From the Navigation menu, select Admin > Procurement. A ProcurementAdministration page displays.
From the left navigation, select the trueRATE folder.
Select the Formula Component folder.
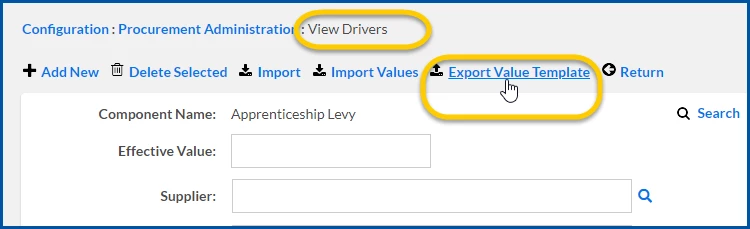
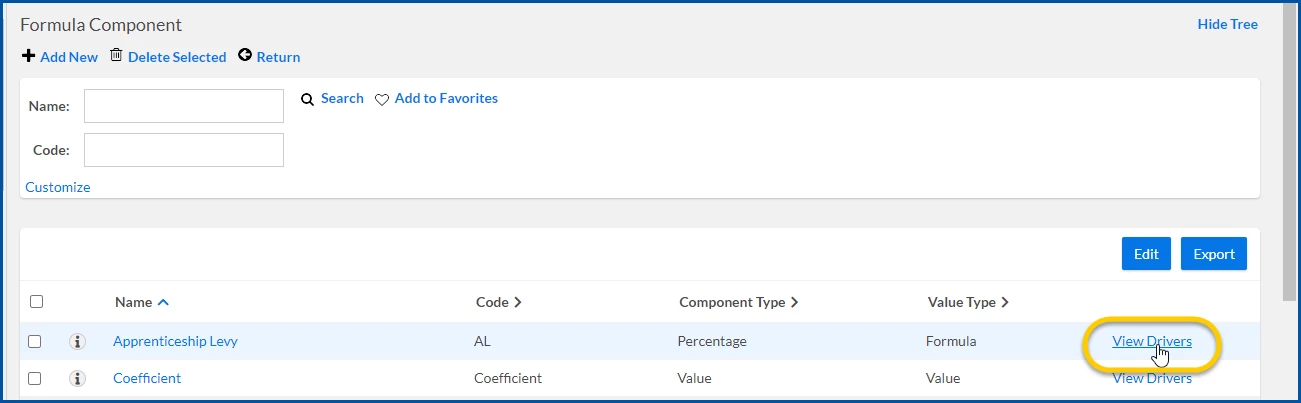
In the FormulaComponent section that displays at the right of the page, locate the formula you want to update, and then select ViewDrivers.
From the ViewDrivers page, select ExportValueTemplate.
Use the Save As dialog to navigate to the location to which you want to save the Excel template you’ll use to adjust values.
Locate and open the Excel template you just saved.
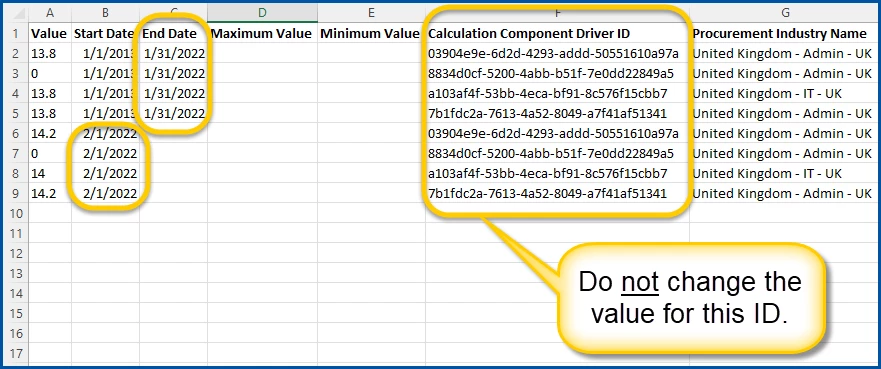
Locate the values you want to update in the file, and then copy and paste the rows for those values below the original rows. TIP: Make sure you copy and paste the rows below the initial rows, so you retain the original Calculation Component Driver ID.
Expire the existing value for the driver you want to update by adding a termination date in the EndDate column for the corresponding row.
Repeat step 9 for each value you want to change.
Edit the data in the Value and the StartDate columns in the row corresponding to the value you’re updating. CAUTION: Do not change the data for the Calculation Component Driver ID. That ID is a system-generated value that ensures updates to values are uploaded to the correct drivers.
Save the template you just updated.
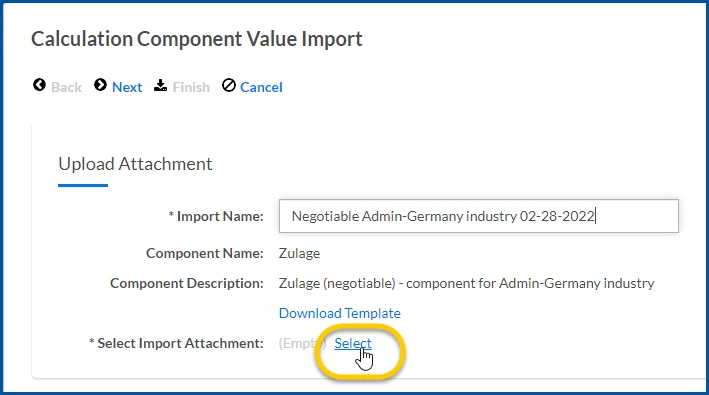
From the ViewDrivers page, select ImportValues. An Calculation Component Value Import dialog displays.
Enter a label for your import in the Name field.
Choose Select.
A Select Standard Attachment dialog displays.
Select ChooseFile.
From the Open dialog, navigate to and select the template file in which you saved your updates. Then select Open.
From the Select Standard Attachment dialog, select Upload.
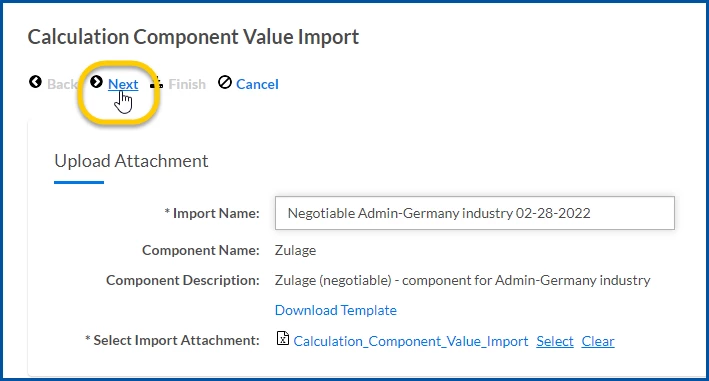
From the Calculation Component Value Import dialog, select Next.
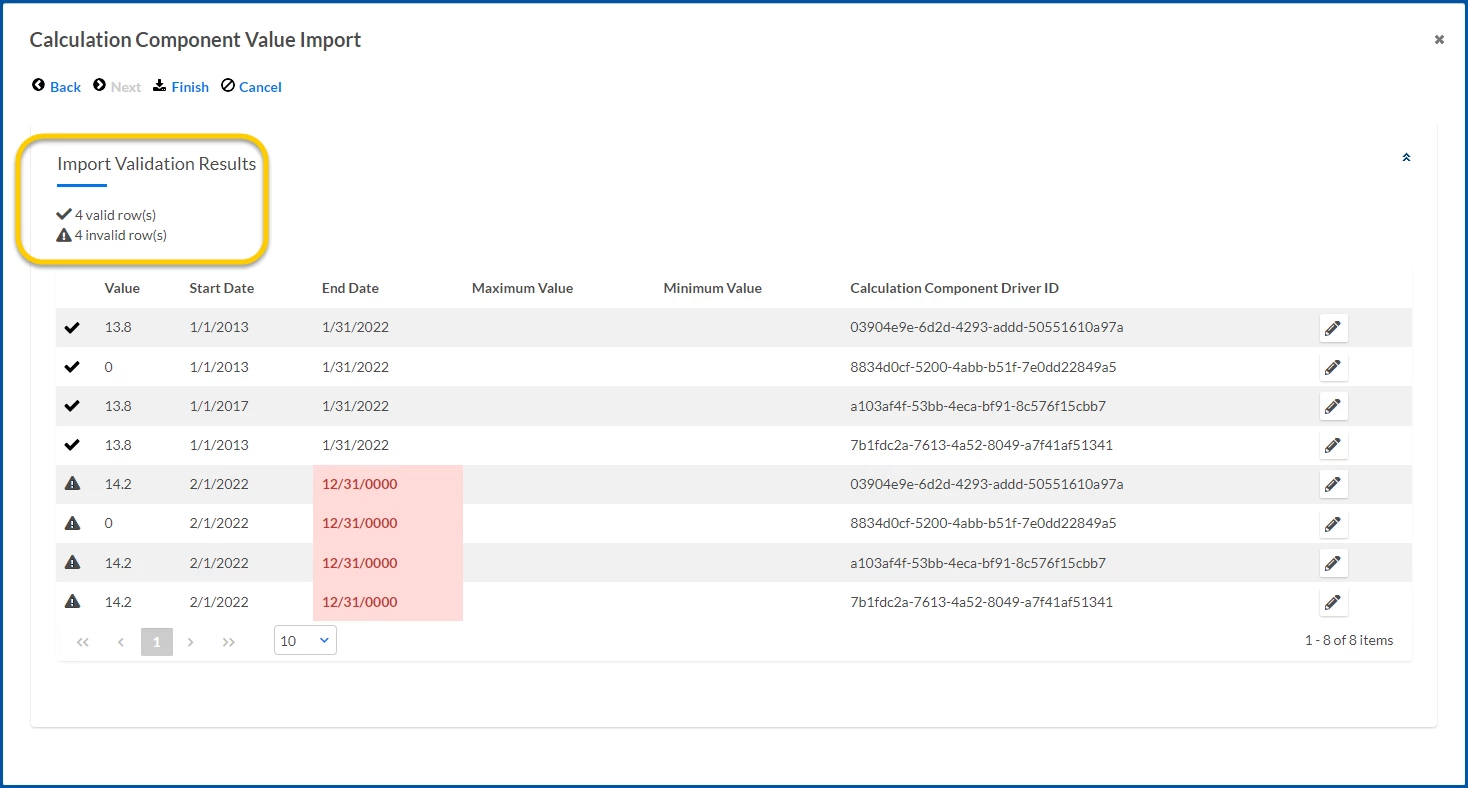
Your import data is validated, and results display in the ImportValidationResults section on the Calculation Component Value Import dialog.
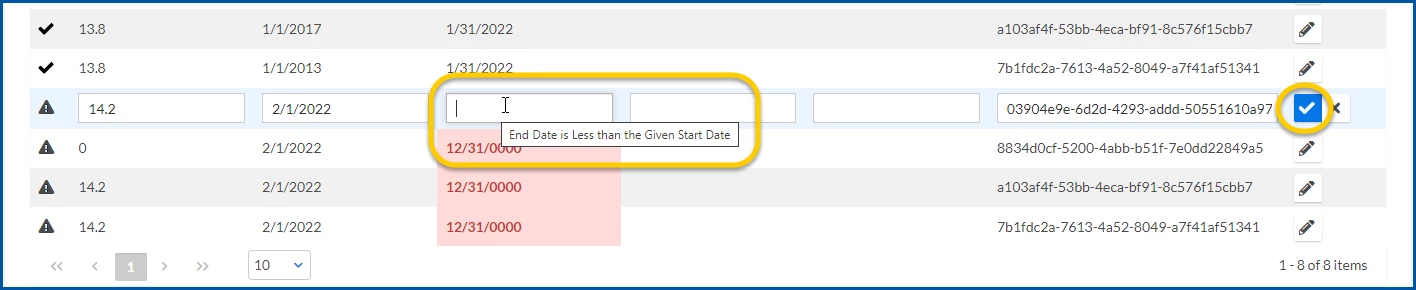
Optional. If validation errors occurred when you imported data, take these actions: a. Select the Edit icon in the row with the invalid data. The row expands so you can edit errors inline. b.Correct the value and select the Save icon or use the Delete icon to remove the row.
Repeat steps a and b until you’ve corrected all errors.
Select Finish. A dialog box displays prompting you to confirm your action.
Select OK.
Your updated driver values are imported to Enterprise.
Updating a single value for a driver
You can quickly update the value for a single driver in Enterprise. For example, you might need to only update the driver value associated with the National Insurance rate.
To update an individual value for a trueRATE driver, complete these steps from your Enterprise dashboard.
From the Navigation menu, select Admin>Procurement. A ProcurementAdministration page displays.
From the left navigation, select the trueRATE folder.
Select the Formula Component folder.
In the FormulaComponent section that displays at the right of the page, locate the formula you want to update, and then select ViewDrivers. A View Drivers page displays.
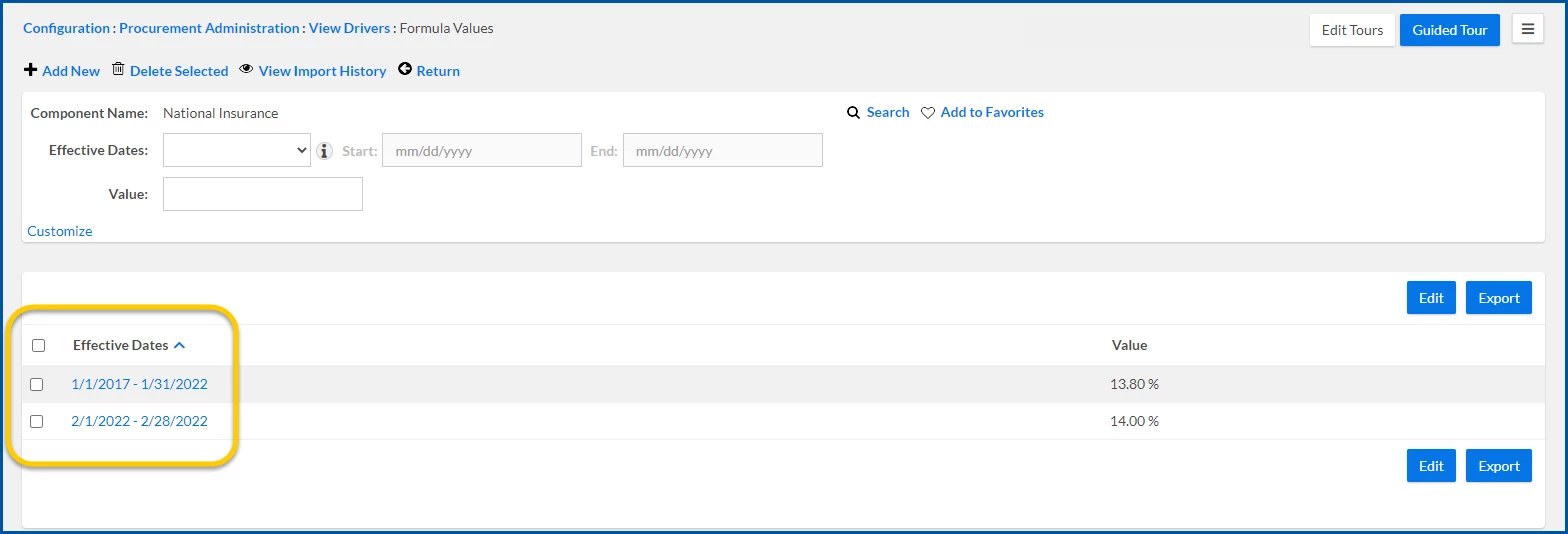
Scroll down to the Drivers list near the bottom of the page, locate the Effective Value you want to update, and then select the link. A Formula Values page displays.
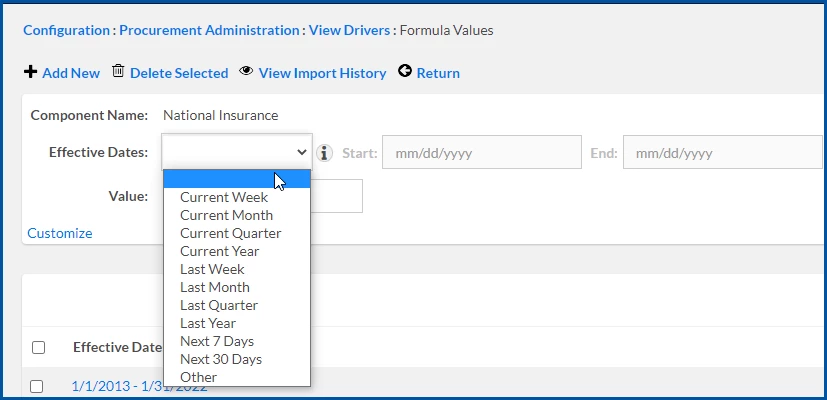
Select Add New. An Add Value page displays.
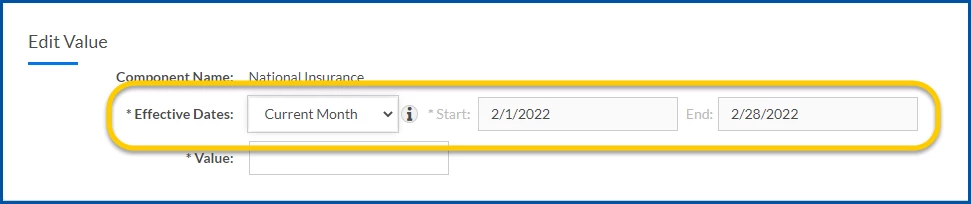
From the EffectiveDates list, select a value to automatically calculate the Start and End date fields. If you want to manually enter Start and End dates, select Other from the EffectiveDates list. Then you can enter data in the Start date field and, if required, in the End date field. For example, assume today is January 31, and you select CurrentMonth. The Start and End dates display the first and last date in the present month.
In the Value field, enter the updated value.
Select OK.
Your updated driver value is added to Enterprise.
TIP: If you’re adding a new value and you didn’t specify an end date for the effective value, the effective value automatically expires the day before the start date of the new value.
Applying updated driver values to active assignments
After you’ve updated trueRATE driver values, you need to amend active assignments in your Beeline platform to ensure rates are recalculated and aligned. You can amend a single assignment, or simultaneously amend multiple assignments using the Mass Amendment feature.
Selecting the SyncRateCards checkbox Mass Amendments lets you quickly update rates on the fly while assignments are in progress. Assignments details are immediately updated, target rates on the assignments you select are amended to match your updated component value, and your contingent workforce spend stays on track!
To apply updated drivers to active assignments, complete these steps from your Enterprise dashboard.
Select the Preferences gear, and then select VMS Settings > Contingent Staffing. A ContingentStaffing page displays.
Expand the Mass Amendments list, and then select ReviseAssignments. A Select Assignments to Amend page displays showing you fields you can use to filter assignments and a list of assignments you can select.
Select the assignments you want to amend, apply any filters you want, and then complete the required and desired fields on the Select Assignments to Amend page.
In the Rates frame, select the SyncRateCards checkbox.
Complete any additional required and desired fields.
Click OK to save your changes to all the assignments you selected. A warning displays alerting you to the number of assignments you’re amending.
Click OK.
TIP: Force flags, such as Cost Centers on projects, are maintained when you amend assignments. Warnings display for any changes you attempt to make that aren’t permitted. An error message displays for any changes you attempt to make that cannot be validated.
Please complete the following fields as part of your Beeline Community registration. Unless noted as private, this information will be displayed on your user profile within the community.