
Jump to what you need
Take control of your SOW setup—create, update, and manage everything in one place, on your timeline.
Statement of Work (SOW) Templates provide a structured foundation for managing execution, compliance, billing, and reporting across Services Procurement engagements. Manage templates, categories, and terms directly in your VMS (Preferences > VMS Settings) using self-service tools that help you standardize language, organize work, and ensure consistent, accurate SOW creation for every project.
Why it matters
Self-service SOW management puts you in control. You reduce delays, keep your program agile, and ensure your templates stay aligned with changing business needs.
- Avoid waiting on external updates
- Keep projects moving without interruptions
- Standardize processes across teams
- Improve reporting and spend visibility
Who it’s for
This feature is designed for users responsible for managing SOW setup and governance:
- Managed Service Providers (MSPs)
- Program office users
- Procurement, operations, or program leads
- Any user with permissions to edit SOW components
How it helps
You can directly manage key SOW components to improve accuracy, efficiency, and consistency. Faster SOW creation, fewer errors, and better program control.
- Templates: Guide users through SOW creation with predefined structures
- Categories: Organize work by labor groups and improve spend tracking
- Types & Terms Library: Standardize language and reusable content
- Filters & Search Enhancements: Quickly find the right template using geography and industry
- In-app Guidance: Tooltips and captions help users complete setup with confidence
How it works
You manage all SOW components from the VMS settings area. Each component supports creation, editing, copying, and filtering so you can adapt quickly.
Example capabilities:
- Add and manage SOW categories to classify work
- Build templates with required fields, filters, and behaviors
- Copy existing templates to save time
- Organize reusable terms by type and category
- Apply filters (industry, geography, project type) to target the right use cases
Action steps
Before using self-service SOW management:
- Users must have the appropriate roles and permissions
- Your organization must enable SOW self-service features
- Contact your COM to grant access (initial setup only)
How to steps
Information in this article reflects a standard Enterprise configuration. Your Enterprise platform is based on your organization’s configuration. Settings and/or data visibility rules may vary slightly from what is described.
To accomplish your task, complete these steps from your Enterprise dashboard.
SOW templates help guide users through creating a statement of work and ensure they provide all required information. Users select the applicable SOW template to define project-specific activities, deliverables and timelines for a vendor providing services to the client.
For help determining how to configure specific fields for your organization’s needs, contact your Client Operations Manager (COM).
Creating a new SOW template
- Select Preferences > VMS Settings > Statement of Work. A Statement of Work page displays.
- SOW Templates. A Template List page displays.
- Select Add New. An Add Template page displays with the Type set to SOW by default.
- General Information section
To define the key attributes that determine when an SOW template applies and how it’s selected, take these steps:- Enter a label in the Name field. This name will display on the Template List page.
- Enter an abbreviation in the Code field. This code displays on the Template List page.
- Optional. Enter an explanation for the work in the Business Justification field.
- Select the Active checkbox.
- From the Terms Section Type list, select Terms Section or Terms Document Section. S.o, your team can collaborate on a Word document to finalize contract terms and conditions language.
- Export Templates section
Optional. To define the contents and layout of an exported SOW, take these steps. You can define separate formats for clients and suppliers.- Optional. Choose the Client Export Template Select link. A Select Standard Attachment dialog displays.
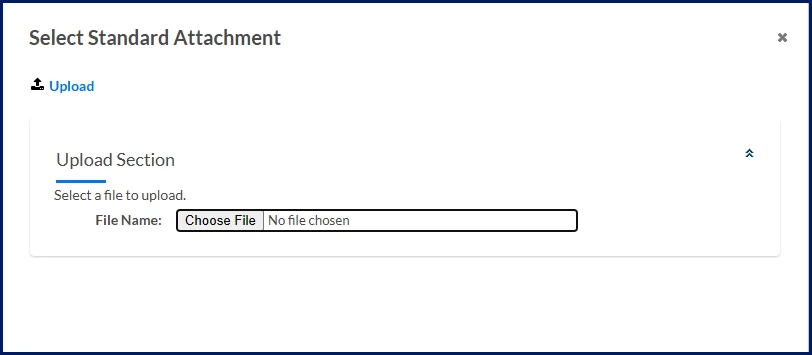
- Select Choose File and then navigate to the template you want to upload.
- select Upload.
- Optional. Choose the Supplier Export Template Select link. A Select Standard Attachment dialog displays.
- Select Choose File and then navigate to the template you want to upload.
- Select Upload.
- Optional. Choose the Client Export Template Select link. A Select Standard Attachment dialog displays.
- Signature Page Templates section
To override the format for a DocuSign signature page, take these steps:- Optional. Choose the Signature Page Template Select link. A Select Attachment Type Contract Signature Page dialog displays.
- Select Choose File and then navigate to the template you want to upload.
- select Upload.
- Main Drivers section
To define the key attributes that determine when an SOW template applies and how it’s selected, take these steps:- From the Geography list in the Main Drivers frame, select a region to which the template applies.
- From the Industry list in the Main Drivers frame, select the business to which the template applies.
- From the Project Type list in the Main Drivers frame, select the project type associated with this SOW template.
- Category Filter section
Optional. To define the types of projects that can be created using this template, take these steps:- Select the Filter Categories checkbox.
- From the Available Allowed Categories list, choose a project type.
- Use the Arrow icons to move the category to the Selected list.
- Milestone Type Filter section
Optional. To define the types of targets associated with this template, take these steps:- Select the Filter Milestone Types checkbox.
- From the Available Allowed Milestone Types list, choose a project objective.
- Use the Arrow icons to move the category to the Selected list.
- Behaviors section
Optional. To define how the SOW template behaves during use (including what’s shown, restricted, or allowed for a user), take these steps:- Optional. Select the Hide Tax Information On Project Agreement checkbox in the Behaviors frame to conceal tax information on the Financials tab when a user is creating an SOW.
TIP: Some organizations exclude global, Value Added Tax (VAT), and other taxes from a project budget. Using this feature hides tax-related fields when a user is creating an SOW. - Optional. Select the Limit Job Titles checkbox in the Behaviors frame to restrict the type of candidate a supplier can submit. You can limit billable and non-billable job titles.
TIP: Limiting job titles on an SOW template restricts only the role of the resources you require. It does not affect the bill rate, the hours required or the allotted budget. - Optional. Select the Set Hiring Manager to user That Created SOW If Not Defaulted checkbox in the Behaviors frame to set the user creating the SOW as the hiring manager when the hiring manager role does not default to another user.
- Optional. Select the Allow Milestone Override of Tax Job Category and Location checkbox in the Behaviors frame to accept different tax rates on job categories and work locations.
- Optional. Select the Hide Tax Information On Project Agreement checkbox in the Behaviors frame to conceal tax information on the Financials tab when a user is creating an SOW.
- Project Agreement Statuses section
Optional. To define the lifecycle statuses that apply to different SOW actions or system events, take these steps. These fields control how the SOW progresses through its workflow and approval process at each stage.- Optional. From the Initial Status list, select the default status for a new SOW (for example, Draft or Pending Initial Approval).
- Optional. From the Amendment Status list, select the status used when an existing SOW is modified.
- Optional. From the System Adjustment Status list, select the status applied when the system makes automatic updates.
- Optional. From the Edit SOW Status list, select the status assigned when a user edits an existing SOW.
- Reasons section
Optional. To define default explanations for why a request or assignment associated with the SOW was canceled because the role was removed, take these steps:- From the Request Cancellation Reason list, select Cancelled by SOW as the explanation for withdrawing a request.
- From the Assignment Cancellation Reason list, select Cancelled by SOW as the explanation for withdrawing an assignment.
- Legal Acceptance section
Optional. To specify what acceptance text is shown and whether those messages are required or visible (ensuring users review and agree to legal terms) as part of the SOW process, take these steps:- In the Client Legal Acceptance Message field, enter the text you want the client to review and acknowledge before participating in an SOW. That text displays on the Welcome page when a client begins creating an SOW.
- In the Vendor Legal Acceptance Message field, enter the text you want the vendor/supplier to review and acknowledge before participating in an SOW. That text displays on the Welcome page when a vendor/supplier begins responding to an SOW.
- Select the Show Client Legal Acceptance Message checkbox to display the corresponding text on the Welcome page when a client begins creating an SOW.
- Select the Show Vendor Legal Acceptance Message checkbox to display the corresponding text on the Welcome page when a vendor/supplier begins responding to an SOW.
- Take one of these actions:
- Select OK to save your SOW template. OR
- Select Save and Add New to save your SOW template and immediately open a new Add Template page so you can create another SOW template. OR
- Select Save And Edit Default Content to save your SOW template, and then define information (such as the SOW name, work location, Cost Center, Cost Allocation, and more) you want to gather when an SOW is created. Contact your Client Operations Manager (COM) for assistance with editing the default SOW content.
Copying an SOW template
If your organization already has an existing SOW template you want to modify only slightly, you can copy that template and create a new one.
- Select Preferences > VMS Settings > Statement of Work. A Statement of Work page displays.
- SOW Templates. A Template List page displays.
- Take these steps to search for a template:
- If you know the template name, enter it in the Name field. If you know the template name, enter it in the Name field.
- From the Is Active list, select Yes or No.
- From the Project Type list, select the kind of assignment you want to match. For example, your organization might use different templates for a milestone-based project versus a deliverable-based project.
- From the Geography Name list, select the region you want to match.
- From the Industry Name list, select the kind of business you want to match.
- Select Search.
- Optional. If you’ll frequently use the search criteria you selected, select Add to Favorites.
- Select the checkbox next to the Name of the SOW template you want to copy.
- Select Copy at the top of the Template List page. An Add Template page displays.
- Modify the fields you want, and then select OK to create a new template.
Editing an SOW template
Occasionally, business processes and requirements change, and you might want to update your SOW templates.
- Select Preferences > VMS Settings > Statement of Work. A Statement of Work page displays.
- SOW Templates. A Template List page displays.
- Take these steps to search for a template:
- If you know the template name, enter it in the Name field.
- From the Is Active list, select Yes or No.
- From the Project Type list, select the kind of assignment you want to match. For example, your organization might use different templates for a milestone-based project versus a deliverable-based project.
- From the Geography Name list, select the region you want to match.
- From the Industry Name list, select the kind of business you want to match.
- Select Search.
- Optional. If you’ll frequently use the search criteria you selected, select Add to Favorites.
- Select the Name link for the SOW template you want to edit. A View Template page displays.
- Select Edit at the top of the View Template page. An Edit Template page displays.
- Modify the fields you want, and then select OK to save your changes.
Managing SOW terms
Your organization most likely reuses paragraphs, phrases, and sections when creating an SOW. You can use the SOW Terms Library to create and store generic verbiage frequently used in your SOWs.
You can also create Types, like Financial and General, to tag and organize terms by the kind of work to be completed. In addition, you can use Categories to tag and organize terms by labor groups, such as Accounting, Marketing, and much more, so you can track spend by category.
Contact your Client Operations Manager (COM) for assistance with adding items to your SOW Terms Library.
| Persona Clients, program office users, system administrators | Modules Services Procurement | Documentation release Beeline Enterprise | Q2 2026 | Feedback? Email us: |