
Accurate resume tagging—better insights for everyone.
When you create a resource profile in Beeline Enterprise as a supplier, you most likely upload attachments related to the candidate, such as their resume or a curriculum vitae, a cover letter, a letter of recommendation, work samples, and more. Later after you submit a candidate to a requisition, hiring managers and program office users leverage those attachments to evaluate candidates.
To streamline the candidate evaluation and potential offer process, you can proactively flag one attachment as the candidate’s primary resume. That simple step speeds up candidate processing and ensures global consistency—helping you deliver better results with less effort.
Why it matters
- Faster screening: Prioritizes the correct resume, speeding candidate evaluation.
- Fewer errors: Prevents document mix‑ups and improves data quality.
- Consistent processing: Supports uniform screening, reporting, and advanced evaluations when available.
How it helps
- Clear ownership: Suppliers designate one attachment as the official resume.
- Simpler workflow: Prepopulated Resume lists make identification easy and optional.
- Stronger AI outcomes: Flagging the resume supports advanced, more accurate AI evaluations when configured.
Persona
Suppliers
Action required
The Resume Identifier feature is automatically available in your Contingent Staffing and Services Procurement modules in Enterprise.
How to steps
Information in this article reflects a standard Enterprise configuration. Your Enterprise platform is based on your organization’s configuration. Settings and/or data visibility rules may vary slightly from what is described.
As a supplier, you can proactively flag one attachment from the Resource and Candidate Submission pages. Upload and identify the candidate’s resume as a single document to streamline candidate evaluation. Attach additional documents separately, such as a cover letter or work samples.
Adding a resource and flagging an attachment
To accomplish your task, complete these steps from your Enterprise dashboard.
- From the Navigation menu, select Manage/Search > Resource Pool. A Resource Pool Search page displays.
- Select Add New. A Create Candidate page displays.
- From the Industry list, select the line of business you want to add a resource to.
TIP: In Beeline Enterprise, an Industry combines the Geographies and Labor Categories set up in a site. They help align an Enterprise configuration with your client’s business workflows, processes, lines of business, and the types of contingent talent they use.
- Select OK. The Add Candidate-Details page displays.
- Complete the required fields on the Add Candidate-Details page.
- Optional. To add a new attachment, complete these steps:
- In the Resume and Other Attachments section, select Add Item. A Select Resource Attachment dialog displays.
- In the Upload section, select Choose File.
- Navigate to and select the attachment you want. Be sure to choose a .docx or.pdf file.
- Select Upload. The attachment is added to the Resource profile.
- Select OK on the Select Resource Attachment dialog.
- Optional. From the Resume list, select the attachment that is the candidate’s resume or select No Resume Attached, if your program doesn’t require a resume.
TIP: All uploaded attachments display in the Resume list.

-
Follow your program’s process for adding a resource.
Submitting a candidate and flagging an attachment
Upload and identify the candidate’s resume as a single document to streamline candidate evaluation. Attach additional documents separately, such as a cover letter or work samples.
To accomplish your task, complete these steps from your Enterprise dashboard.
- From your My To Do List, select the You have New Request tasks awaiting action link. A& strong>Review Alerts dialog displays.
- Locate the request you want, and then select Action > View Details.
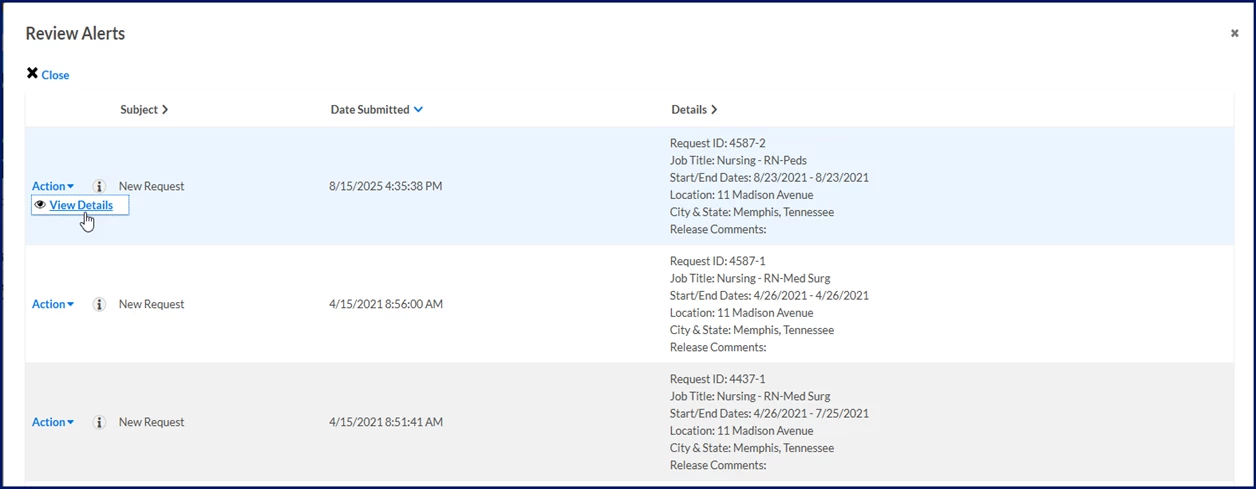
A Request Details page displays.
- From the Request Menu section, select Submit Candidate.
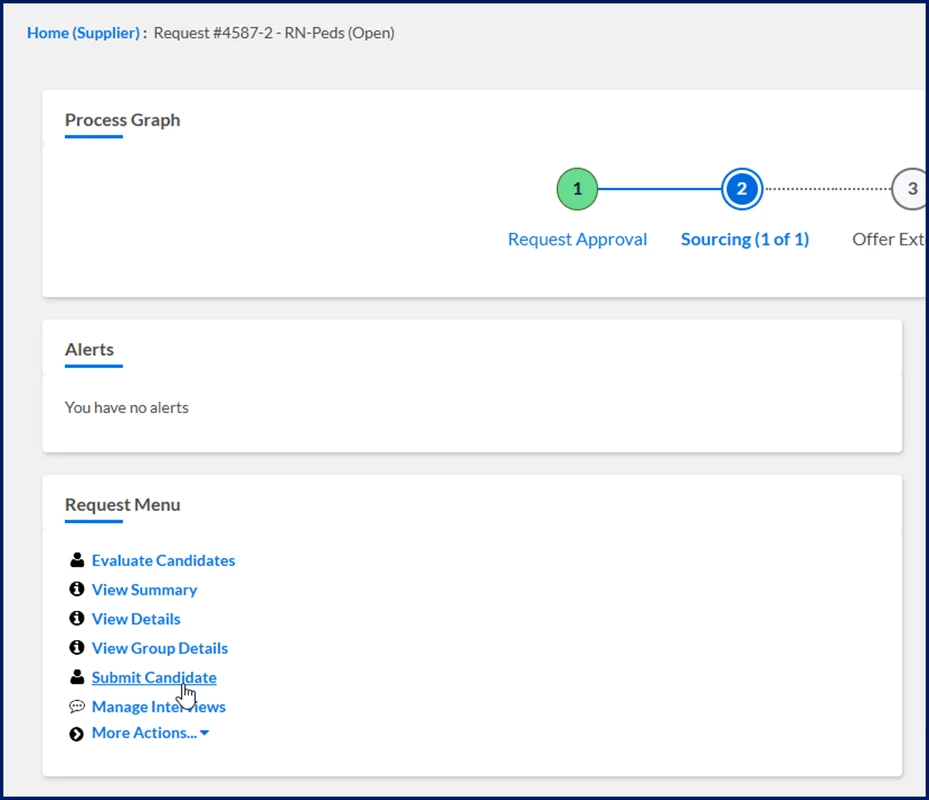
A Select Profiles to Submit page displays.
- Optional. To add a new candidate, complete these steps:
- Select Add New. An Add Candidate-Details page displays.
- Complete the required fields on the Add Candidate-Details page.
- In the Attachments section, select Add Item. A Select Resource Attachment dialog displays.
- In the Upload section, select Choose File.
- Navigate to and select the attachment you want. Be sure to choose a .docx or.pdf file.
- Select Upload. The attachment is added to the Resource profile.
-
Select OK on the Select Resource Attachment dialog.
- Locate and select the checkbox for the candidate you want, and then select Submit Profile. A Submit Profiles page displays.
TIP: By default, all attachments associated with the Resource profile automatically display in the Resume and Other Attachments section and are selected to be included in the candidate submission. - Optional. To add a new attachment, complete these steps:
- In the Submission Attachments section, select Add Item. A Select Candidate Attachment dialog displays.
- In the Upload section, select Choose File.
- Navigate to and select the attachment you want. Be sure to choose a .docx or.pdf file.
- Select Upload. The attachment is added to the Candidate profile.
- Select OK on the Select Candidate Attachment dialog.
- Optional. From the Resume list, select the attachment that is the candidate’s resume or select No Resume Attached, if your program doesn’t require a resume.
TIP: If an attachment was already identified as the resume, it automatically displays in the Resume list. Only attachments selected to be included in the candidate submission display in the Resume list.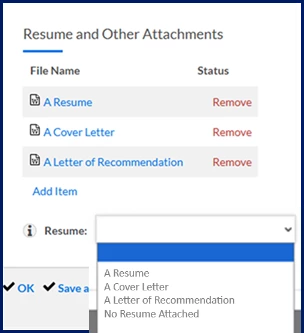
- Follow your program’s process for submitting a candidate.
| Persona Suppliers | Modules Contingent Staffing Services Procurement Resource Tracking | Documentation release Beeline Enterprise | Q1 2026 | Feedback? Email us: |