
Your organization can easily and precisely define, capture and track extended workforce costs using Beeline’s flexible user-defined cost allocation feature. To streamline managing cost allocation data in Beeline Enterprise, you can use the Web Import tool and one of these templates.
TIP: Access to these templates requires a Make a Change ticket.
| Template name | Description/Usage |
|---|---|
| Assignment Amendment Cost Allocation | Streamline amending cost allocation information for multiple assignments. You can update several cost allocation details. |
| Assignment Cost Allocation | Simplify managing cost allocation information for multiple assignments, including assignments where a cascading client-defined field (CDF) is part of the cost allocation string. |
| Assignment Miscellaneous Fees with Cost Allocation | Facilitate uploading assignment miscellaneous fees with cost allocations. |
| Cost Allocation Unit Segment | Shorten updating values for cost allocation unit segments. |
| Miscellaneous Fee Cost Allocation | Streamline uploading miscellaneous fee with cost allocations. |
| Projects and Services Cost Allocation | Simplify managing cost allocation information for projects and services. |
| Request Cost Allocation | Modernize adding cost allocations to requests. You cannot import cost allocations to requests that already have allocations or that are in one of these statuses: Cancelled, Closed, Rejected, or Filled. |
| Timesheet Cost Allocation | Facilitate uploading timesheets with cost allocations. |
Import considerations
Imports for timesheets or miscellaneous fees may fail when the timesheet or fee includes an entry against a cost allocation string for a date when the string is not active on the related assignment. For example.
- Assume Assignment #1234 has the cost allocation string ABC active from October 1 through December 31.
- Assume Assignment #9876 does not have any cost allocation strings active from October 1 through December 31.
You attempt to import these items:
- Timesheets and miscellaneous fees that use the cost allocation string ABC with dates between October 1 and December 31.
- Timesheets and miscellaneous fees that use the cost allocation string ZYX with dates between October 1 and December 31.
Your import validation returns these results:
- Timesheets and miscellaneous fees that use the cost allocation string ABC with dates between October 1 and December 31 are added to Assignment #1234 but not to Assignment #9876.
- Timesheets and miscellaneous fees that use the cost allocation string ZYX with dates between October 1 and December 31 are not added to either Assignment #1234 or Assignment #9876.
Using the Web Import tool to upload cost allocation data
The steps for using the Web Import tool and a template related to cost allocation data are the same regardless of the template you choose.
To import cost allocation data, complete these steps from your Enterprise dashboard.
- Select Preferences > VMS Settings > Data Management.
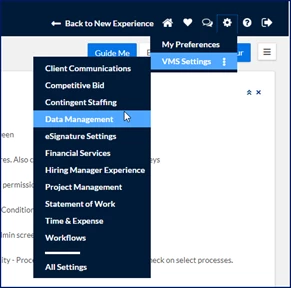
A Data Management page displays.
- Select Web Import. An Import page displays.
- Select Add New from the upper left of the page. An Import Status–Creating page displays.
- Select the cost allocation-related template you want from the Import Type list.
- Select the template name link to download the template
- Select Cancel or Return to exit the Import Status–Creating page.
- Navigate to the template you just downloaded, enter your data into the template, and then use Save As to save the template as your import file.
- From your dashboard, select Admin > Import. An Import page displays.
- Select Add New from the upper left of the page. An Import Status–Creating page displays.
- From the Import Type list, select the cost allocation related you want.
- Enter a label for your import in the Name field.
- Click Select next to Select File, and then browse to the import file you saved and populated with your data from the Select Import Attachment dialog.
- Select Upload.
- Select Save.
The cost allocation data you uploaded is imported to Enterprise.
What’s next?
Documentation release: Beeline Enterprise | Q4 2024