DocuSign is available as an add‑on solution to Enterprise. You can integrate DocuSign with the SOW feature in your Services Procurement module and/or with your candidate and assignment approval workflows throughout Enterprise.
Integrating DocuSign with multiple Enterprise workflows requires Enterprise configuration, updates to your workflows, including the SOW negotiation phase in your Services Procurement module, and applicable permissions granted to your designated Enterprise administrator to set up and manage your DocuSign integration. Reach out to your Client Operations Manager (COM) or Relationship Manager (RM) to learn more.
Persona
Your designated Enterprise administrator who has the applicable permissions must set up and manage your DocuSign Demo account integration.
Information in this article reflects a standard Enterprise configuration. Your Enterprise platform is based on your organization’s configuration. Settings and/or data visibility rules may vary slightly from what is described.
The steps outlined in this article are based on non-client-specific configuration settings. Your specific setup is based on your company's configuration/visibility and may vary slightly.
After you’ve worked with your COM or RM to integrate DocuSign with Enterprise, you must pair your DocuSign account with Enterprise via self-service before you can use the DocuSign add-on with your SOW feature and/or with your candidate and assignment approval workflows throughout Enterprise.
You must set up a demo and a production DocuSign account in Enterprise.
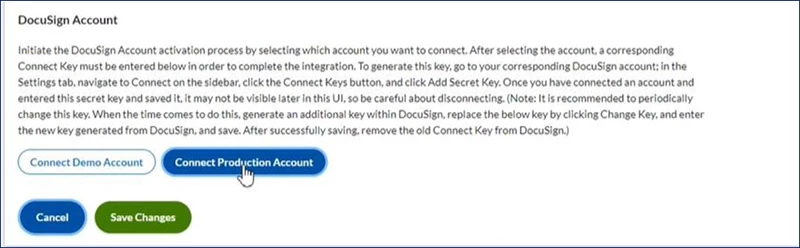
To link your DocuSign account with Enterprise, you need a Connect Key. Your Connect Key is the HMAC key generated for your account in DocuSign.
Each DocuSign key must be unique for each Enterprise environment and cannot exceed 100 characters. If your key exceeds that limit, work with your DocuSign representative to generate a new key with less than 100 characters.
Connecting your Demo account
As the designated Enterprise administrator, set up and test your Demo DocuSign before you set up your Production DocuSign account.
Beeline Best Practice. Always use your Demo account to test changes in your user acceptance testing (UAT) environment before you make them in your production environment.
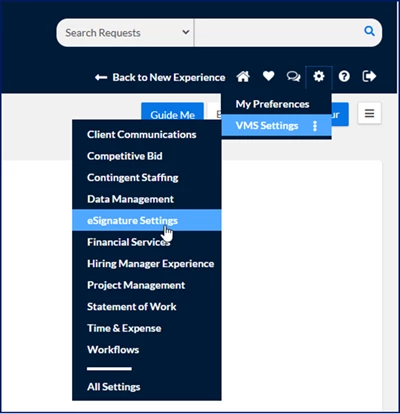
To pair your DocuSign Demo account with Enterprise, complete these steps from your Enterprise dashboard.
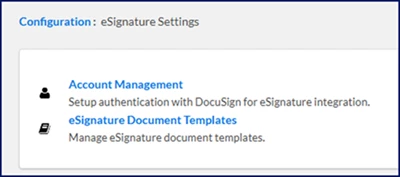
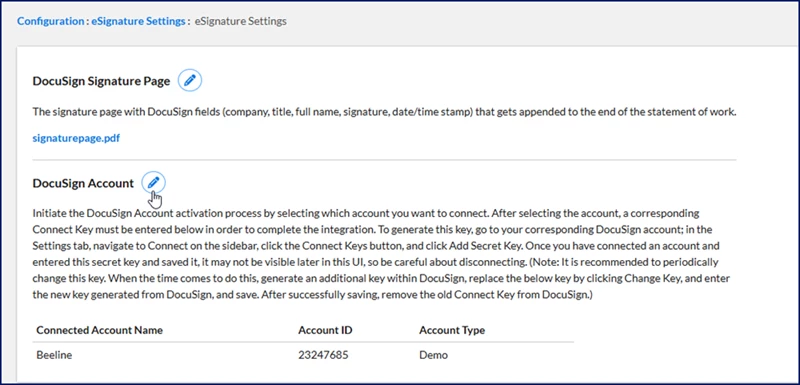
Select Account Management. A different eSignature Settings page displays. TIP: This eSignature Settings page includes a configuration for your default DocuSignSignature page. If you have questions about that setting, please contact your COM or RM.
Select the Edit icon next to DocuSign Account. A DocuSign Account page displays.
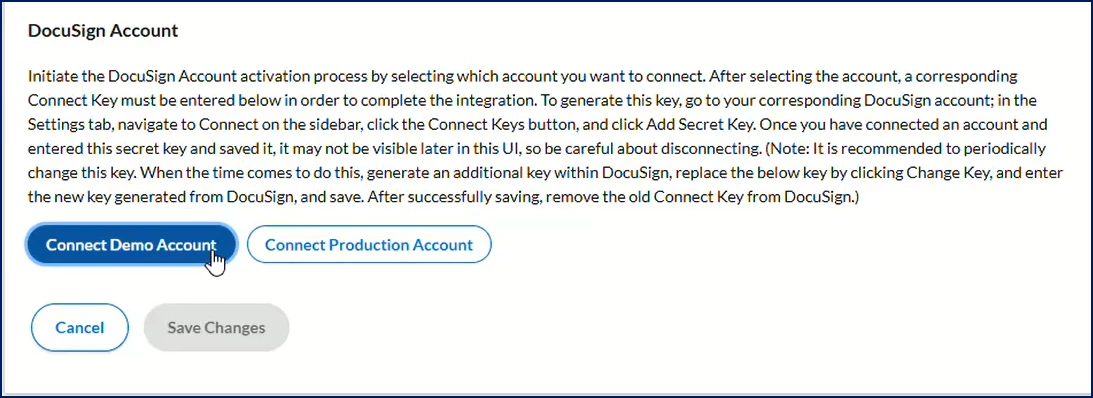
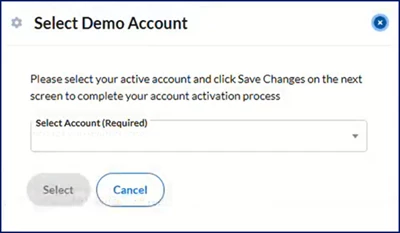
Select Connect Demo Account. A Select Demo Account dialog displays.
Choose your account from the Select Account list, and then click Select.
In a separate browser tab, navigate to and sign in to your production DocuSign account.
Choose the Admin tab from the Home page.
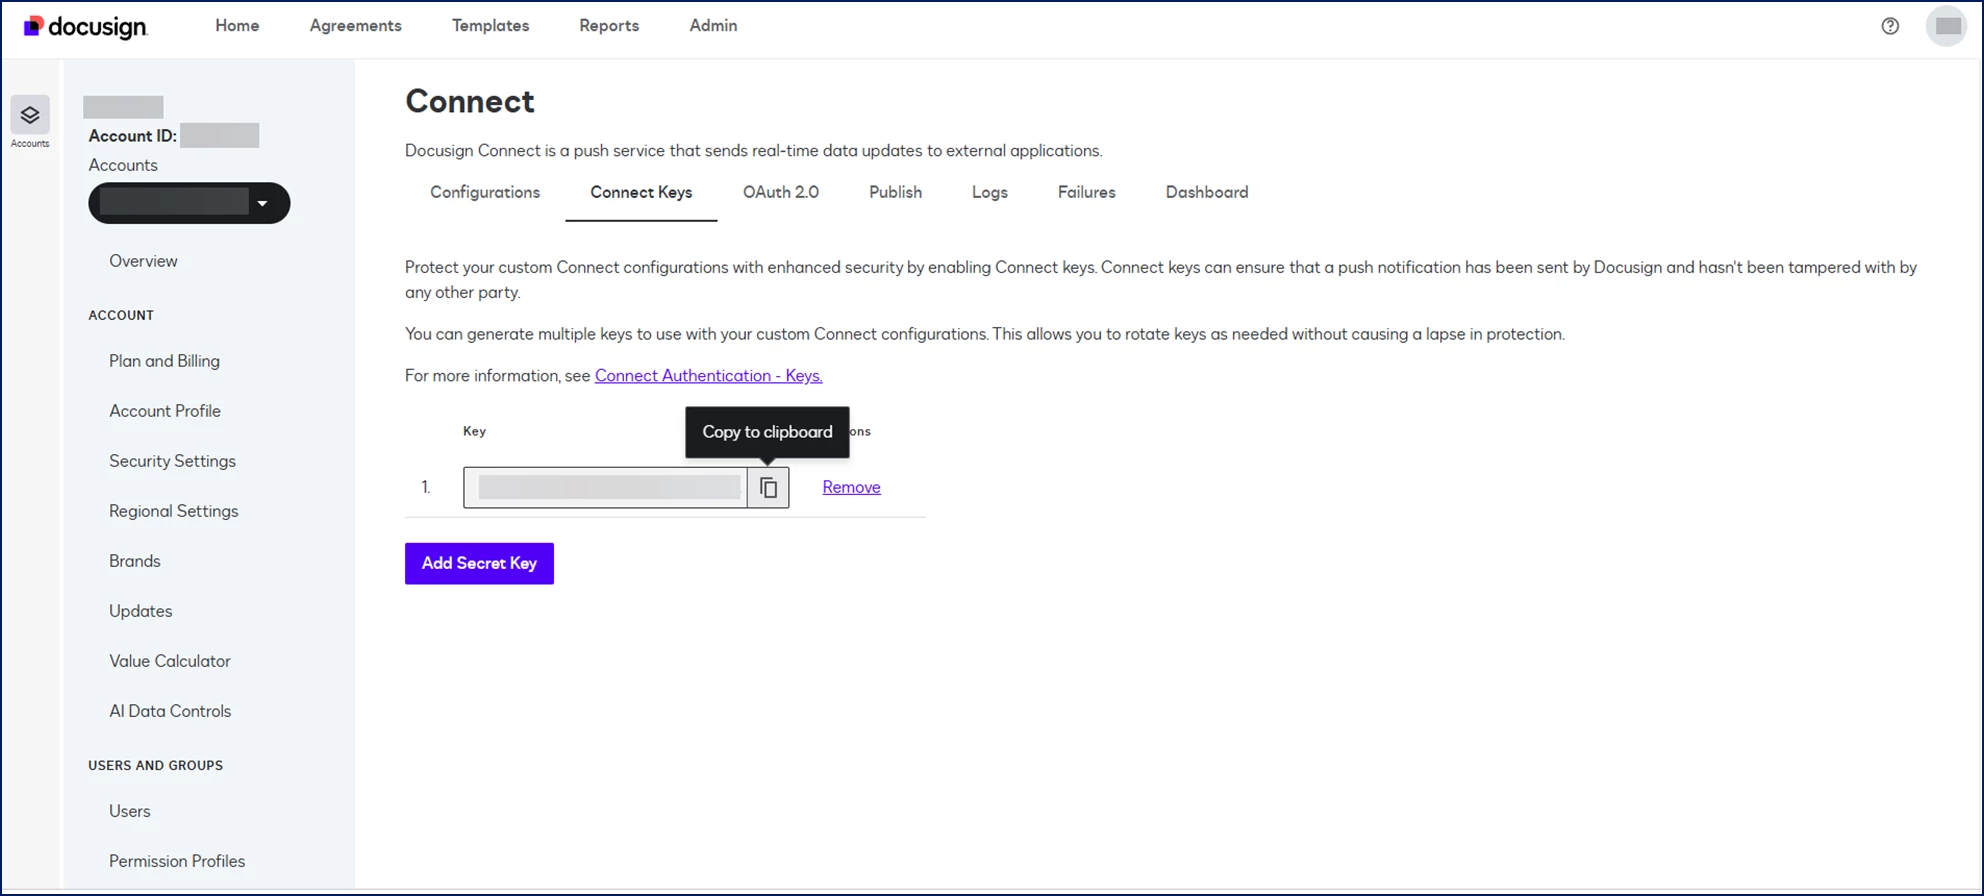
Scroll down to Integrations and then select Connect. A Connect page displays.
Select the ConnectKeys tab.
Select Add Secret Key. An HMAC key is generated.
Select the Key field and then select Copy to clipboard.
Navigate back to the DocuSign Account page in Enterprise.
Click in the Connect Key field to paste your DocuSign key.
Select SaveChanges. Your demo DocuSign account is paired with your Enterprise platform.
Continue with Testing your demo account.
Testing your demo account with your talent management templates
Before you replicate your DocuSign demo account settings in your Production environment, test your integration in your Enterprise project site. Testing your integration helps ensure that your talent management document templates and processes run smoothly for each workflow (candidate and/or assignment), industry, and request type your organization uses.
Before you test your demo account, make sure you’ve completed these tasks.
Check the status of pending documents on the eSignature Management tab for the Candidate workflow.
Review and sign each document.
Optional. If you have DocuSign integrated into your assignment approval workflows, complete these steps.
Locate an assignment for which you have DocuSign integrated into the workflow.
Extend the assignment and make sure that each template you’ve created for your Assignment workflow is initiated.
Locate an assignment for which you have DocuSign integrated into the workflow.
Amend the assignment and make sure that each template you’ve created for your Assignment workflow is initiated.
Complete these steps to test your workflow for a rejected signatory.
Locate an email requesting approval on an eSignature document.
From within DocuSign, reject the document. A task is generated in Enterprise to prompt the program office to review the rejected eSignature document.
Make sure the managed service provider owner received a Setup eSignature task awaiting action notification in their My To Do List.
Preview and download a completed document.
Optional. If you’re using delegation, open an eSignature document and then use the Assign To feature in DocuSign.
After you’ve completed testing, continue with Connecting your Production account.
Connecting your Production account
Your designated Enterprise administrator who has the applicable permissions must set up and manage your DocuSign Production account integration.
As the designated Enterprise administrator, you must pair your DocuSign Production account with Enterprise via self-service before you can use DocuSign with the SOW feature in your Serivces Procurement module and/or your candidate and assignment workflows. Be sure you set up and test your Demo DocuSign account before you set up your Production DocuSign account in Enterprise.
To pair your Production DocuSign account with Enterprise, complete these steps from your Enterprise dashboard.
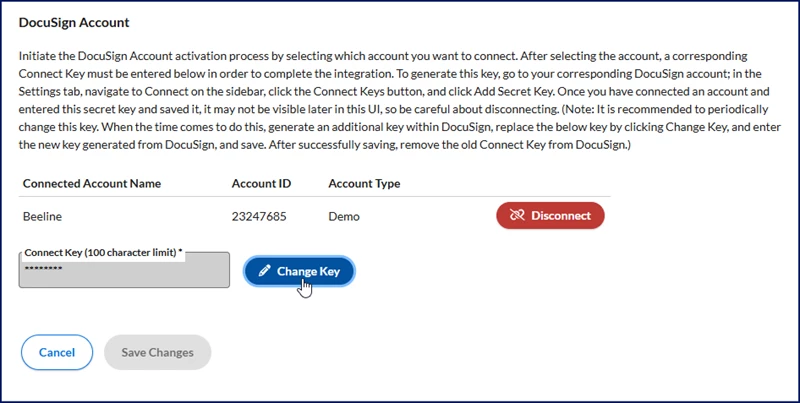
Beeline Best Practice Recommendation: To minimize risk and prevent unauthorized access to your DocuSign account, occasionally change your DocuSign account key.
To change your DocuSign account key, complete these steps from your Enterprise dashboard.
Please complete the following fields as part of your Beeline Community registration. Unless noted as private, this information will be displayed on your user profile within the community.