
Topics on this page
Tracking and managing tenure usually involve adjusting rates, which needs to happen as near real-time as possible. As a program office user, you can leverage a powerful rules-based engine to automatically adjust pay rates, bill rates or markup based on criteria you define.
You have versatility and control when setting up rules. You can define the exact criteria for when rates should be automatically adjusted based on worker tenure or assignment duration. Plus, you can account for variations in tenure adjustments by grouping rules and defining differences in rate adjustment percentages based on industry, job title, supplier, and much more.
TIP: Tenure rate amendments are based on duration; rate amendments based on billed hours are not supported.
Tenure Rate Amendment Rules interact with the Mass Amendments feature, ensuring rules are correctly validated when applied to an assignment and preventing conflicting amendments.
After you set up Tenure Rate Amendment Rules, mass amendment batch transactions are automatically created and processed when rules are applied to assignments. When multiple rules apply to the same assignment, individual batch transactions are created and processed so each rule is applied separately.
Persona
Clients, program office users, system administrators
Understanding dates and tenure
Before you define Tenure Rate Amendment Rules, be sure you understand how various dates can affect your rules. Numerous dates are collected and recorded as transactions are processed through Enterprise. You can view those dates when you review assignments and contingent talent records.
TIP: To learn more about monitoring tenure, qualifying periods and breaks, read this article about the Service Clock.
| Location | Date field | Description | Graphic |
|---|---|---|---|
| From an assignment page, select View Details from the Assignment Menu to open an Assignment Edit dialog. | Current Start Date | When the contingent talent began an active assignment. | 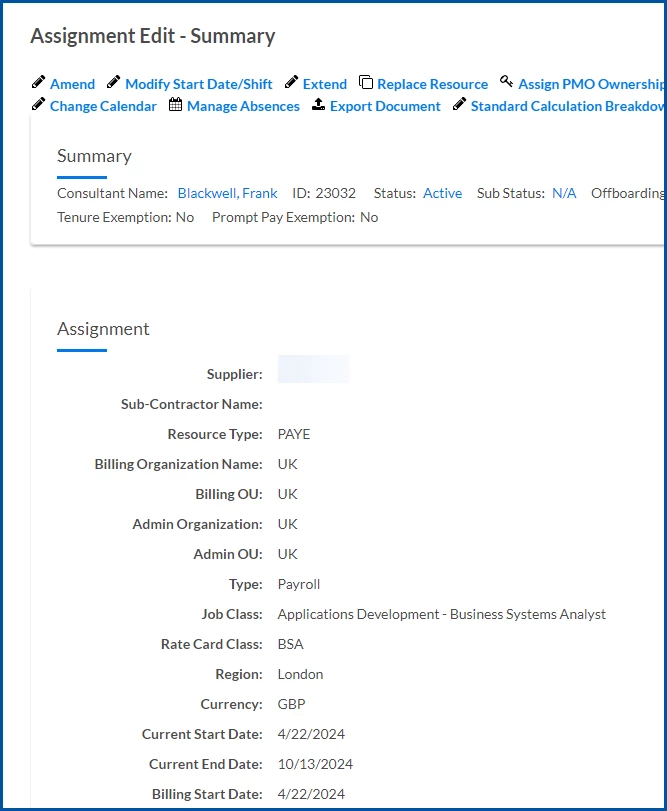
|
| From an assignment page, select View Details from the Assignment Menu to open an Assignment Edit dialog. | Billing Start Date | When an active assignment is eligible for invoicing. | |
| From an assignment page, select View Details from the Assignment Menu. Next, select the contingent talent’s name, and then select the Tenure tab. | Current Tenure Start Date | When the most recent tenure period began based on all active assignments a contingent talent is on. This date resets after a defined break in service between assignments is fulfilled. | 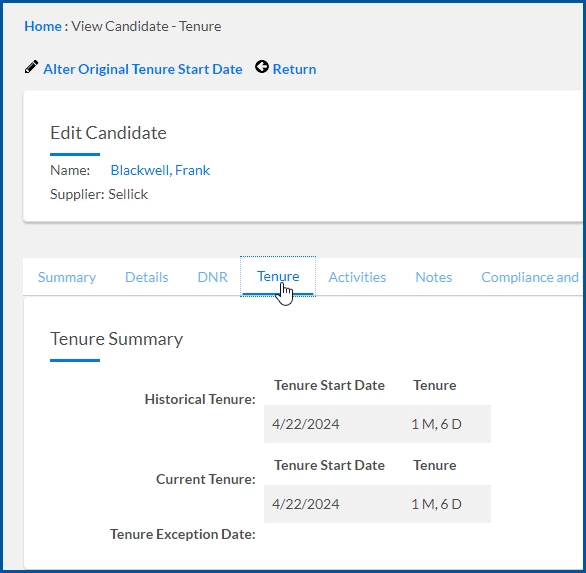
|
| From an assignment page, select View Details from the Assignment Menu. Next, select the contingent talent’s name, and then select the Tenure tab. | Historical Tenure Start Date | When a contingent talent started working for your organization based on all assignments the contingent talent is or was active on. This date never resets and is used to calculate how long a contingent talent has worked for an organization. | |
| Select Preferences > VMS Settings > Contingent Staffing. Next, select Tenure Rate Amendment Rules, and then select Add New. You can define an effective date in the General Information section. | Effective date | Determine when assignments are identified as requiring tenure rate amendments. Assignments are amended only when the targeted rate amendment date is on or after the effective date defined in the rule. Effective date example You define a rule with an effective date of January 1, 2024, and you set the duration based on the assignment start date and 12 months. The rate amendment is targeted for 12 months from the assignment start date and will be applied only to any assignments that meet the 12-month duration on or after January 1, 2024. | 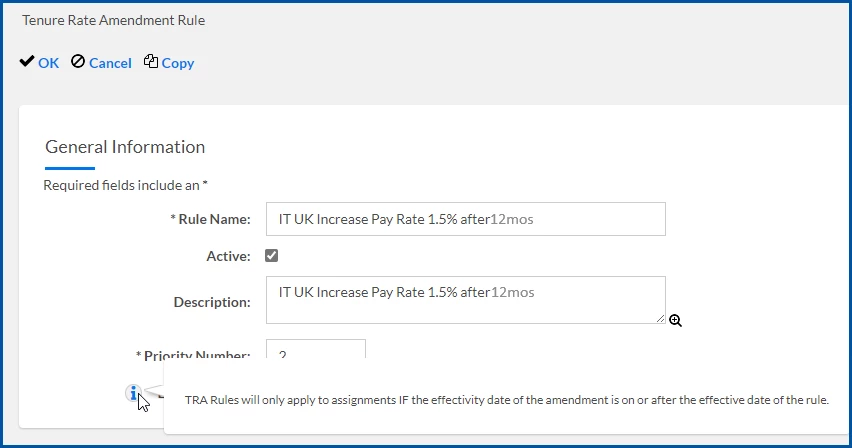 |
How to steps
Information in this article reflects a standard Enterprise configuration. Your Enterprise platform is based on your organization’s configuration. Settings and/or data visibility rules may vary slightly from what is described.
To define tenure rate amendment rules for your organization, complete these steps from your Enterprise dashboard.
- Select Preferences > VMS Settings > Contingent Staffing.
- Select Tenure Rate Amendment Rules.
- Select Add New.
- Continue with Adding General Information about your rule.
Adding General Information about your rule
- In the Rule Name field, enter a label to identify your rule.
- Ensure the Active checkbox is selected.
TIP: Inactive rules are not applied to assignments, but they don’t affect active rules previously applied to an assignment or mass amendments in progress. - Optional: In the Description field, add an explanation for how and when the rule applies and is used.
- In the Priority Number field, enter a numeric value to set the order in which the rule is applied when multiple rules apply to an assignment on the same amendment date. Lower numbers set higher priorities.
- From the Effective Date field, use the Calendar control to choose the date a rule is active in Beeline Enterprise and can be applied to an assignment.
- Continue with Setting up Duration values.
Setting up Duration values
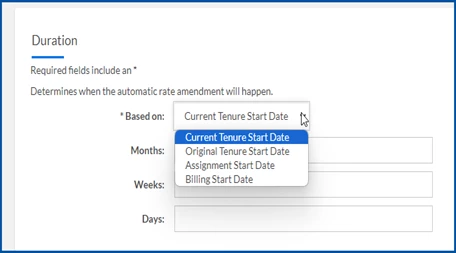
Choosing duration values establishes when an automatic rate amendment happens. Duration values are simplified so that 1 month equals 30 days and 1 week equals 7 days.
For example, you set the duration based on the assignment start date for 1 month, 2 weeks and 3 days. The rate amendment is targeted for 47 days from the assignment start date.
- From the Based on list, select which value determines how tenure is calculated.
- In the Months field, enter a value for the number of months.
- In the Weeks field, enter a value for the number of weeks.
- In the Days field, enter a value for the number of days.
- Continue with Choosing drivers.
Choosing drivers
Selecting drivers lets you apply filters to choose which assignments are affected by your rule. Industry is the only required driver. After you choose an industry, the other drivers automatically filter to your selection.
- From the Industry list, select the business you want.
- Optional: Choose the Select link to the right of the Supplier list. Next, choose the suppliers you want from the Select Suppliers dialog, and then select OK.
- Optional: From the Available Request Type list, choose the kind of requisitions you want, and then use the Arrows to move them to the Selected list.
- Optional: Choose the Select link to the right of the Job Class list. Next, choose the position category you want from the Job Class Selection dialog, and then select OK.
- Optional: Choose the Select link to the right of the Job Title list. Next, choose the position title you want from the Job Title Selection dialog, and then select OK.
TIP: You can also search for a specific job title. - Optional: From the Assignment Type list, choose the kind of engagements you want, and then use the Arrows to move them to the Selected list.
- Optional: Choose the Select link to the right of the Resource Type list. Next, choose the contingent talent category you want from the Select Resource Type dialog, and then select OK.
- Optional: Choose the Select link to the right of the Physical Work Location list. Next, choose the site location you want from the Select Location dialog, and then select OK.
- Optional: Choose the Select link to the right of the Rate Card Category 1 list. Next, choose the rate card name you want from the Search Screen dialog, and then select OK.
- Optional: Choose the Select link to the right of the Rate Card Category 1 list. Next, choose the rate card name you want from the Search Screen dialog, and then select OK.
- Continue with Updating Rate Instructions.
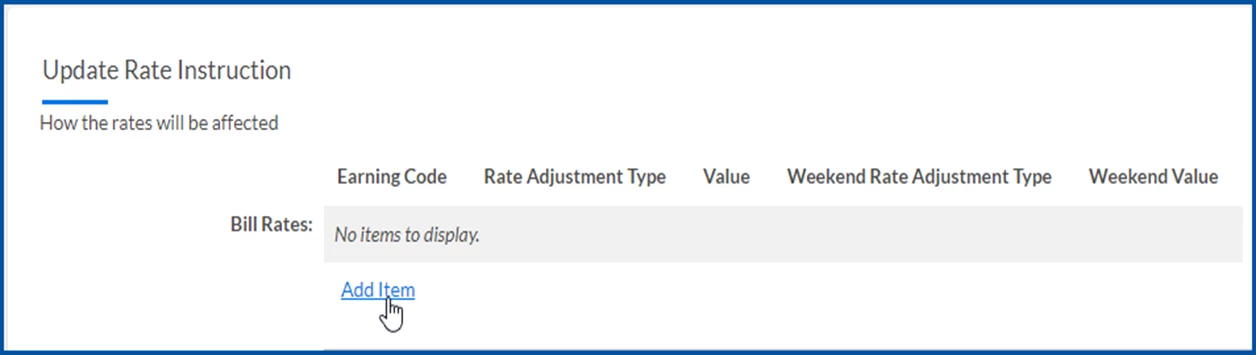
Updating Rate Instructions
Adjust the rate rules to control how rates are updated. You can update bill rates, pay rates and supplier markup. You can choose to increase or decrease those items by a percentage or a fixed amount. You can also account for weekend rates on bill or pay rates.
- To adjust the bill rate, select Add Item from below the Bill Rates row.
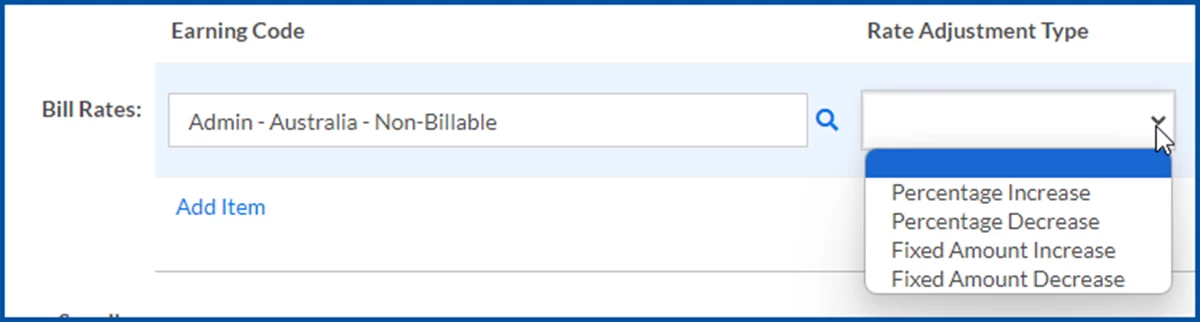
- Select the Earning Code field to automatically display earning codes for the industry you selected. You can also use the Search icon to look for a specific code.
- From the Rate Adjustment Type list, choose how you want to change the rate. such as Percentage Increase, Fixed Amount Increase.
- In the Value field, enter the percentage or fixed amount by which you want to adjust the rate.
- From the Weekend Rate Adjustment Type list, choose how you want to change the rate. such as Percentage Increase, Fixed Amount Increase.
- In the Weekend Value field, enter the percentage or fixed amount by which you want to adjust the weekend rate.
- From the Supplier Markup Adjustment Type list, choose how you want to change the supplier’s margin. such as Percentage Increase, Fixed Amount Increase.
TIP: Supplier Markup is specified in the assignment rate card; they are not trueRate rates. - To adjust the pay rate, select Add Item from below the Pay Rates row.
- Select the Earning Code field to display earning codes for the industry you selected automatically. You can also use the Search icon to look for a specific code.
- From the Rate Adjustment Type list, choose how you want to change the rate. such as Percentage Increase, Fixed Amount Increase.
- In the Value field, enter the percentage or fixed amount by which you want to adjust the rate.
- From the Weekend Rate Adjustment Type list, choose how you want to change the rate. such as Percentage Increase, Fixed Amount Increase.
- In the Weekend Value field, enter the percentage or fixed amount by which you want to adjust the weekend rate.
- Select OK to save all of your settings and your rule.
After you’ve defined Tenure Rate Amendment Rules, you can copy an existing rule, modify the rule and quickly create a new one. Just use the Copy command on the Tenure Rate Amendment Rules page.
Documentation release: Beeline Enterprise | Q1 2024